
How to Create a Newsletter Signup Form in WordPress
Build a WordPress newsletter signup form with a name, an email and a real consent checkbox, a welcome email sent on the spot, and the subscriber added to MailerLite, Mailchimp, MailerPress or your CRM by an action.

A newsletter signup form is the shortest form on most sites and the one that gets the most traffic, and it has 3 jobs: take the email, take real consent, and put the subscriber where the newsletter is sent from. So, if you are looking to create a newsletter signup form in WordPress that feeds MailerLite, Mailchimp, MailerPress, FluentCRM or any other list, this guide can surely help.
I build Core Forms, and every screen here comes from its Newsletter signup template running on a test site.
Every newsletter tool has its own list, and one guide cannot cover 10 of them. This one covers the form, the consent checkbox that keeps you on the right side of the law, the welcome email, and the action that hands the subscriber to your tool, with MailerLite as the worked example and the others one link away.
The template ships with the plugin, so you can follow along click for click. Or, if you get stuck halfway, support is a message away. Without further ado, let’s get started.
What a Newsletter Signup Form Asks
The Newsletter signup template collects 3 things, and 3 is the right number:
- Your name is required, so the first email can say hello properly.
- Email address is required, with help text under it: “We’ll never share your email. Unsubscribe anytime.”
- I agree to receive email updates is a required checkbox with the value
yes.
The checkbox is the field people delete first and regret first. It is what makes the signup consent rather than a form the visitor happened to fill in, and a list built without it is a list you cannot prove you were allowed to email.
Create the Newsletter Signup Form
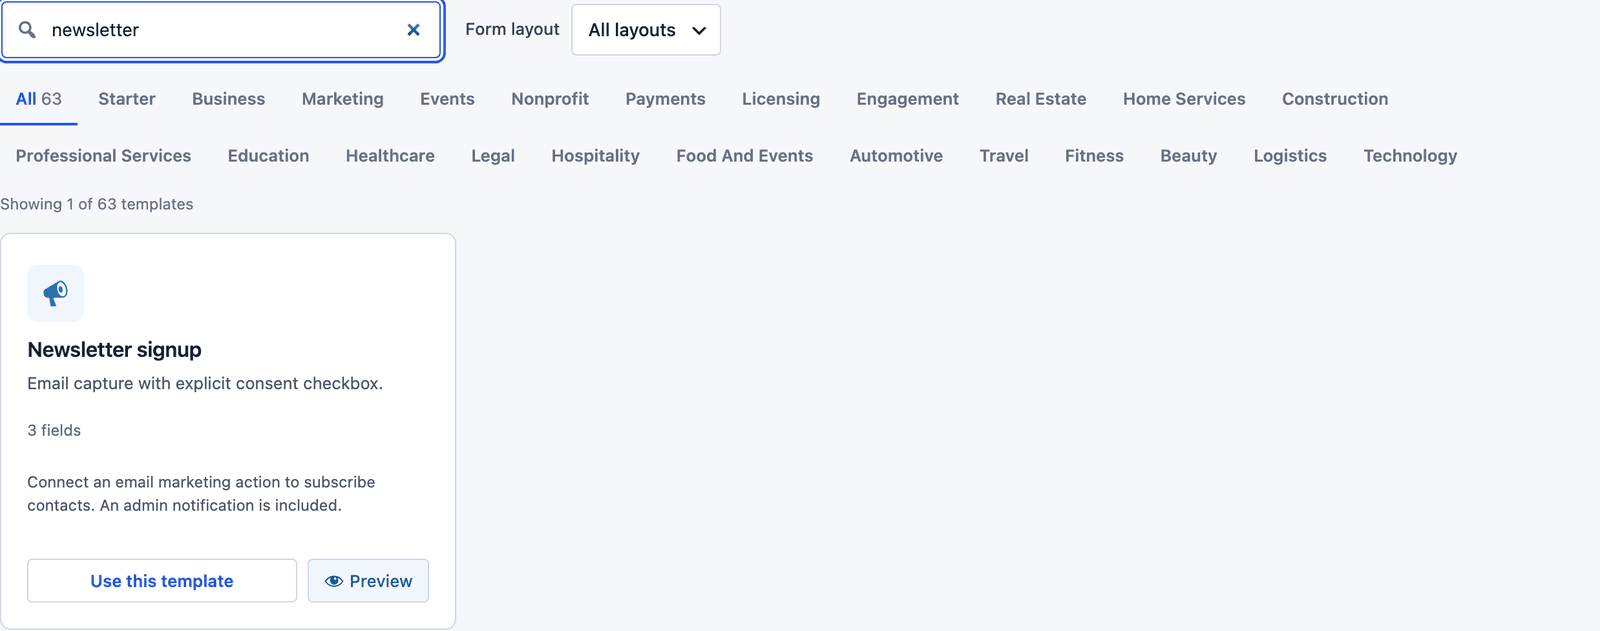
- Go to Core Forms > Add New.
- Type
newsletterin the template search. - Click Use this template on the Newsletter signup card.
 Three fields, and a Subscribe button.
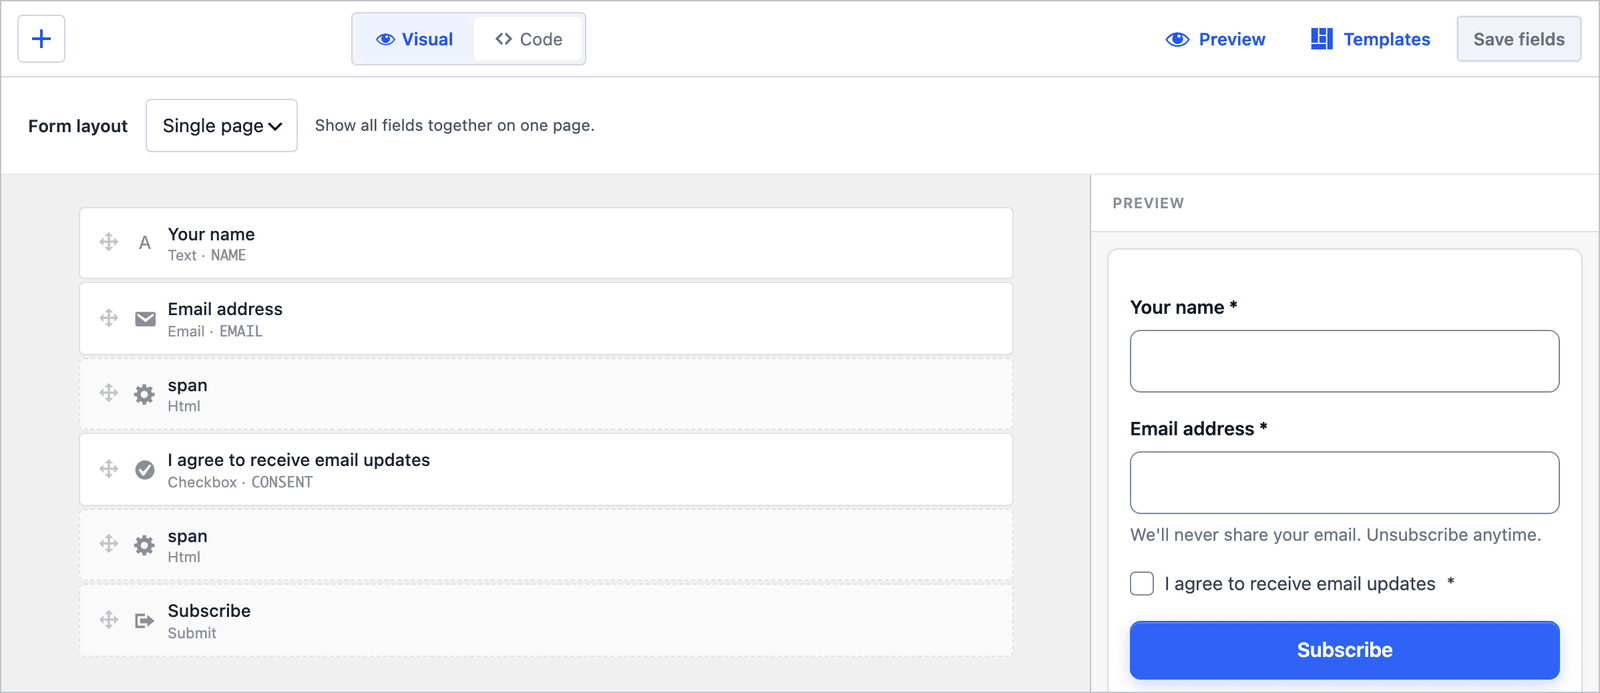 The consent checkbox is a required field with a fixed value, so the submission records a yes.
One edit is worth making: change the consent label to say what the visitor is agreeing to. “Send me the Friday issue, about once a week” is consent to a specific thing, and “I agree to receive email updates” is consent to whatever you decide later.
Publish It
The shortcode is shown next to the form’s name in the editor:
[cf_form slug="newsletter-signup"]
Paste it into a page, a post’s footer or a sidebar widget, or use the Core Forms block. The block or shortcode piece covers which to use where.
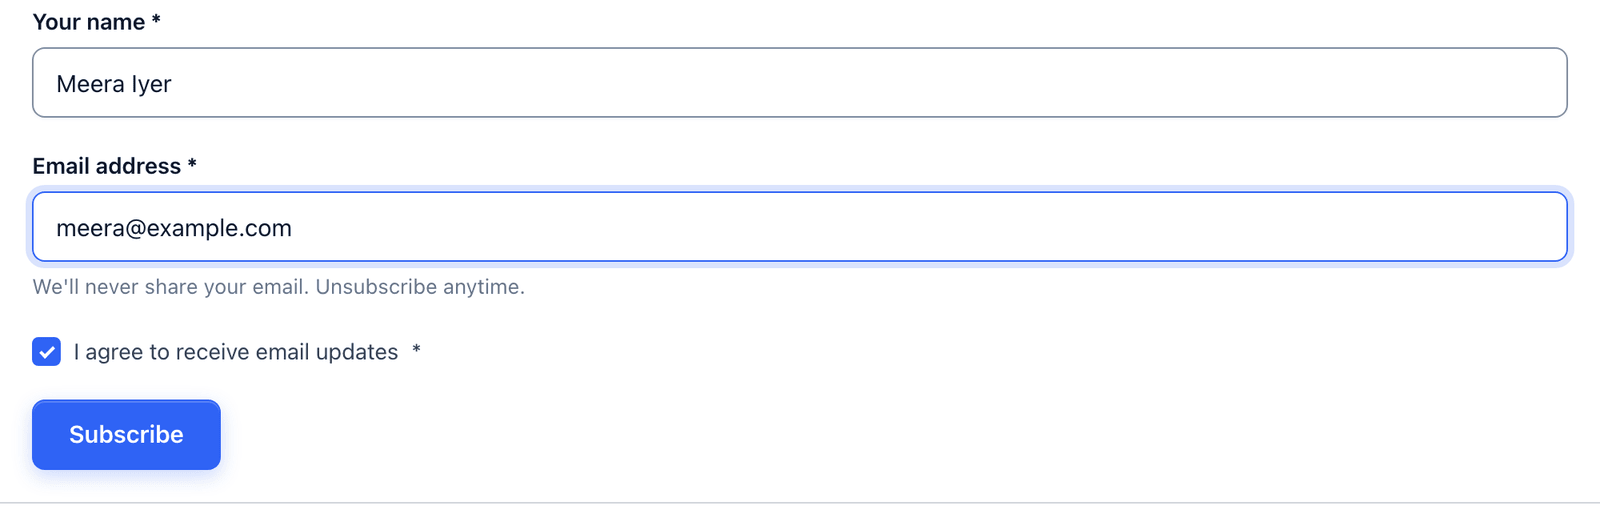 Say what the newsletter is and how often it arrives in the sentence above the form. That sentence is the whole pitch.
Send the Welcome Email
The Auto-Responder action sends the subscriber an email the moment they submit, and on a signup form it is the welcome email:
- Open the Actions tab and click Add Action, then Auto-Responder.
- Set Recipient email field to
EMAIL. - Set the From name to the newsletter’s name and the Subject to something like “You are on the list.”
- Write the message with
[NAME]for the greeting, say when the next issue arrives, and add one line for the wrong-address case: “If you did not sign up, reply and we will remove you.” - Click Save Changes.
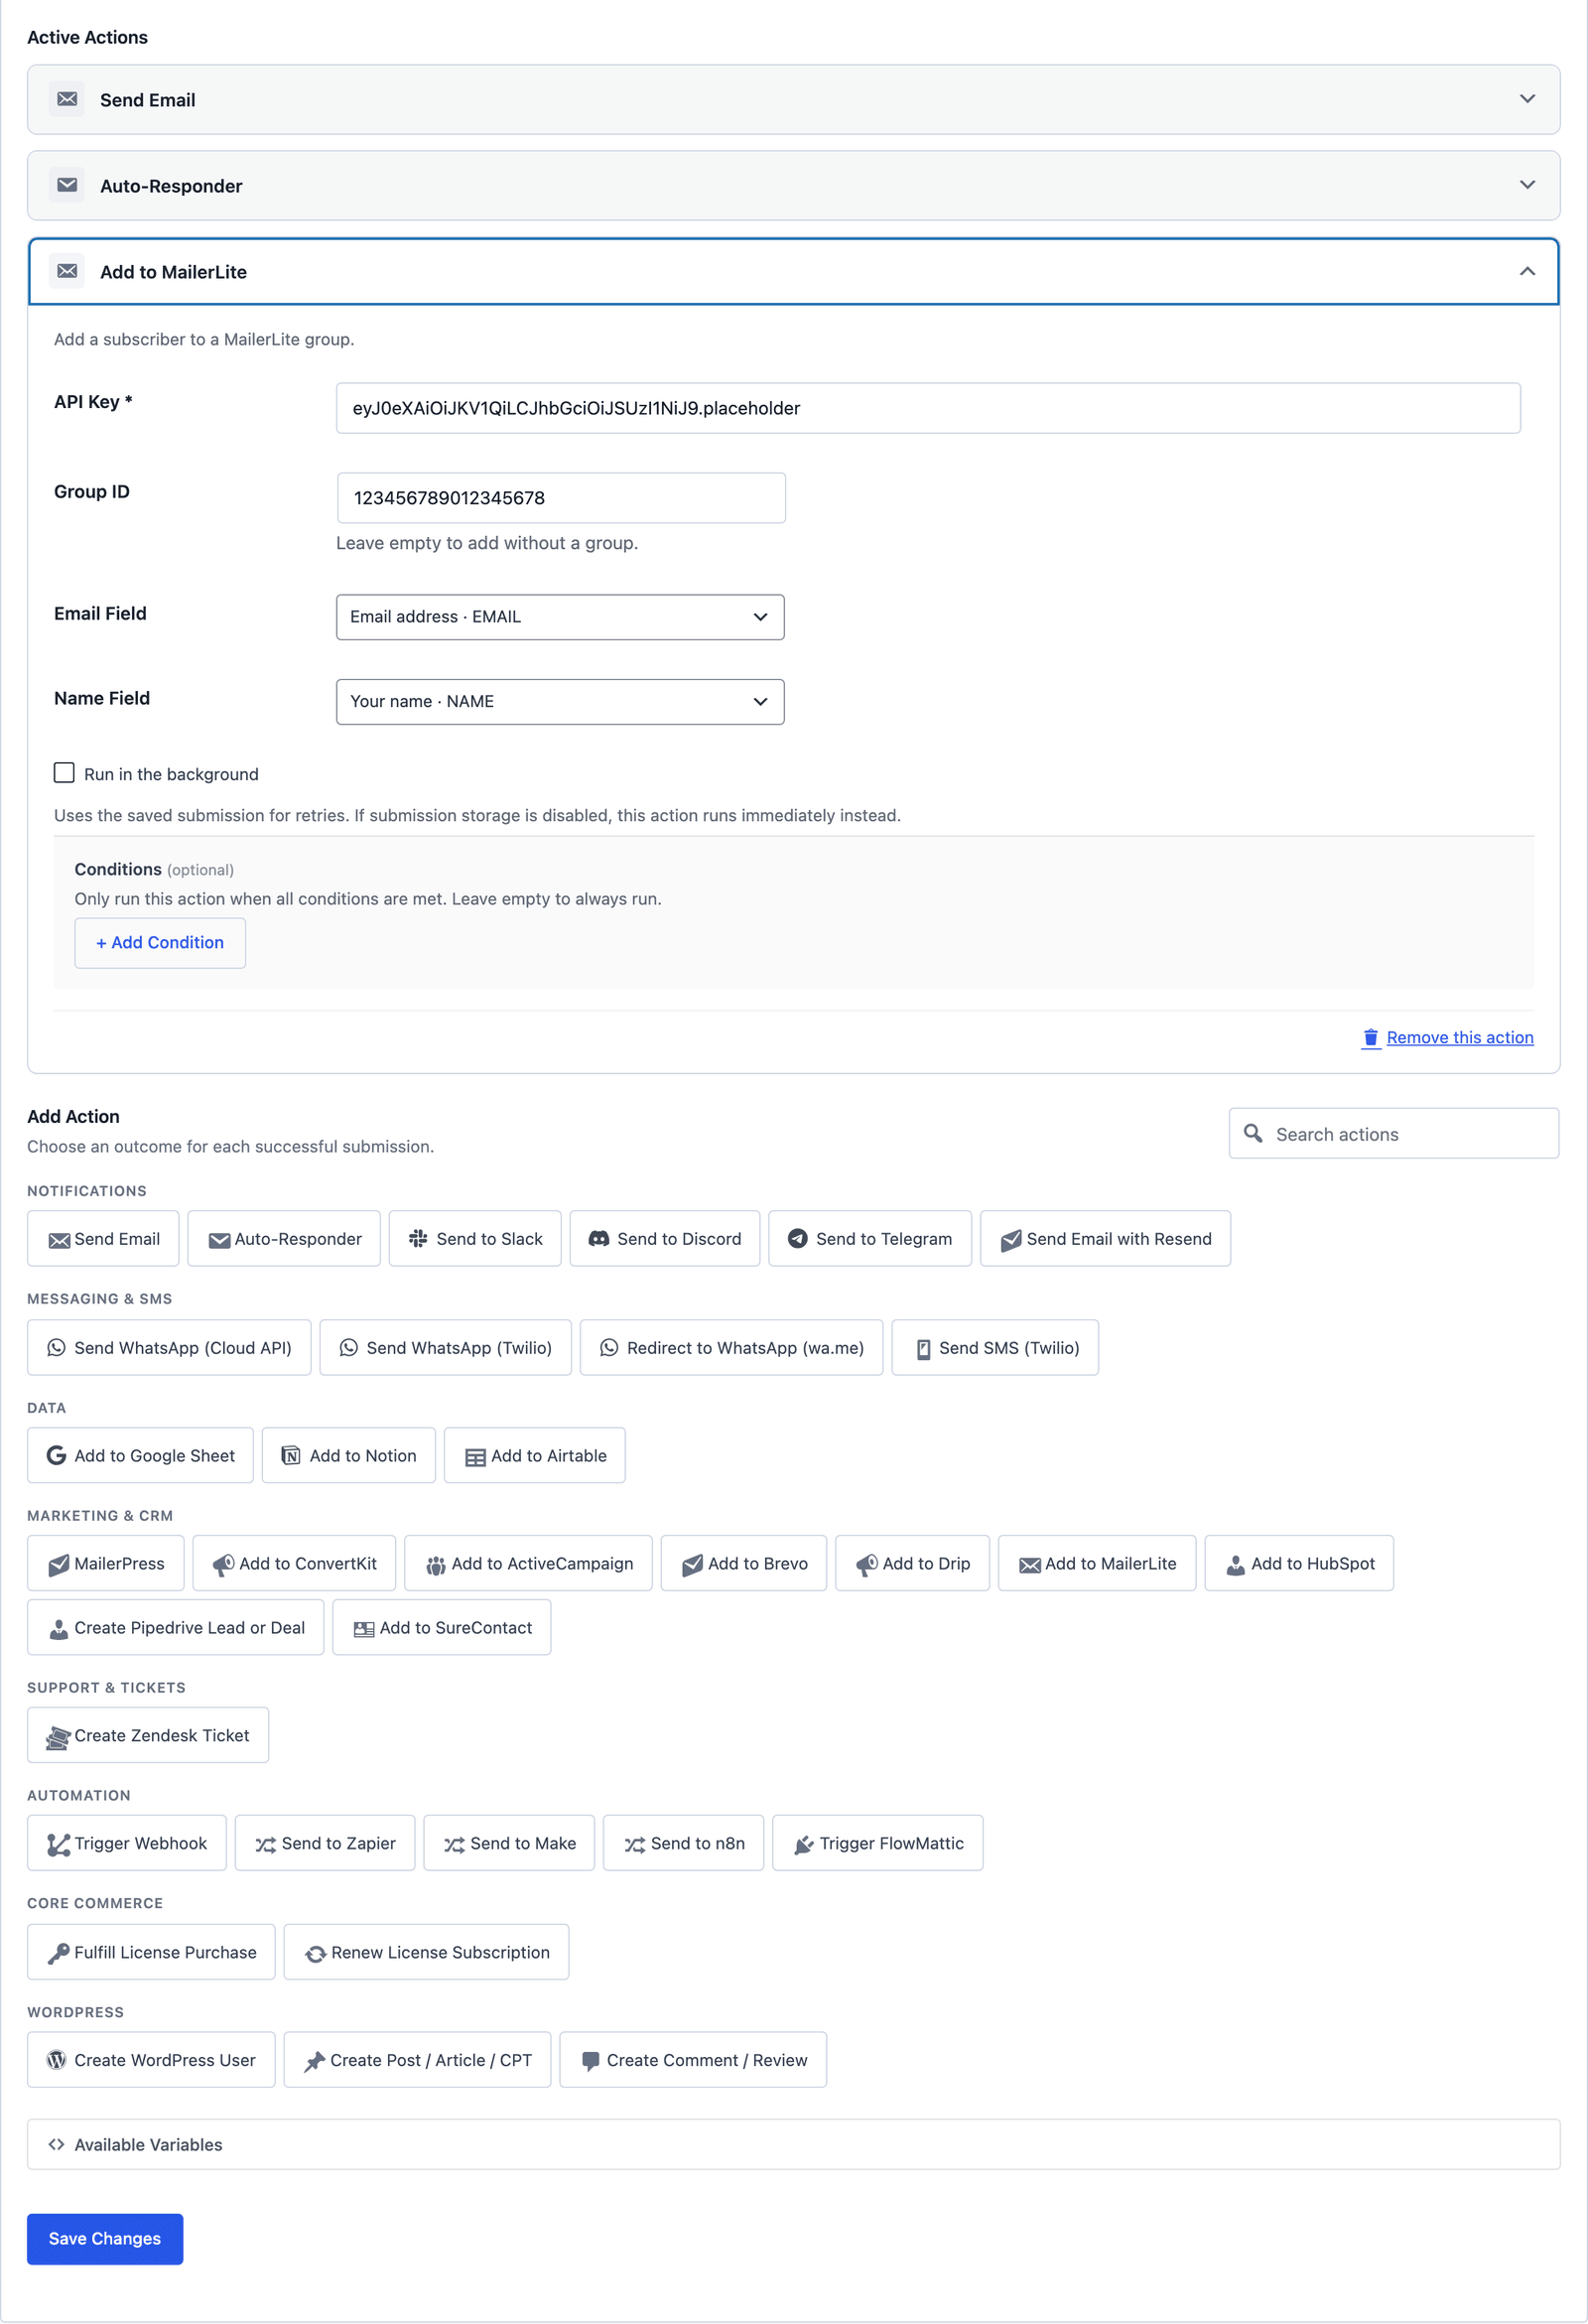 Three actions: the notification to you, the welcome email to the subscriber and the handover to the list.
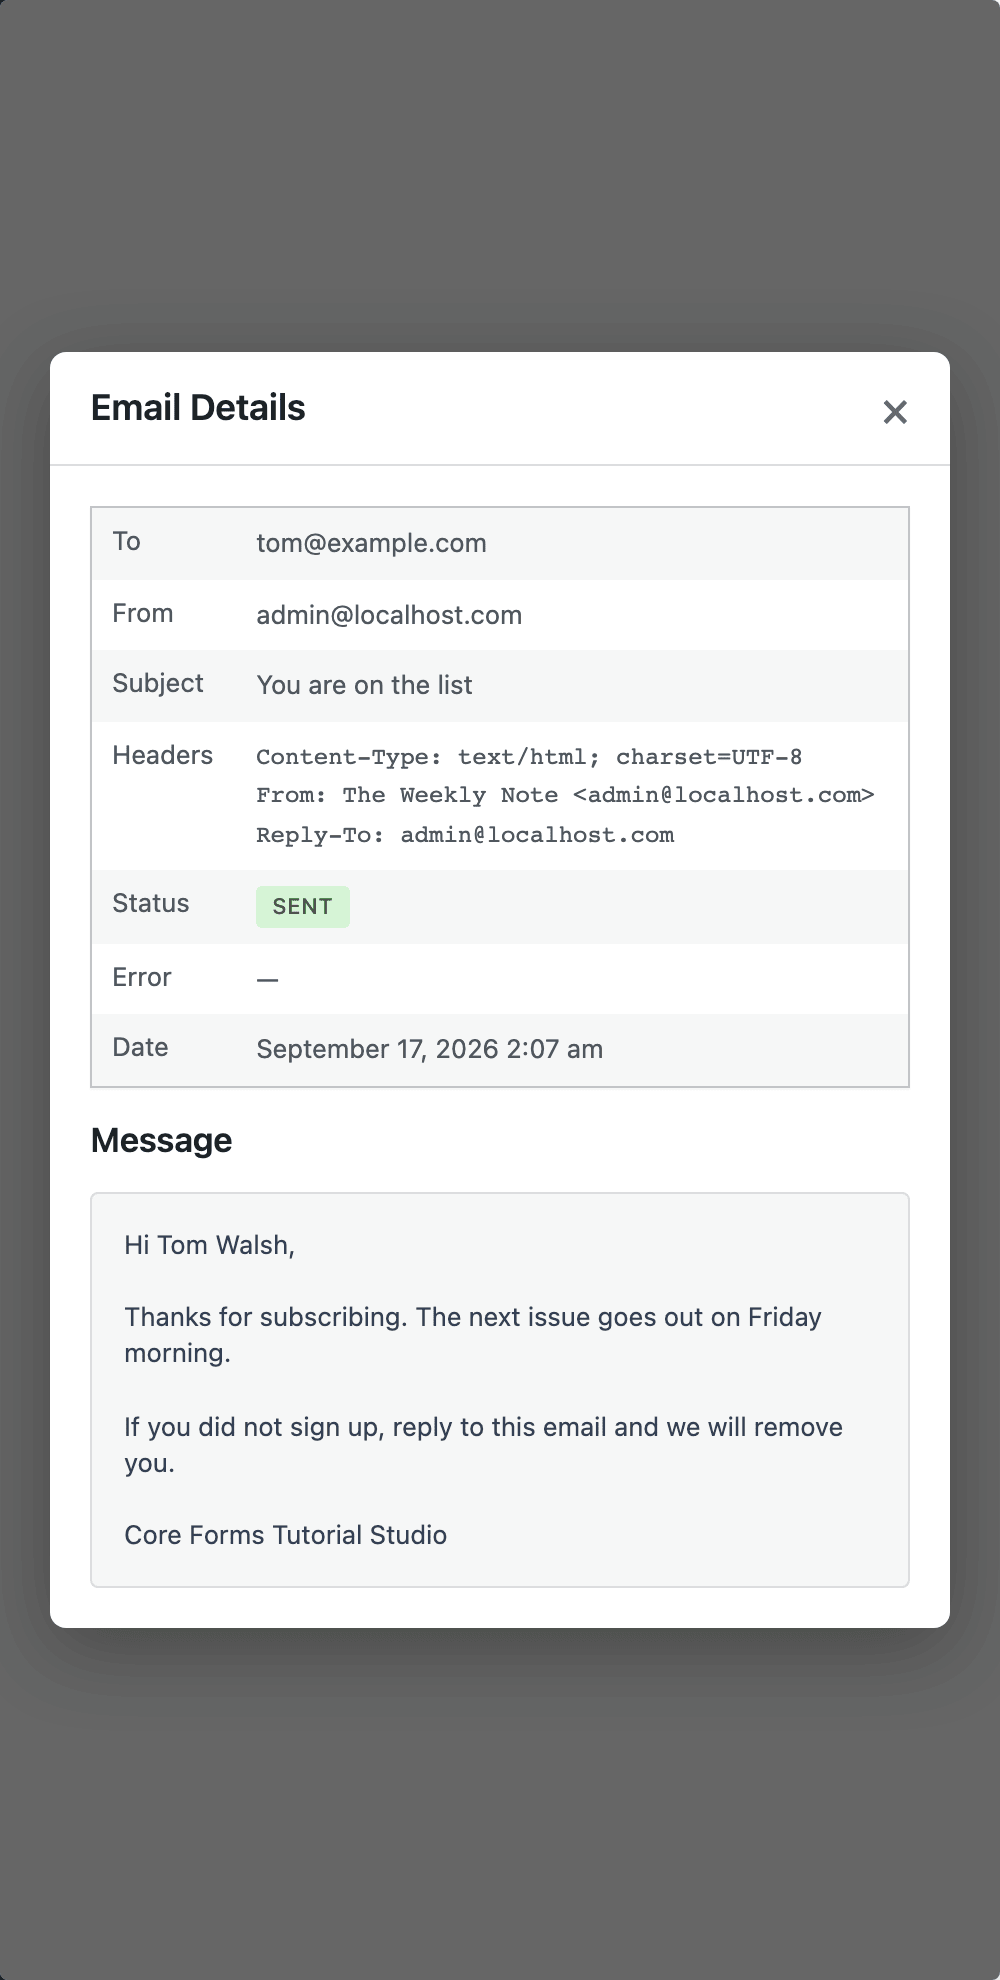 Every welcome email is logged. This is the record of one going out, with the name filled in from the form.
If your newsletter tool sends its own double opt-in email, keep the welcome email short and let the tool’s confirmation do the confirming. Two “confirm your subscription” emails in a row is the fastest way to lose a subscriber before the first issue.
Add the Subscriber to Your List
The third action is the one that matters, and it is a different action per tool. The MailerLite version:
- Click Add Action and choose Add to MailerLite from the Email marketing group.
- Paste the API key from MailerLite’s developer settings.
- Enter the Group ID of the group the subscriber should join.
- Set the email field to
EMAILand the name field toNAME. - Click Save Changes, then submit the form once with your own address and check the group.
The MailerLite integration guide covers the group ID and the first test in full. The same shape, with the tool’s own credentials, works for Mailchimp, MailerPress, FluentCRM, ActiveCampaign, Kit, Brevo and Drip.
Add to MailerLite. Needs the API key from Integrations, Developer API, and the group ID, a long number from the group’s URL. Map EMAIL and NAME. Double opt-in is a MailerLite setting. Full guide.
Add to Mailchimp. Needs an API key and the audience ID from Audience settings. Map EMAIL and NAME. Subscribers are added as pending, so Mailchimp sends its own confirmation email before they are active. Reference.
Add to MailerPress. Same site, no key. Pick the list and an optional tag from dropdowns, and leave the action’s double opt-in switch on so MailerPress sends the confirmation. Reference.
Add to FluentCRM. Same site, no key. Pick the lists and tags, and whether the contact arrives as subscribed or pending. A tag is what most FluentCRM automations trigger on, so set one per form. Reference.
Add to ActiveCampaign. Needs the API URL and key from Settings, Developer, plus a list ID and tag IDs by number. Map EMAIL, NAME and optionally PHONE. Full guide.
Every one of them runs after the form’s own emails, so the subscriber gets the welcome email even if the list service is down for a minute, and a failed request is retried from the saved submission.
Only Subscribe on Consent
The consent checkbox is required, so nobody submits without ticking it. On a form where the checkbox is optional, because the signup sits inside a contact form, add a condition to the list action so it runs only when the box is ticked:
- Scroll to Conditions at the bottom of the list action’s card.
- Click + Add Condition, enter
CONSENT, choose equals and enteryes. - Click Save Changes.
The contact form’s message still arrives, and the subscriber is added only when they asked to be. The conditional logic guide covers action conditions.
Read the Signups
Every signup lands in the form’s Submissions tab as well as in your list, with the consent value in its own column.
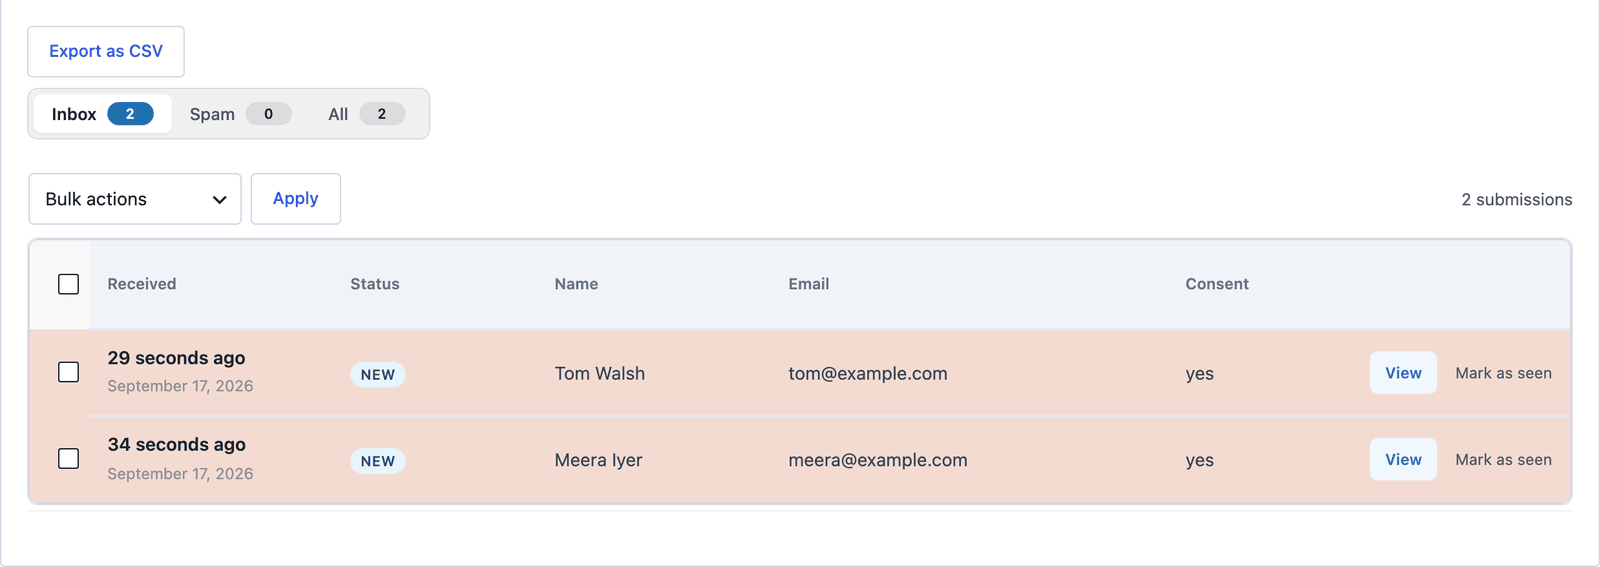 The consent column is the record. Export it as CSV when someone asks how they got on the list.
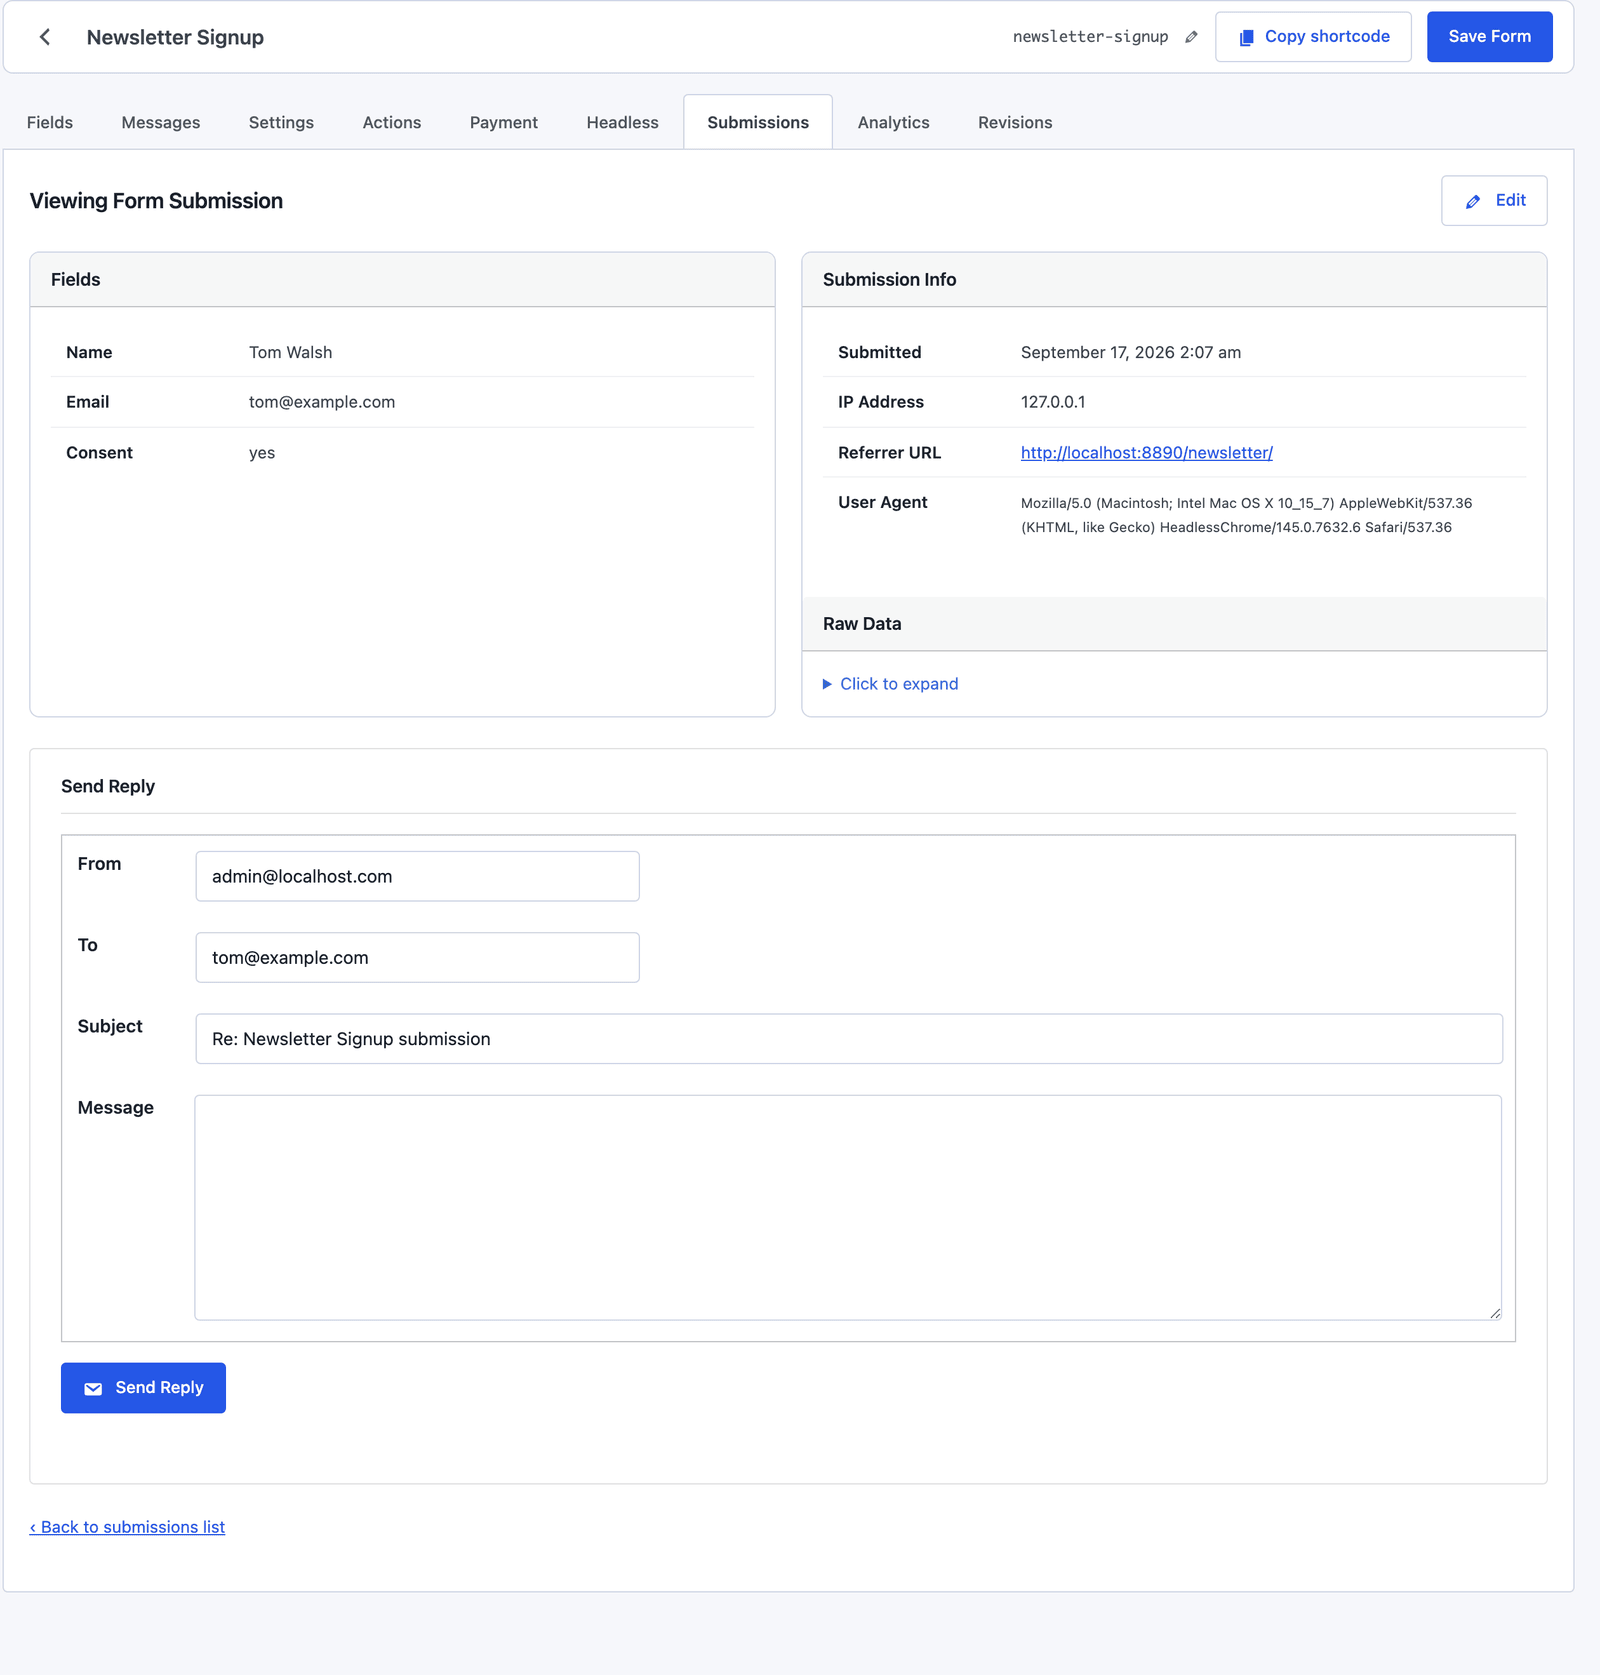 The record behind one signup: the consent value, the time and the page it came from.
This is the record that answers “when did I subscribe?” and “did I agree to this?” a year later. Keep Save submissions on for a signup form even if you never read the inbox.
Keep the Bots Out
A signup form on a public page collects fake addresses within a week, and the settings that stop it ship with the template:
- Honeypot is on, and catches the bots that fill every field.
- Prevent duplicates stops the same address subscribing twice from a double click.
- Rate limiting in the Settings tab caps submissions per address per hour.
For a form that gets more, Cloudflare Turnstile adds a check the visitor rarely sees, and a fake address that gets through still has to survive the list tool’s double opt-in.
Before It Goes Live
The Limits
The form does not send the newsletter. It collects the subscriber and hands them to the tool that does, and the newsletter plugin comparison covers which tool.
Double opt-in is the list tool’s job. The welcome email from the form is a courtesy, and the confirmation that proves the address is the one the tool sends.
One form adds to one list per action. A subscriber who should be in 2 groups needs 2 actions, or a tag applied in the tool.
Unsubscribe happens in the tool, not the form. The form’s job ends when the subscriber is added.
What Quietly Ruins a Newsletter Signup Form
Deleting the consent checkbox because it costs signups. It does cost a few, and the ones it costs were never going to open an issue.
Asking for a first name, a last name, a company and an interest. The email is the product, and every extra field is a reason to close the tab.
A welcome email and a double opt-in email in the same minute. Pick one to confirm, and let the other say hello.
A signup form with no spam settings on a busy page. The list fills with addresses that bounce, and the sending service’s reputation pays for it.
Final Remarks
You now have a newsletter signup form with the 3 fields that matter, a welcome email that goes out on the spot, the subscriber added to your list by an action you tested with your own address, and a consent record in your own database. If you keep one idea from this guide, keep this one: the consent checkbox is the form, and everything else is delivery.
The newsletter signup template page has the fields and a live demo, and the fast Mailchimp signup piece covers the Mailchimp version with its page weight measured. If something here does not behave the way this guide describes, the support team can help.
I hope the next subscriber through it stays for years.
For a course site, the forms for course creators piece covers the signup, the waitlist and the enrollment form together.
FAQ
Do I need a separate newsletter plugin?
You need somewhere to send from. The form collects the subscriber, and a newsletter plugin such as MailerPress or MailPoet, or a hosted service such as MailerLite or Mailchimp, sends the issues. The form connects to any of them with an action.
Is a consent checkbox required by law?
For subscribers in the EU and the UK, consent has to be specific and recorded, and a required checkbox that says what they are agreeing to is the standard way to do that. Elsewhere it is still the honest way to build a list, and it costs almost nothing.
Can the signup form be a popup?
The form can go in any block or widget area, including a popup plugin’s content area. The full-screen forms guide covers the plugin’s own full-screen display for a form that should take over the page.