
ActiveCampaign WordPress Integration: Form Submissions to Contacts, Lists and Tags
Connect a WordPress form to ActiveCampaign by API: create or update the contact, add them to a list, apply tags that start your automations, and test it from the form before a visitor submits.

An ActiveCampaign WordPress integration for forms does 3 things in one request: it creates or updates the contact, puts them on a list and applies the tags your automations are waiting for. So, if you are looking to connect a WordPress form to ActiveCampaign without its site tracking script or a Zapier plan, this guide can surely help.
I build Core Forms, which has an ActiveCampaign action built in, and every screen here comes from it running on a test site.
One guide cannot cover ActiveCampaign’s automations, because those start when the tag lands. It covers the connection: the API URL and key, the list ID and the tag IDs, how the name is split, the first test and the conditions that send only the right submissions.
There is nothing to download. Or, if you get stuck halfway, support is a message away. Without further ado, let’s get started.
What the ActiveCampaign Action Does
The action talks to ActiveCampaign’s API in 3 steps, and each one is a setting on the card:
- Contact sync creates the contact or updates the one with the same email. It is an upsert, so a returning lead never becomes a duplicate.
- List assignment adds the contact to one list as active.
- Tags are applied one at a time, by ID, and a tag is what most ActiveCampaign automations trigger on.
Email, name and phone travel. The name is split on the first space into first and last, so “Priya Sharma” arrives as it should and “Mary Ann Lee” arrives as Mary and Ann Lee.
Get the API URL and Key
- In ActiveCampaign, open Settings and then Developer.
- Copy the API URL, which looks like
https://yourname.api-us1.com. - Copy the API Key below it.
The URL is account-specific and the action needs it as well as the key, which is the step people miss when they come from tools that only ask for a key.
Find the List and Tag IDs
- List ID: open Lists, click the list, and the ID is the number in the URL.
- Tag IDs: open Contacts and then Tags, and each tag’s ID is in the URL when you click it.
Tags are entered by ID, comma separated, 12,15, not by name. It is one more lookup, and it means a renamed tag keeps working.
Add the Action to the Form
- Open the form in Core Forms and click the Actions tab.
- Click Add Action and choose Add to ActiveCampaign from the Email marketing group.
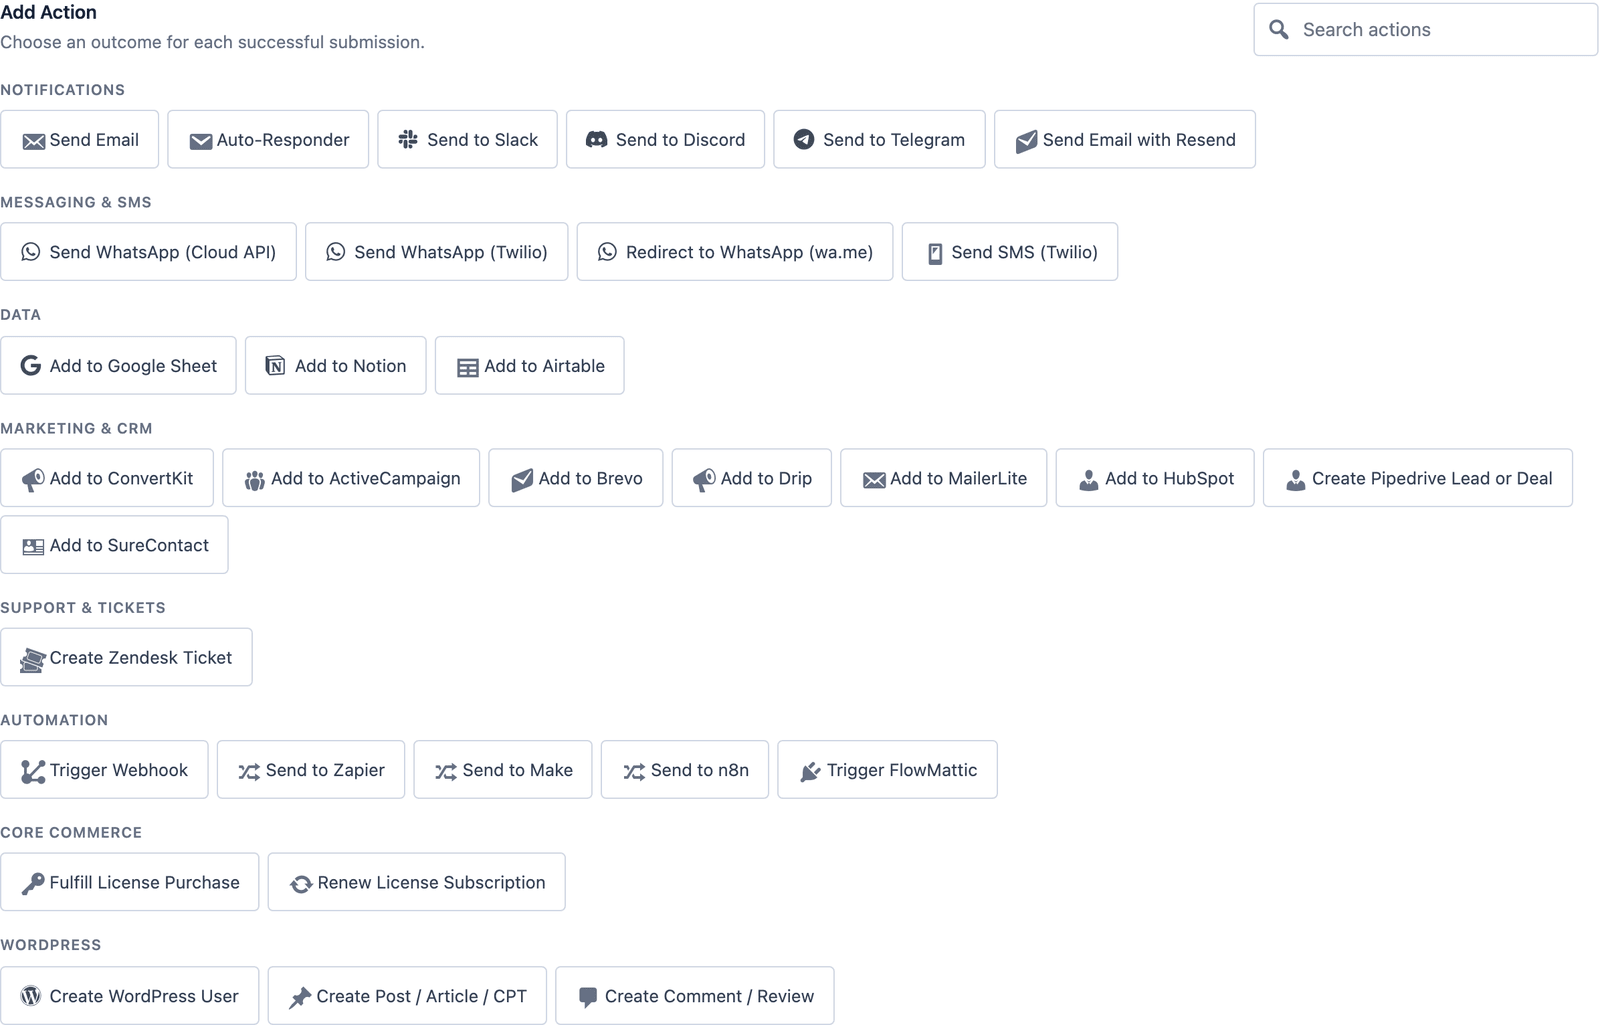 The picker groups actions. ActiveCampaign sits with the other email marketing tools.
- Paste the API URL and the API key.
- Enter the List ID and the Tag IDs.
- Set the email, name and phone fields to the form’s field names,
EMAIL,NAMEandPHONEon the templates. - Click Save Changes.
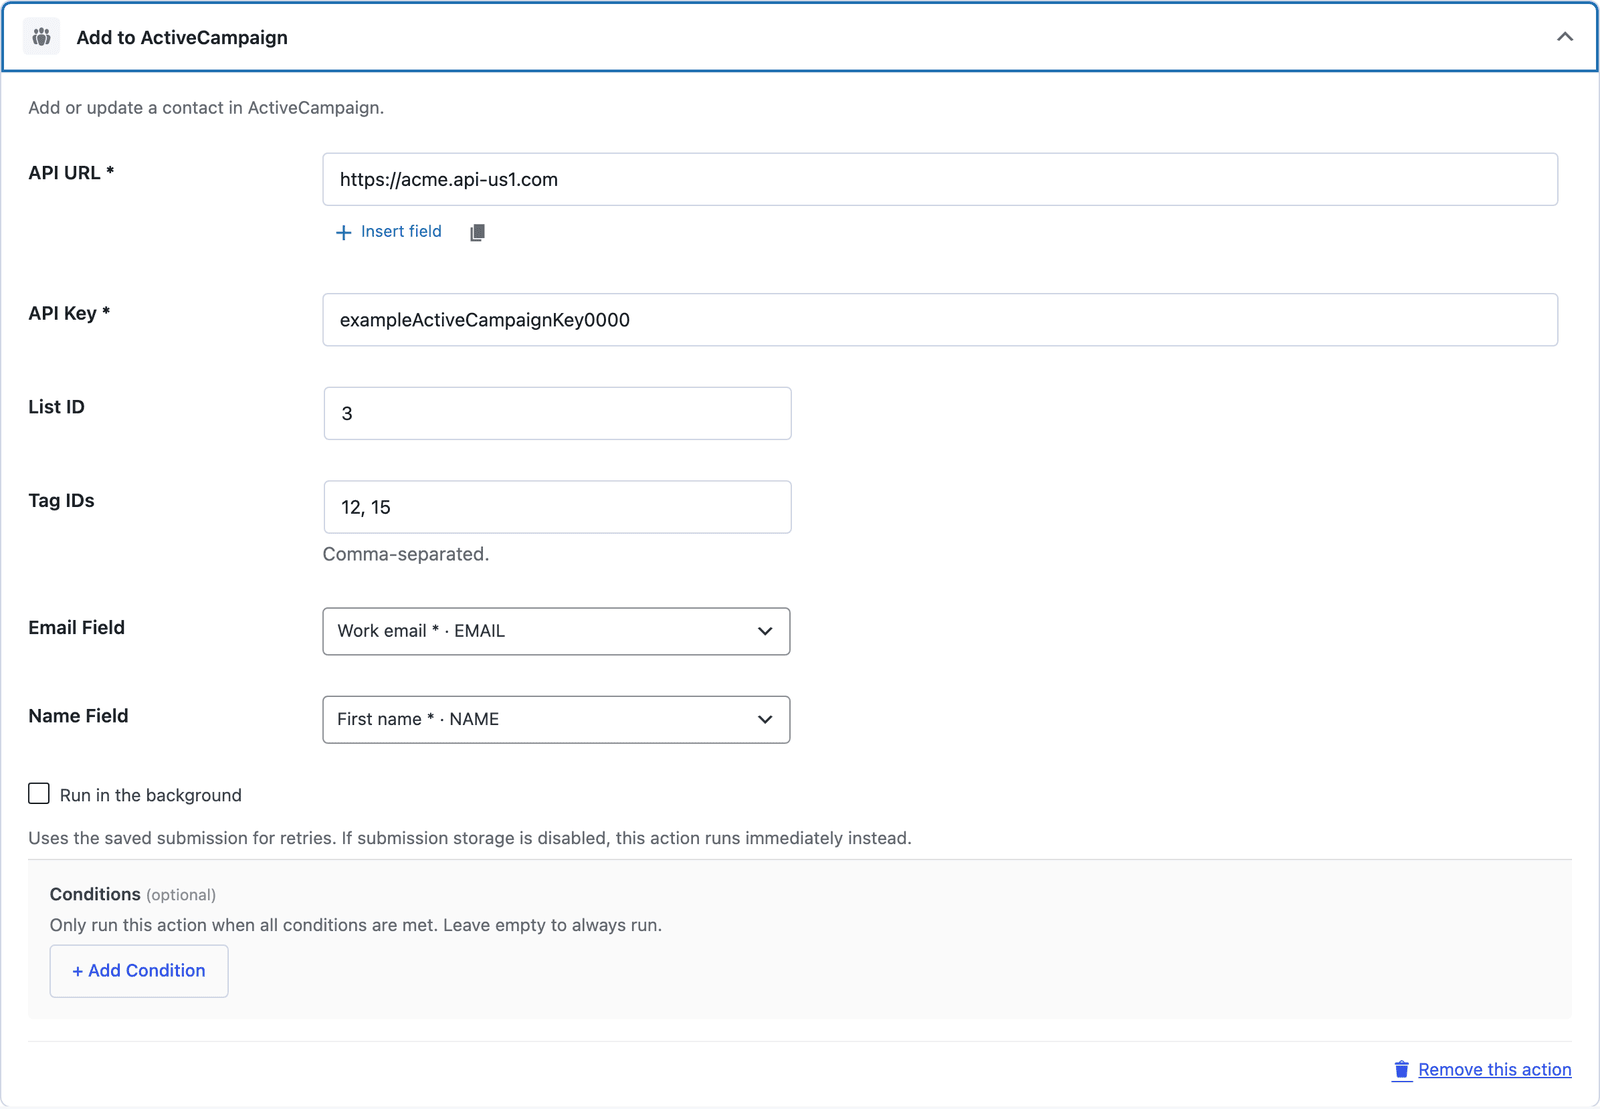 Leave the list ID empty for a contact that should exist without a list, and the tags still apply.
Test It Before a Visitor Does
The ActiveCampaign action has no test panel, so the test is one real submission with an address you control:
- Put the form on a draft page and submit it with your own email and a name you will recognize.
- Open Contacts in ActiveCampaign and search for the address. The contact should show the list and the tags within a few seconds.
- If the contact exists but has no tags, the tag IDs are wrong. If nothing exists, check the API URL and key.
A test submission is also the fastest way to see an automation fire, because the tag lands the same way it will from a real submission. Delete the test contact afterwards.
Tag by Form and by Answer
One tag per form is the plain setup: every submission of the demo request form gets the demo-request tag, and the automation that follows up runs from it. Two more patterns earn their place:
- A tag per answer. Add the action twice with different tag IDs and a condition on each,
INTERESTequalspricingfor one andINTERESTequalssupportfor the other. The contact gets the tag for what they asked about. - A list only on consent. On a contact form with an optional newsletter box, set the list ID on a second action with a condition on the checkbox, and leave the first action with tags only. The lead is in ActiveCampaign either way, and on the list only when they asked.
The conditional logic guide covers action conditions, and the same pattern works for any of the email marketing actions.
Run It in the Background
Below the settings, Run in the background hands the request to a queue. The visitor’s success message shows without waiting for ActiveCampaign, and a failed request is retried from the saved submission. Turn it on once the test submission lands, because ActiveCampaign’s API takes 3 calls per submission and the visitor should not wait for them.
The Limits
The action maps email, name and phone. Custom fields do not travel, and a form that needs a company or a budget in ActiveCampaign sends them through a webhook to its API or through an automation tool.
One list per action. Two lists is 2 actions, which is fine, and 5 is a sign the sorting belongs in an ActiveCampaign automation.
The name split is on the first space. A single-word name arrives as a first name with no last name, and a form with separate first and last fields maps the first.
The action does not read from ActiveCampaign. It cannot check whether the contact exists before the form shows, and it does not pull the contact’s tags back into the form.
What Quietly Ruins an ActiveCampaign Integration
The key without the URL. The action needs both, and a key on its own has nowhere to go.
Tag names in the tag box. The action wants IDs, and “newsletter” there applies nothing.
Every submission on the list. A contact who asked a support question is now getting the campaign, and the consent condition is one line.
Skipping the background setting on a live form. Three API calls on the visitor’s submit is a noticeable pause, and the queue removes it.
Final Remarks
You now have a WordPress form creating or updating contacts in ActiveCampaign, on the list you chose and with the tags your automations trigger on, tested with your own address before a visitor touched it and running in the background once it works. If you keep one idea from this guide, keep this one: the tag is the trigger, so decide which tag each form applies before you set anything else.
The ActiveCampaign integration page has the action’s reference, and the newsletter signup form guide builds the form most people connect first. If something here does not behave the way this guide describes, the support team can help.
I hope the first automation it triggers is the one that closes a sale.
FAQ
Does this need ActiveCampaign’s site tracking script?
No. The action calls the API from the server when the form is submitted, and nothing is added to the page. Site tracking is a separate ActiveCampaign feature you can add or leave out.
Can one form apply different tags depending on the answer?
Yes. Add the action once per tag with a condition on the field that decides it, and each submission gets the tag for its answer. The same API URL and key go on every card.
What happens if ActiveCampaign is down when someone submits?
The form’s own emails still go out, and the ActiveCampaign request is retried from the saved submission. The action log on the submission shows each attempt and the answer.