
How to Create a Support Request Form in WordPress
Build a WordPress support request form with category, priority and site URL, an automatic confirmation email and a route that sends urgent requests to a separate inbox.

A support request form is where a customer’s problem becomes a ticket you can answer, with the site, the category and the priority already filled in instead of buried in the third reply. So, if you are looking to add a support request form to your WordPress site, for a plugin, a theme, a hosting service or an agency’s clients, this guide can surely help.
I build Core Forms, and every screen here comes from its Support request template running on a test site.
Every support team sorts requests its own way, so one guide cannot match every category list. But almost every support form needs the same things, a way to sort the request, a way to say how urgent it is and a confirmation that it arrived, and in this one I will try my best to cover those properly.
The template ships with the plugin, so you can follow along click for click. Or, if you get stuck halfway, support is a message away. Without further ado, let’s get started.
What a Support Request Form Asks
The Support request template collects 7 things, and each one earns its place:
- Your name and Email address are required, because every reply goes to that address.
- Site URL is optional, and it saves a round trip on most website issues.
- Category is a required select: Bug report, Feature request, Help / question or Account issue.
- Priority is a required choice between Low, Medium and High.
- Subject is required and becomes the email subject line.
- Describe the issue is the required text area, with a help line asking for steps, expected and actual behavior and any error messages.
The category select is the field that makes this a support form rather than a contact form. A feature request and a broken checkout should not sit in the same queue, and the category is what lets you split them before anyone reads the message.
Create the Support Request Form
Two templates match a support search, one on a single page and one split into steps:
- Go to Core Forms > Add New.
- Type
supportin the template search. - Click Use this template on the first Support request card for a single page.
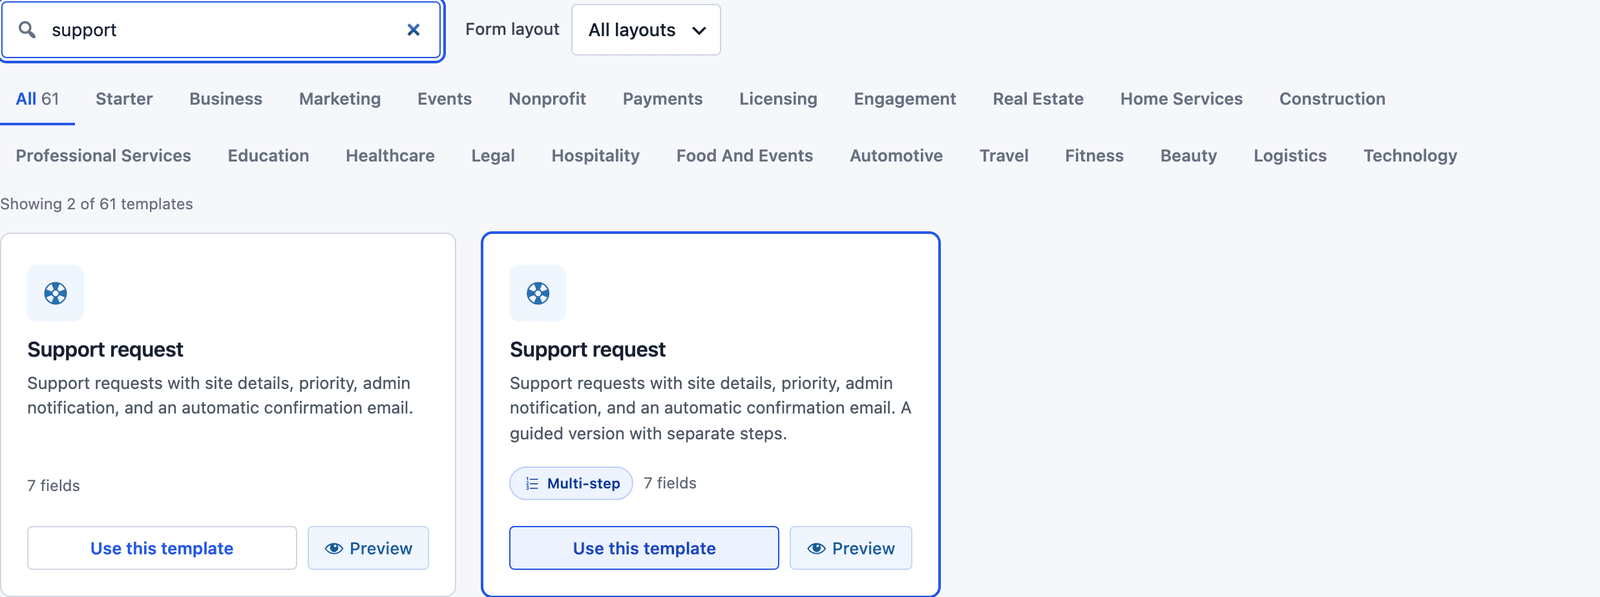 Both versions have the same 7 fields, and only the layout differs.
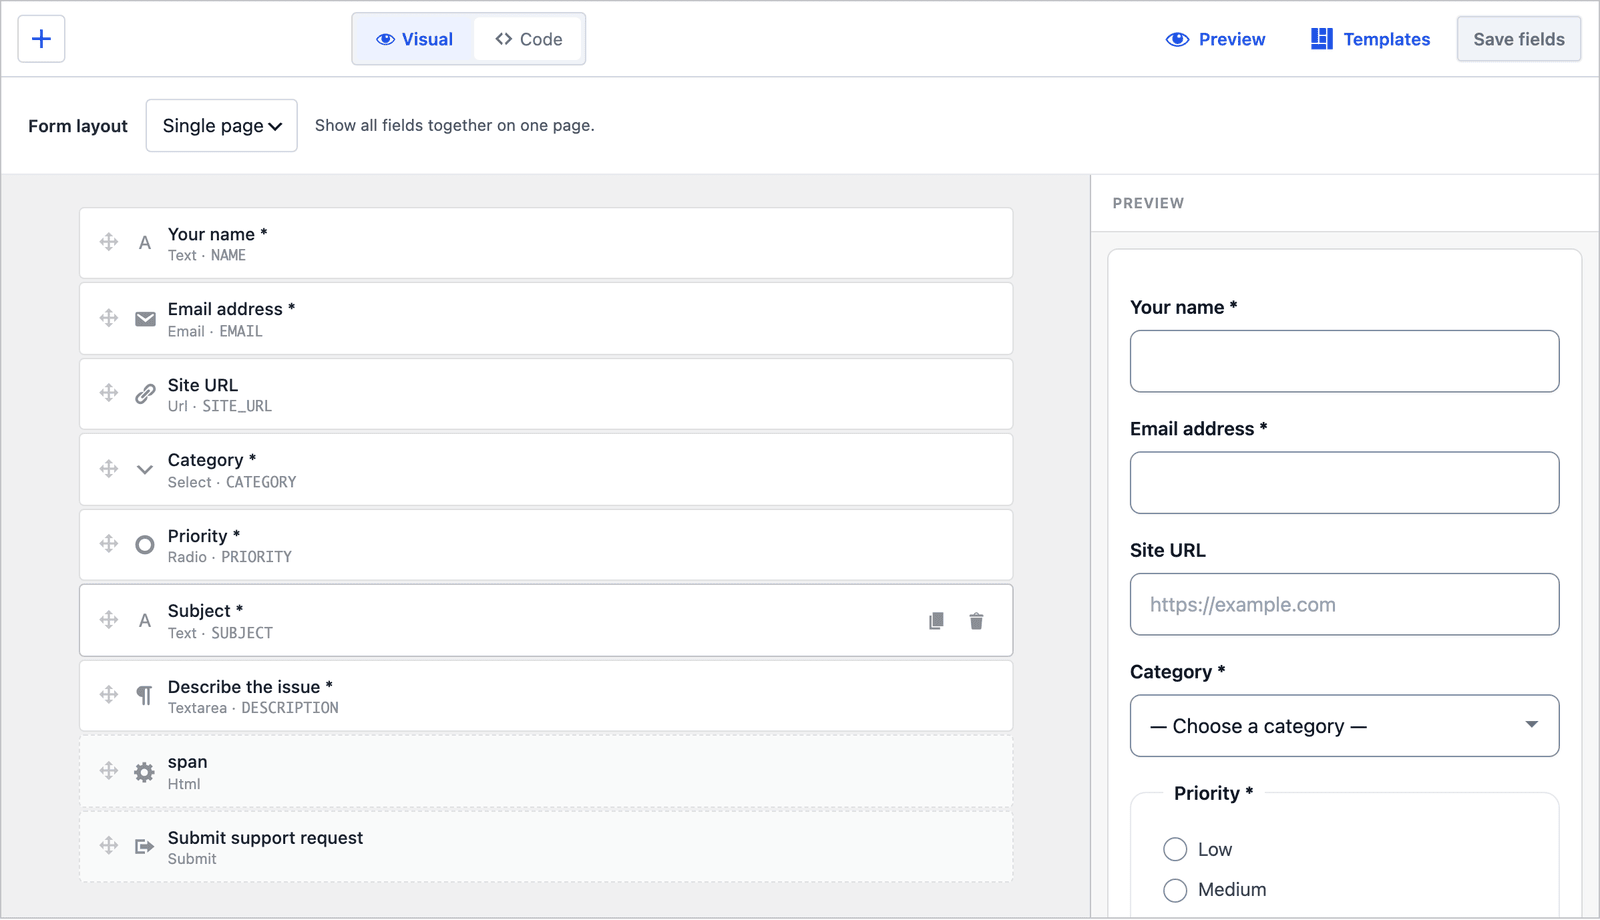 Rename the category options to match your product before you publish. The stored values, bug, feature, help and account, are what the routes below use.
Two Emails Out of the Box
Unlike most templates, this one arrives with 2 actions already set up, and both are worth understanding before you change anything:
- Send Email notifies the admin address with the subject “Support request: [SUBJECT]” and a Reply-To header of
[NAME] <[EMAIL]>, so replying from your mail client answers the customer directly. - Auto-Responder sends the customer “We received your support request: [SUBJECT]” with a copy of everything they typed and a line inviting them to reply with more details.
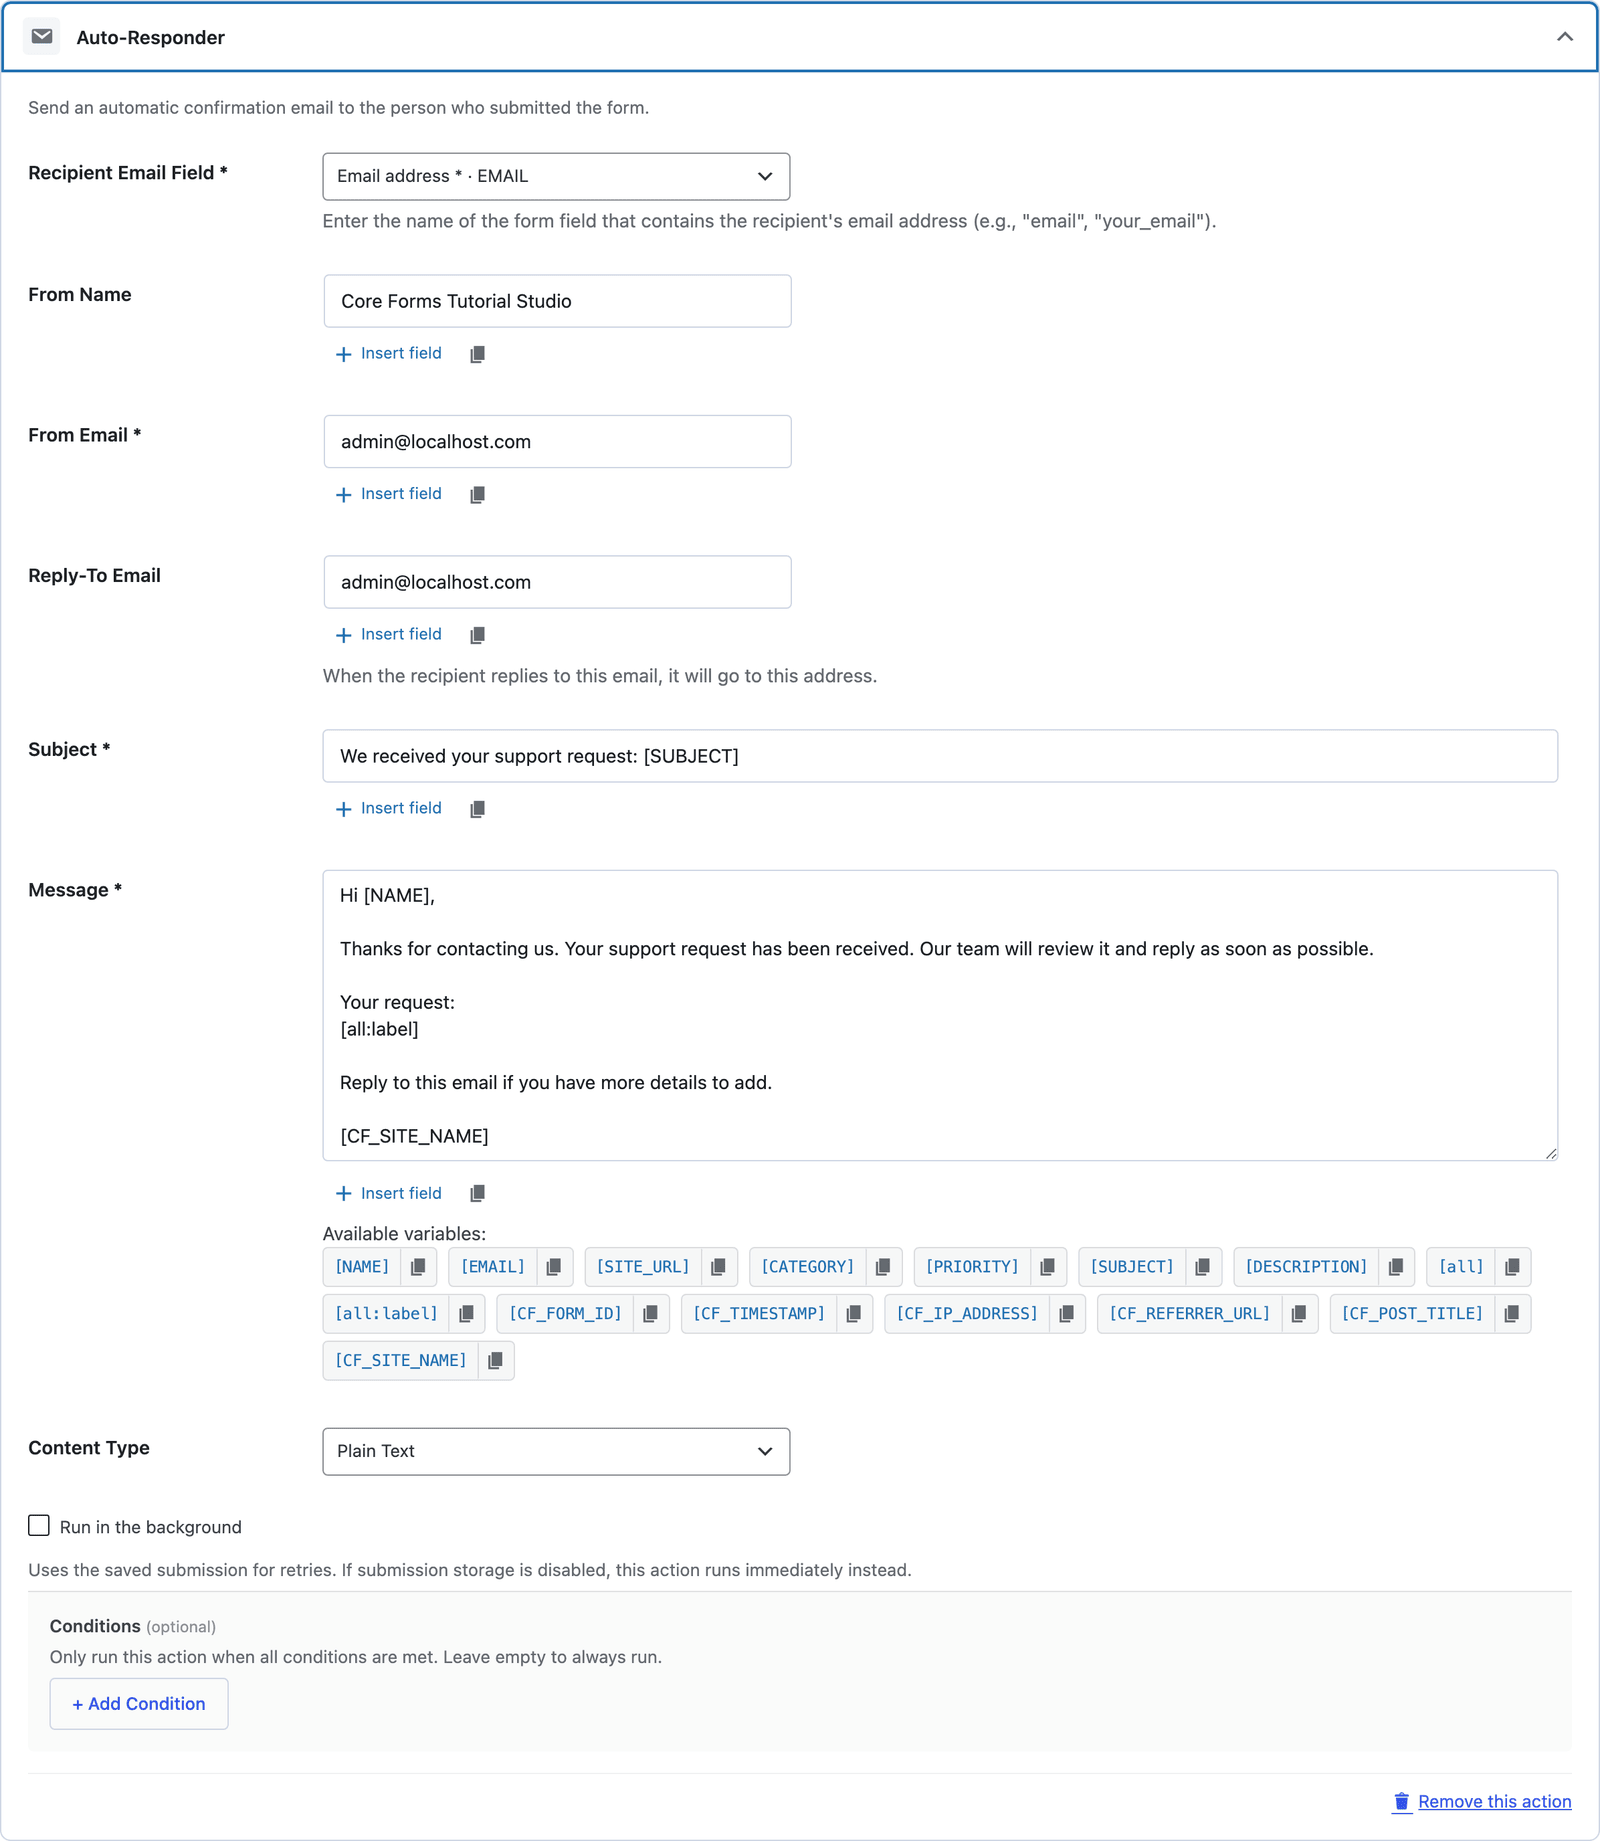 The confirmation quotes the whole request back, which stops the “did my message go through?” follow-up.
Both emails run through the site’s mail setup, and the emails and auto-responders feature covers the variables you can use in either one. Change the From name in the Auto-Responder to your product name before you publish, because the default is the site title.
Send Urgent Requests to a Separate Inbox
A high-priority request should not wait behind 30 feature requests. Recipient routes in the Send Email action send it somewhere else:
- Open the Actions tab and expand Send Email.
- Under Recipient routes, click + Add route.
- Set When field to Priority, Operator to equals and the value to
high. - Enter the urgent inbox in Send to and click Save Changes.
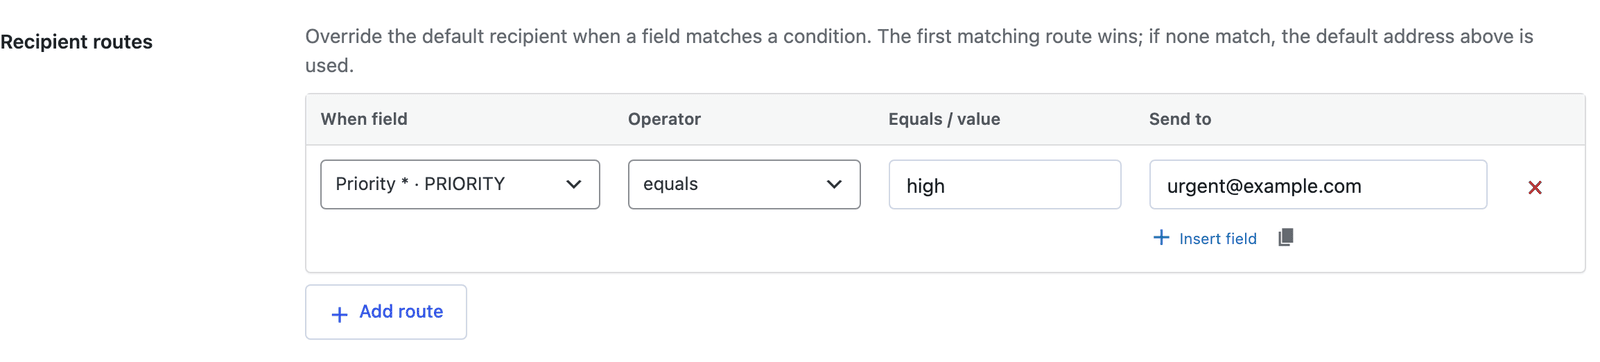 The value is the stored option, high, not the label people see.
The first matching route wins, and a route replaces the default recipient. A second route on Category equals account can send billing questions to the person who handles accounts, and everything else still goes to the default address.
Check the Email Log
Support forms are the forms where “I never got your email” costs the most, so the log matters more here than anywhere. Core Forms > Email Logs lists every notification and confirmation with its status, so you can see both emails for a request without leaving WordPress.
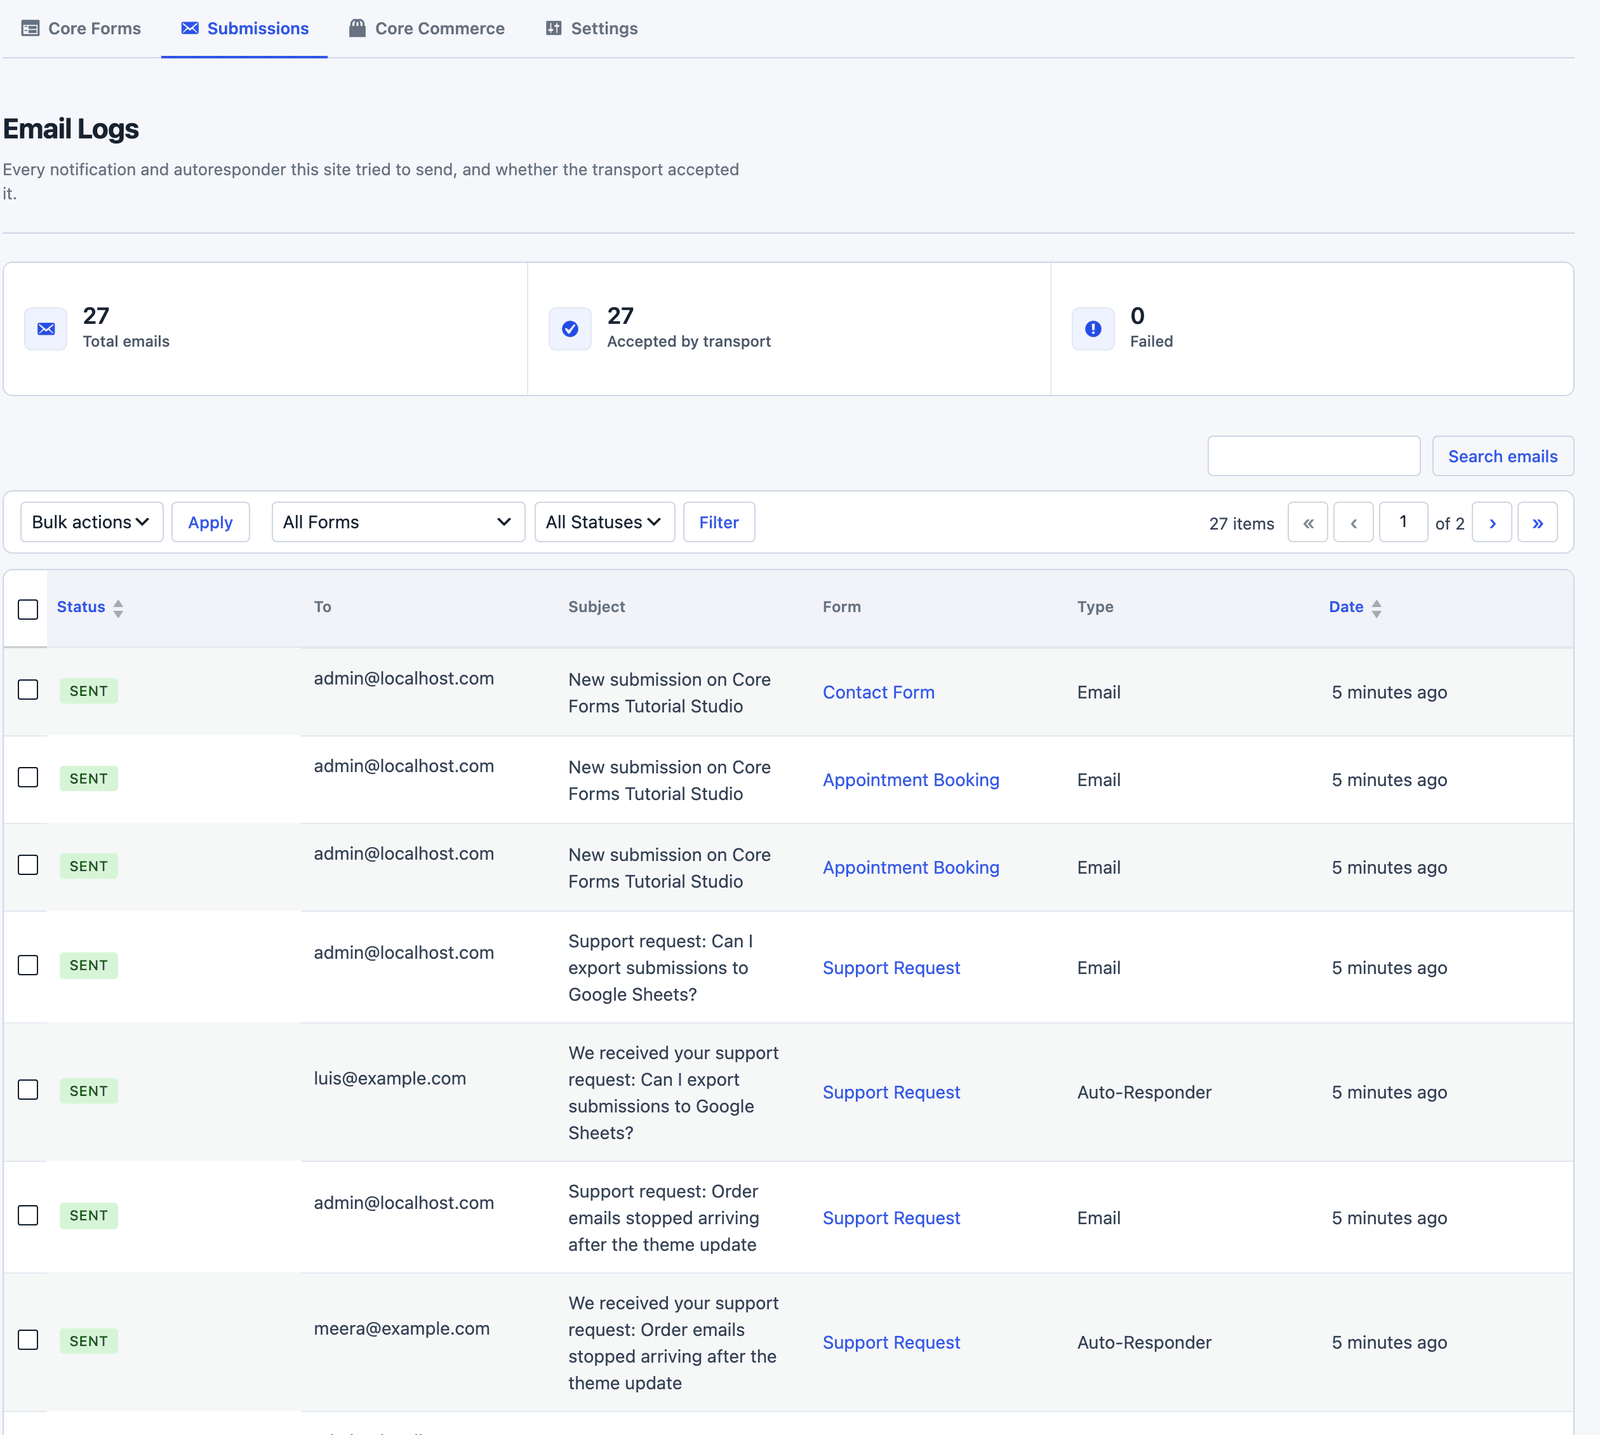 Each request produces 2 rows: the notification to you and the confirmation to the customer.
A row marked failed comes with the error from the mail transport, and a Resend link that sends it again. If the rows say sent and the customer still has nothing, the problem is on the receiving side, and the guide to why form emails land in spam covers what to do about that.
Single Page or Multi-Step
The multi-step version splits the form into “Your details” (name and email) and “Request details” (site URL, category, priority, subject and description).
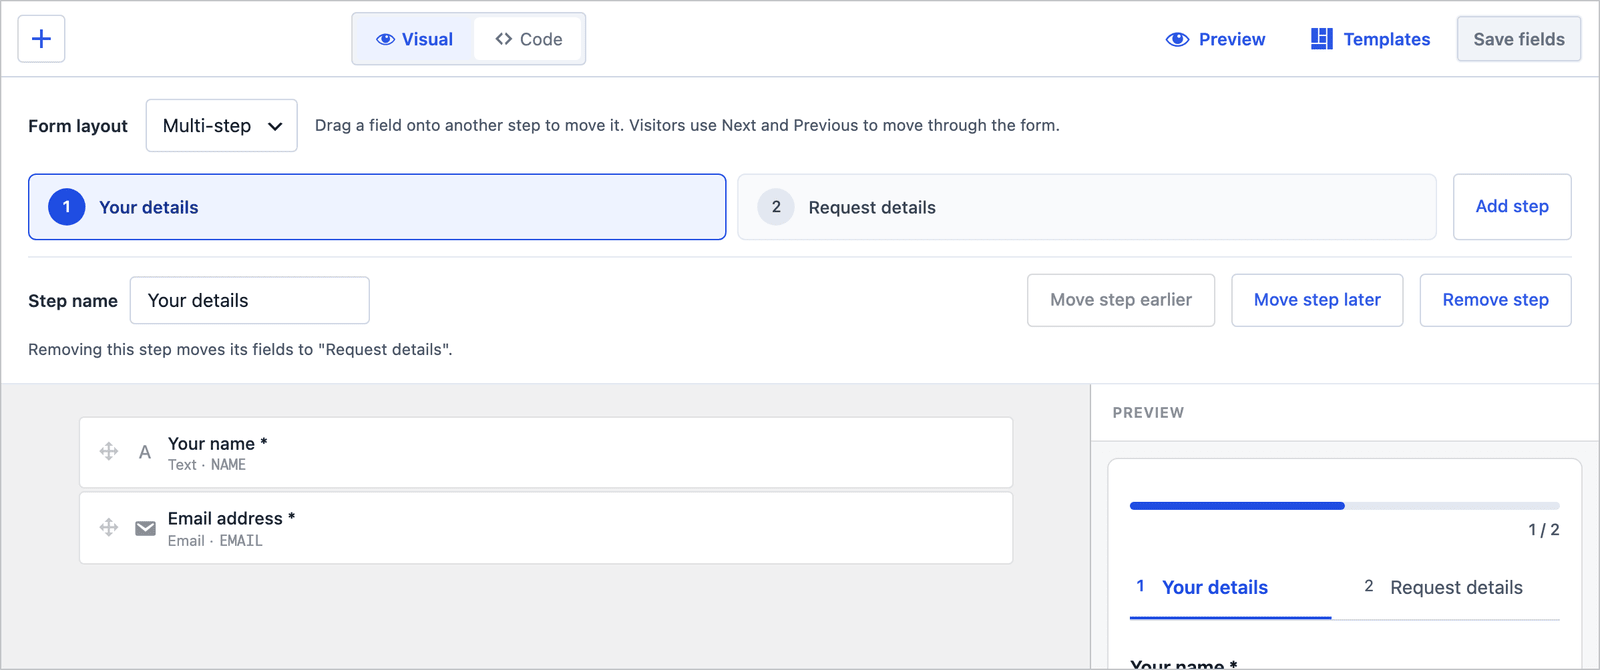 Both actions, the notification and the auto-responder, carry over to the multi-step version.
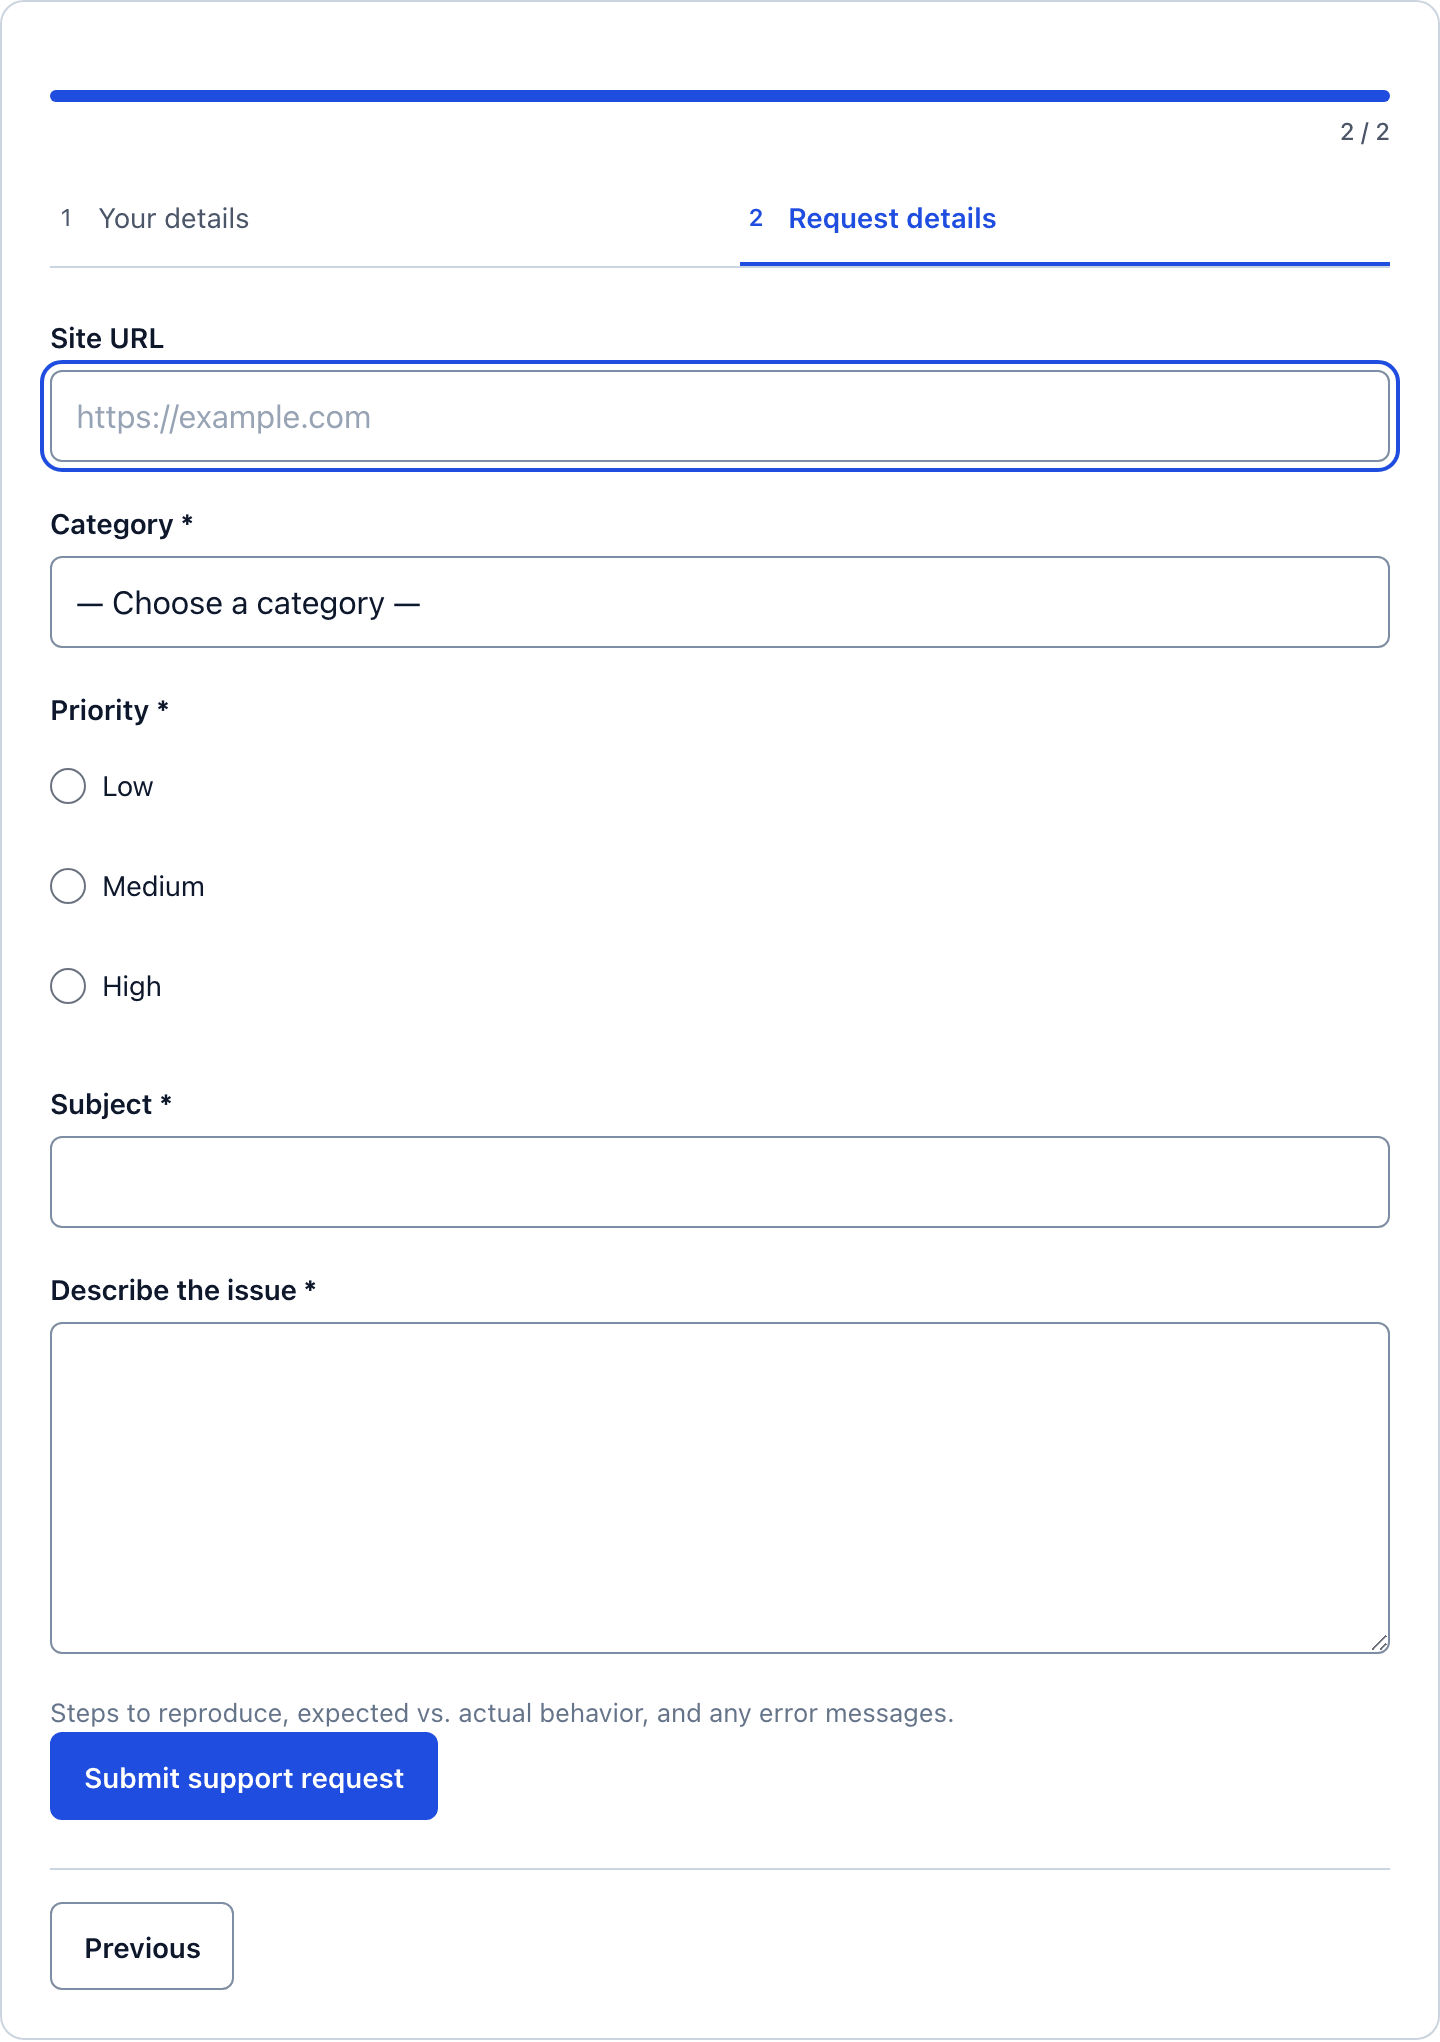 The progress bar and the step tabs come with the layout, without extra setup.
For a support form I would go with the multi-step version more often than for most templates. A person with a problem is happy to give their name and email first, and the second screen then has the room the description needs. The single page is the better choice when the form sits inside a help center page that is already long.
Publish the Support Request Form
The shortcode is shown next to the form’s name in the editor:
[cf_form slug="support-request"]
Paste it into your support page, or use the Core Forms block. Put a short line above the form telling people not to paste passwords, license keys or card details into the description, because some will unless told.
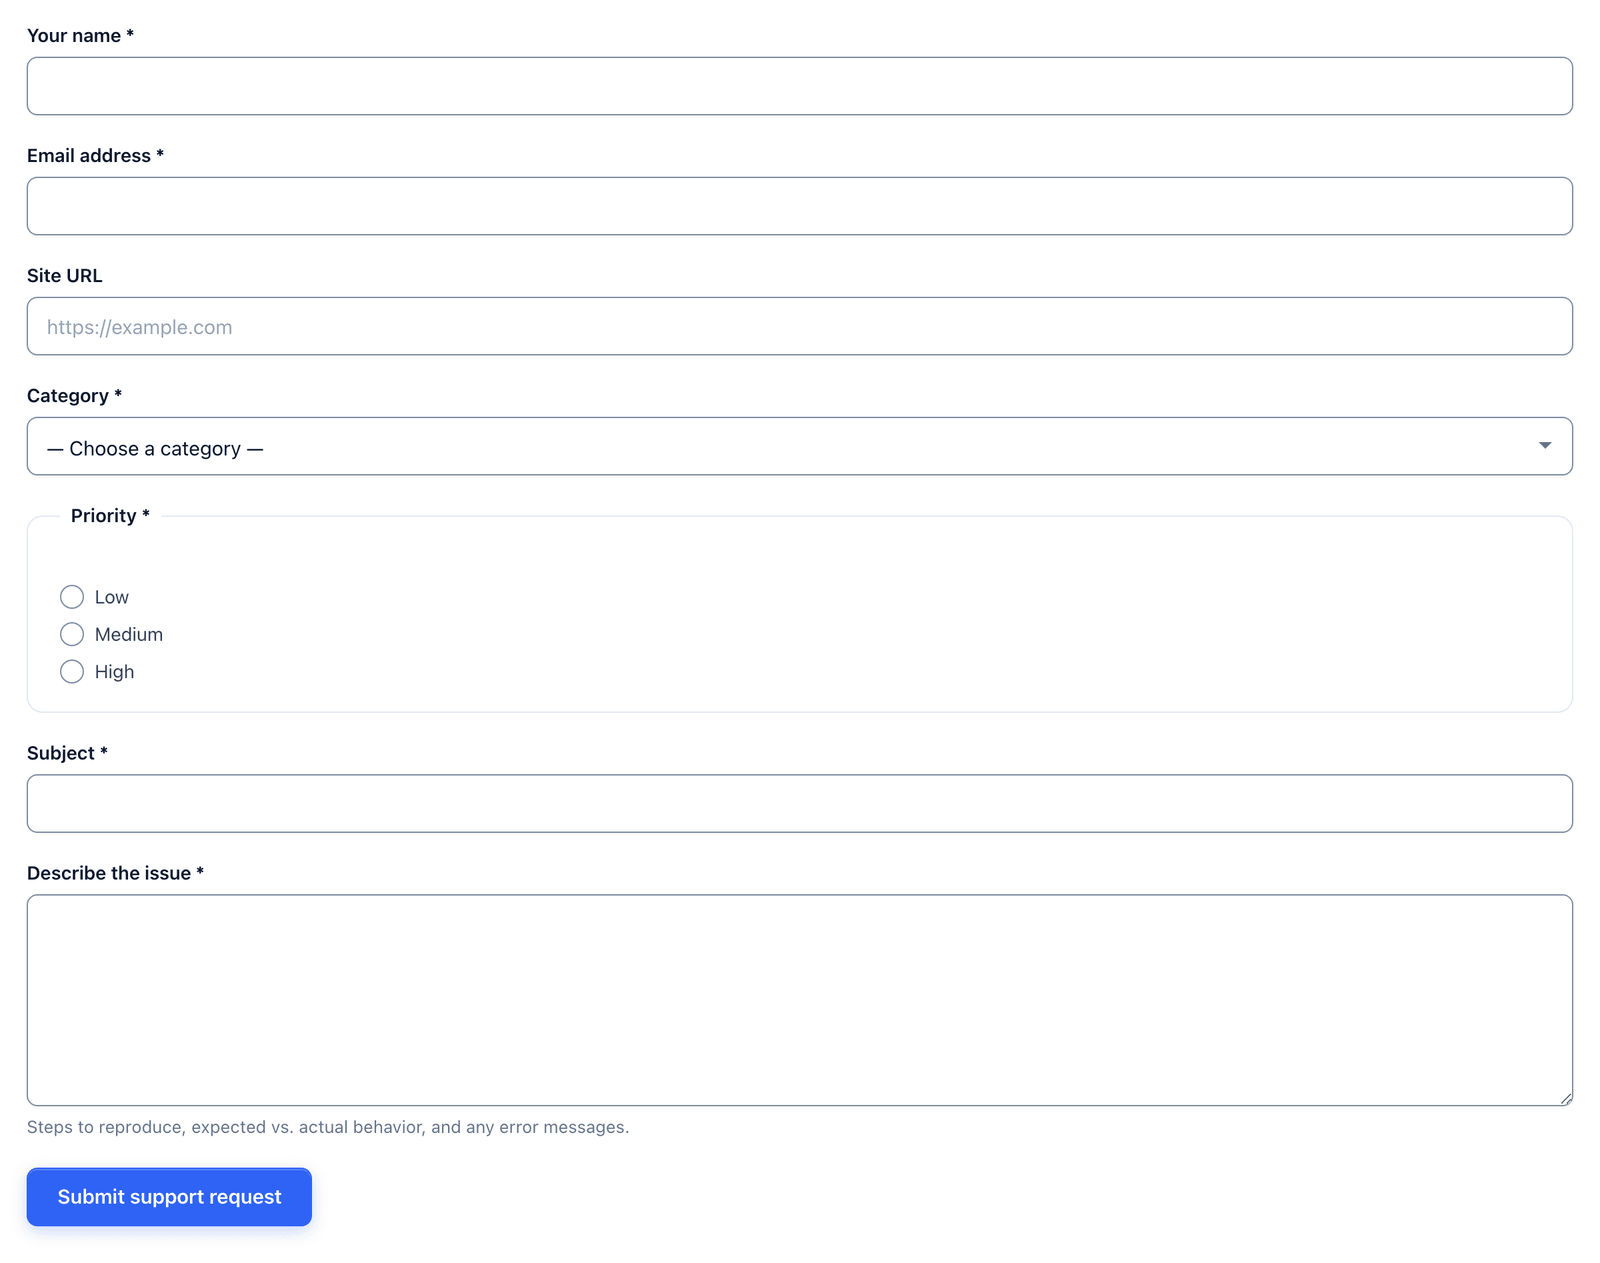 The help text under the description asks for exactly what a support agent needs first.
Turn Requests Into Tickets
Every request lands in the form’s Submissions tab, with category and priority in their own columns and a Send Reply box on each entry.
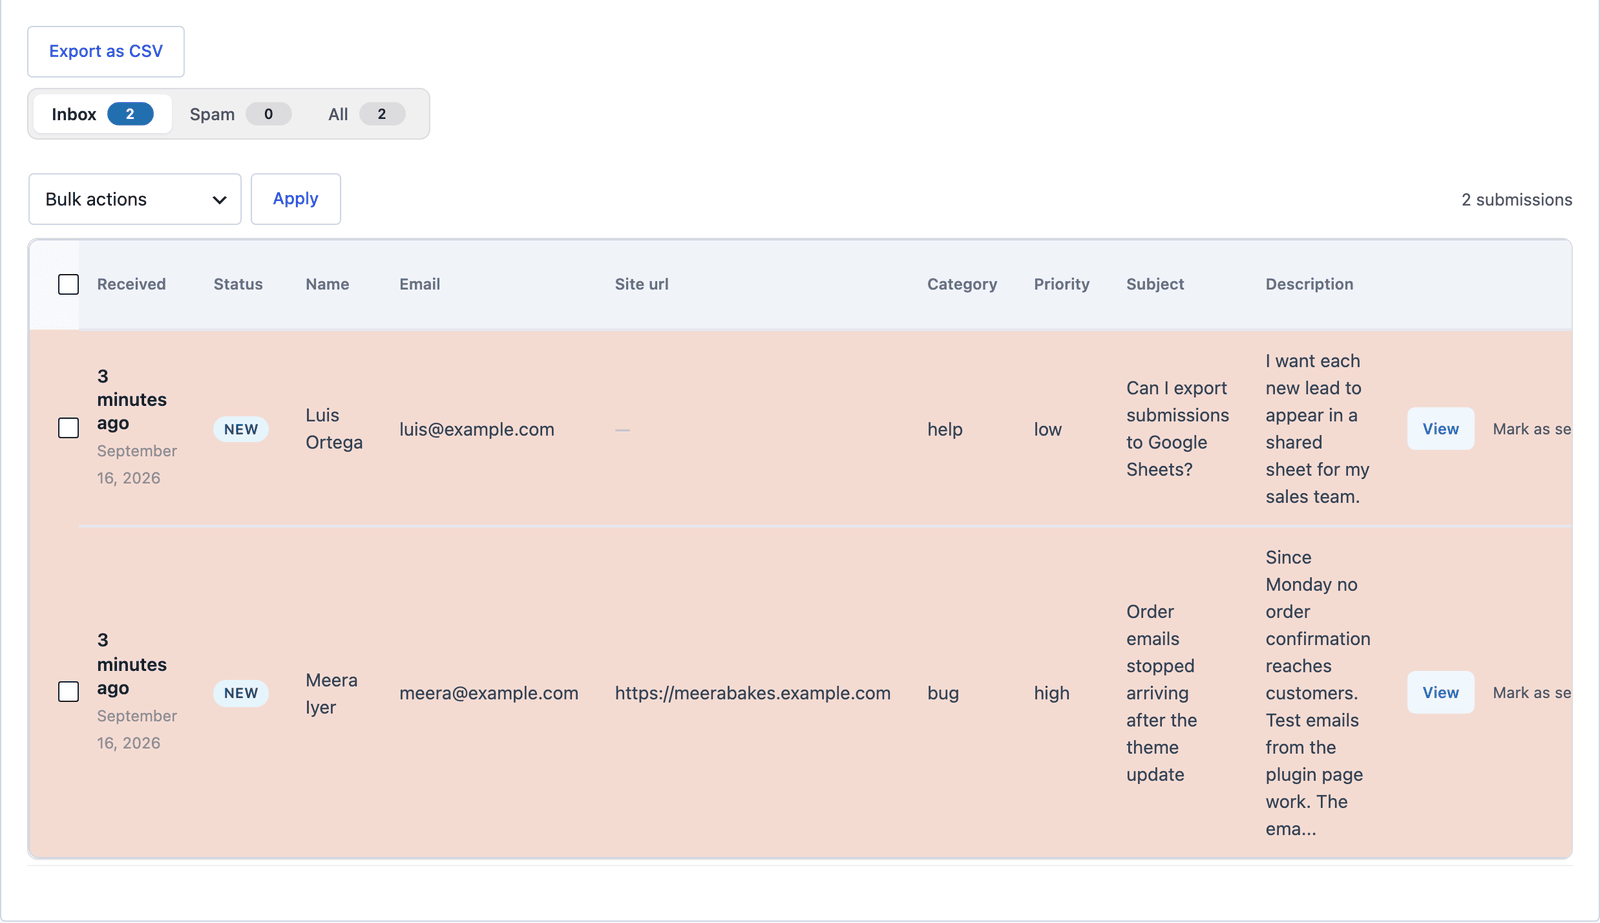 For a small team, this tab plus the reply box is the whole ticketing system.
Once the volume outgrows an inbox, the same form can feed a helpdesk without changing the fields. A Zendesk action creates a ticket with the requester, priority and tags mapped from the form, and a Fluent Support action does the same on a WordPress site that runs Fluent Support. One detail to check is priority. Zendesk uses low, normal, high and urgent, so a medium request needs the action’s priority set to normal or mapped from the field, while Fluent Support turns low and high into its own normal and medium on its own.
The Limits
The form does not give the customer a ticket number. The confirmation email carries their request back to them, and the Reply-To header keeps the thread together, but a visible reference number only appears once a helpdesk action creates the ticket.
There is no file upload in the template. Adding one is a single field in the builder, and the guide to file uploads on WordPress forms covers the size and type limits that apply.
Priority is chosen by the customer. Some people mark everything high, so treat the route as a way to see those requests first, not as a promise about response time.
The auto-responder confirms receipt. It does not know when you have answered, so if you reply from a helpdesk rather than from the submission, tell the customer where the reply will come from.
What Quietly Ruins a Support Request Form
Turning off the auto-responder because “we always reply within a day.” A customer who gets no confirmation sends the same request again 2 hours later, and now you have 2 tickets.
Using a generic support@ address with no Reply-To. The Reply-To header is already set in the template, and removing it means every reply has to be pasted into a new email.
Adding 12 categories. People pick the wrong one when the list is long, and you end up re-sorting every request by hand, which is the work the field was meant to save.
Leaving the site URL field out to shorten the form. On a website problem it is the first question you would ask anyway, and a URL the customer types in the form is more accurate than one you guess from their email domain.
Final Remarks
You now have a support request form that sorts requests by category, sends the urgent ones to a separate inbox, confirms receipt automatically and keeps a log of every email it sent. If you keep one idea from this guide, keep this one: the Reply-To header and the auto-responder are already set, so the fastest way to break a good support form is to remove them.
The support request template page has the fields and a live demo, and the bug report form guide is the right next read when you want a separate form for reproducible bugs with a screenshot. If something here does not behave the way this guide describes, the support team can help.
I hope your support queue gets easier to sort from here.
FAQ
Can customers attach screenshots to a support request?
Yes. Add a file field in the builder. Uploads accept images and documents up to 8 MB per file by default, and the link appears in the submission and the notification email.
Can I send support requests to Slack as well as email?
Yes. A Slack action posts the subject, category and priority to a channel, and conditions on the action can limit that to high-priority requests only.
How do I stop spam support requests?
The template ships with the honeypot on. For a public support page, turning on the rate limit in the Settings tab and adding Turnstile or reCAPTCHA from the spam protection feature handles the rest.