
How to Create a Bug Report Form in WordPress
Build a WordPress bug report form that collects steps to reproduce, severity and a screenshot, then sends critical bugs to the person on call.

A bug report form exists to turn “it’s broken” into something a developer can act on: the steps, the browser, how bad it is and a screenshot. So, if you are looking to add a bug report form to your WordPress site, for a plugin, a theme, a SaaS product or a client site, this guide can surely help.
I build Core Forms, and every screen here comes from its Bug report template running on a test site.
Every product breaks in its own way, so one guide cannot cover every field you might want. But almost every useful bug report needs the same 4 things, a summary, steps to reproduce, a severity and the environment, and in this one I will try my best to cover those properly, along with the routing that gets a critical bug in front of the right person.
The template ships with the plugin, so you can follow along click for click. Or, if you get stuck halfway, support is a message away. Without further ado, let’s get started.
What a Bug Report Form Asks
The Bug report template collects 7 things, and each one earns its place:
- Your name and Email are required, so you can ask a follow-up question.
- Severity is a required choice between critical (site or data loss), high (blocks a workflow), medium (annoying but workable) and low (cosmetic).
- Browser + OS is optional, with a placeholder such as “Chrome 130 on macOS 14” that shows people the format you want.
- Summary is a required one-line title, the thing you will read in the inbox.
- Steps to reproduce is a required text area whose placeholder already reads “1. Go to… 2. Click… 3. Observed… 4. Expected…”.
- Screenshot or log is an optional file upload that accepts images and .txt, .log and .json files.
The placeholder in the steps field does more work than any label could. People copy the shape they are shown, so most reports arrive as numbered steps with an observed and an expected line, which is exactly what a developer needs to reproduce the problem.
Create the Bug Report Form
Two templates match a bug search, one on a single page and one split into steps:
- Go to Core Forms > Add New.
- Type
bugin the template search. - Click Use this template on the first Bug report card for a single page.
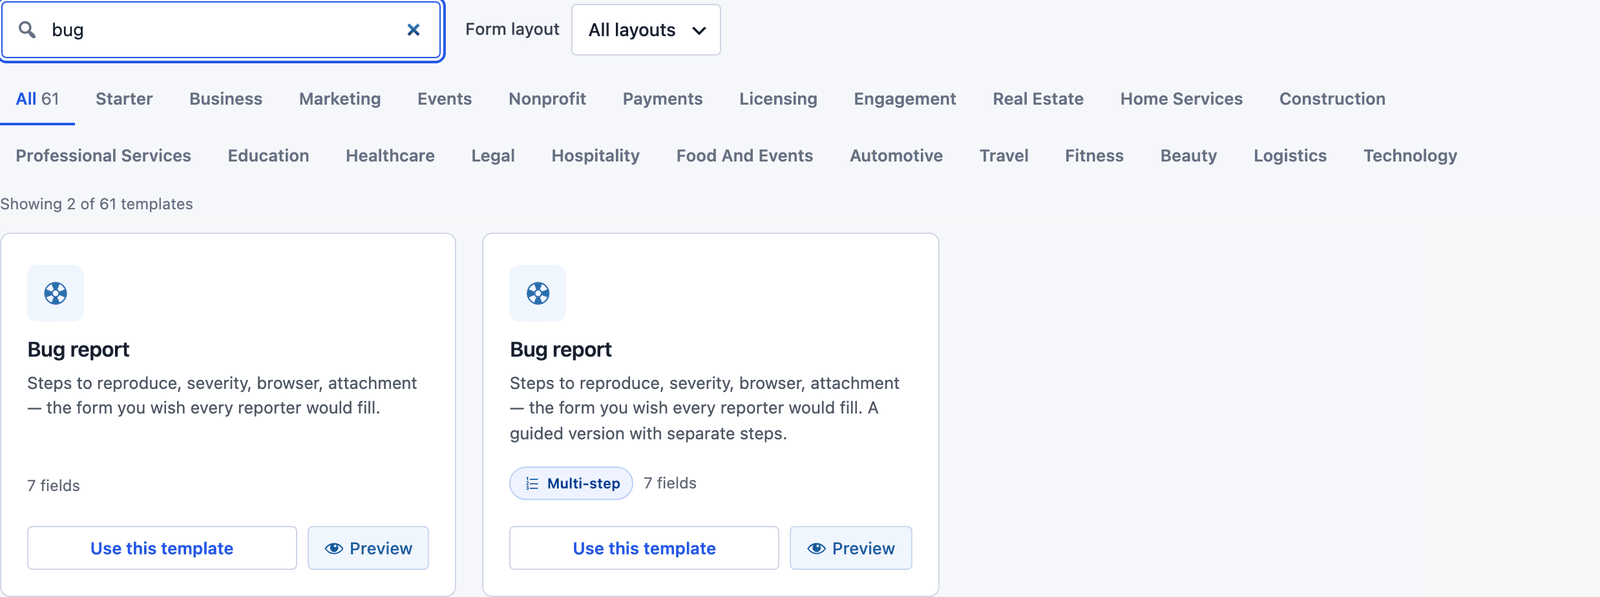 Both versions have the same 7 fields, and only the layout differs.
The builder opens with the fields already in place. Severity and Browser + OS sit side by side inside a container, so they take one row on desktop and stack on a phone.
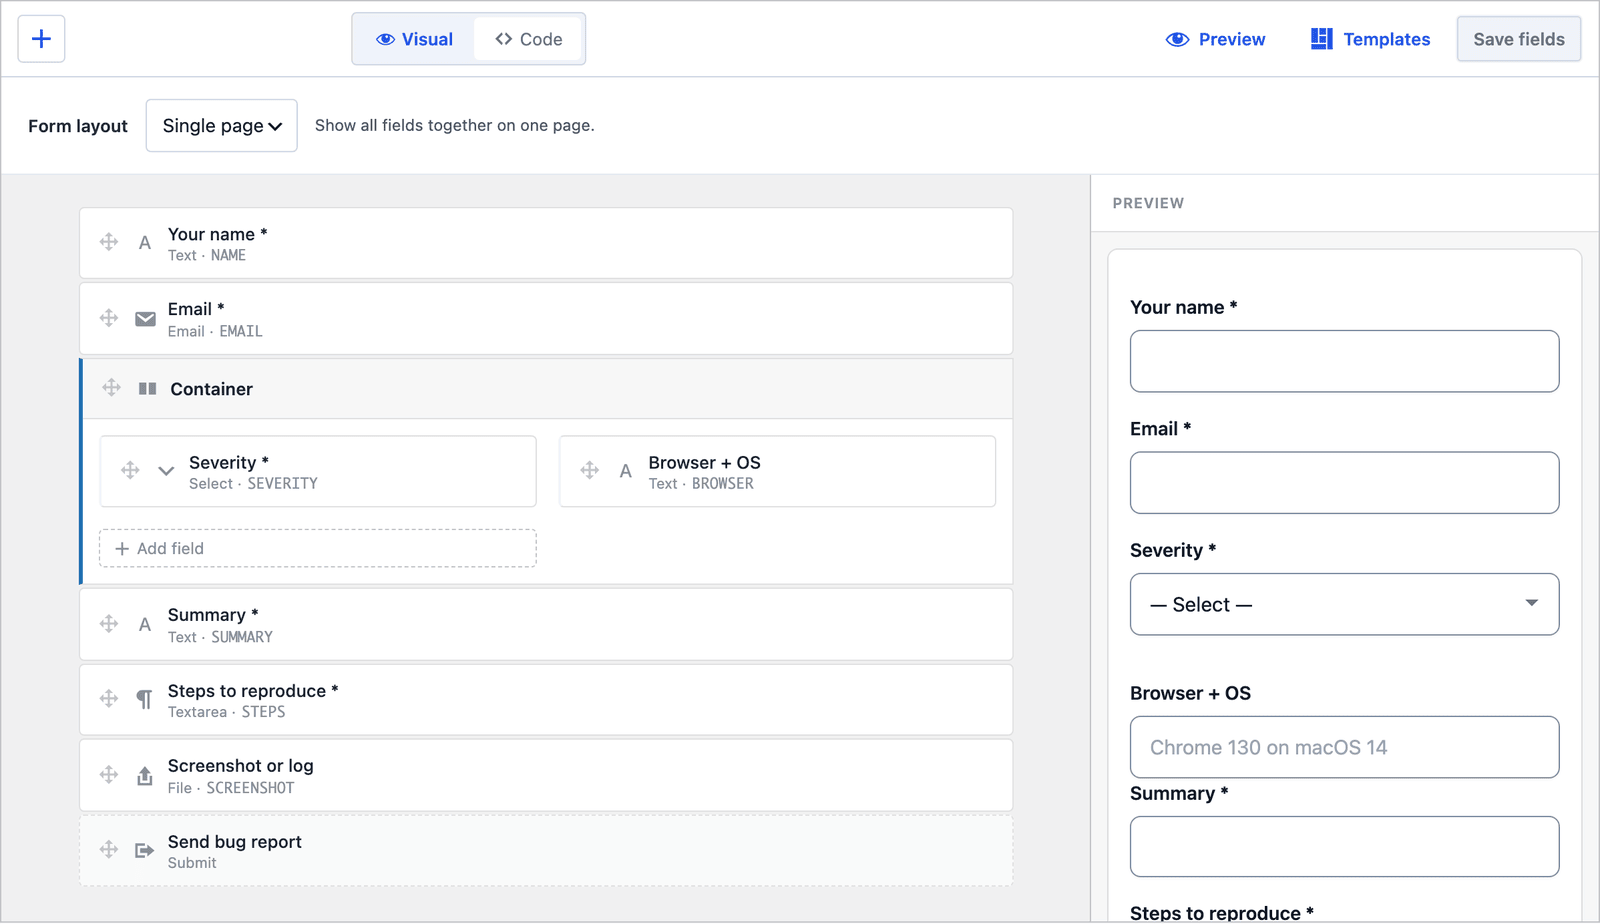 The preview on the right updates as you edit, so you can check the field order before saving.
If your product has a fixed set of areas, a Component select (checkout, editor, API) is the one field worth adding. Click the + button, search for a select field and give its options the names your team already uses in the issue tracker.
Send Critical Bugs to the Right Person
By default every report goes to the site admin email. That is fine for a low bug at 3 p.m. and wrong for a critical one at 3 a.m. Recipient routes in the Send Email action fix it:
- Open the form’s Actions tab and expand Send Email.
- Under Recipient routes, click + Add route.
- Set When field to Severity, Operator to equals and the value to
critical. - Enter the on-call address in Send to and click Save Changes.
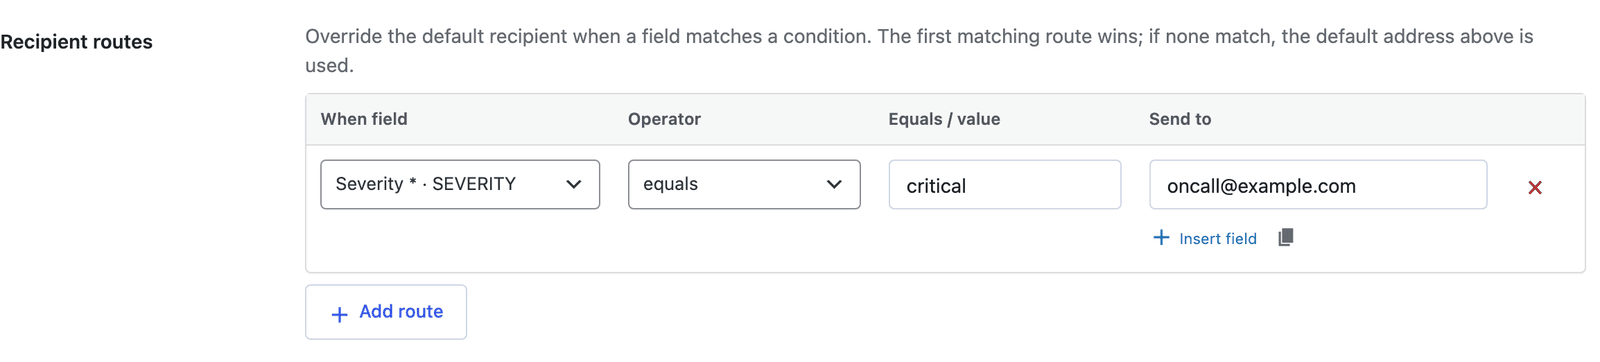 The value is the stored option, critical, not the longer label people see.
The first matching route wins, and a route replaces the default recipient rather than adding to it. If the on-call person should get critical bugs and the team inbox should still get a copy, add CC: team@example.com in Additional Headers instead. The feedback form guide uses the same routes to send low ratings to a support lead, if you want a second example.
Set the Upload Limit
The file field accepts up to 8 MB per file out of the box, which covers a screenshot or a log with room to spare. The file uploads feature explains the checks that run on every upload, and the short version is:
- executable and script extensions (.php, .exe, .sh, .svg and about 30 more) are rejected outright,
- a file’s real type is inspected, so a script renamed to .jpg is rejected too,
- filenames are cleaned before storage,
- the
cf_upload_max_filesizefilter raises or lowers the 8 MB limit.
The accept attribute on the field is a hint to the browser’s file picker, not a security control. The server-side checks are what keep a .php upload out, whatever the picker shows.
Single Page or Multi-Step
The multi-step version of the template splits the form into “Your details” (name and email) and “Request details” (severity, browser, summary, steps and the file).
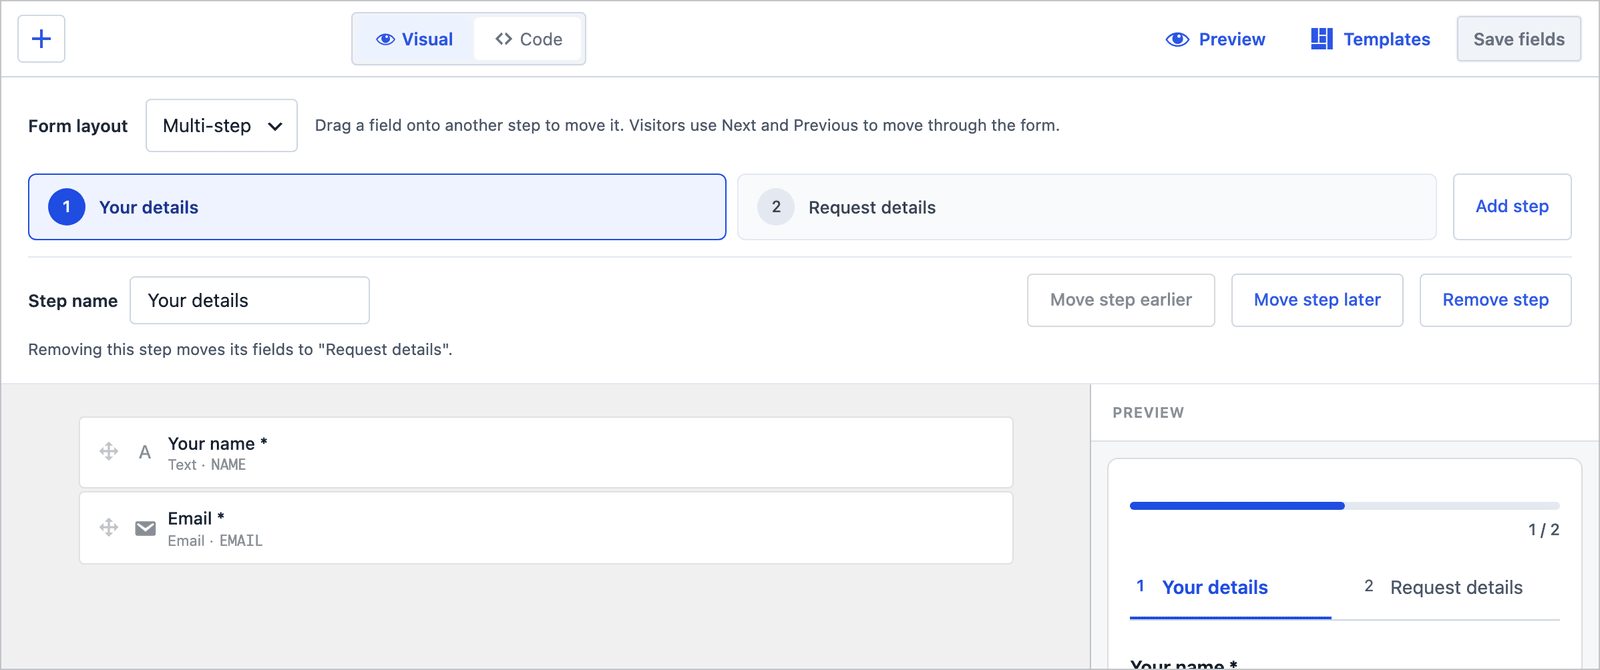 Step names can be changed in the builder, and fields can be dragged between the two step tabs.
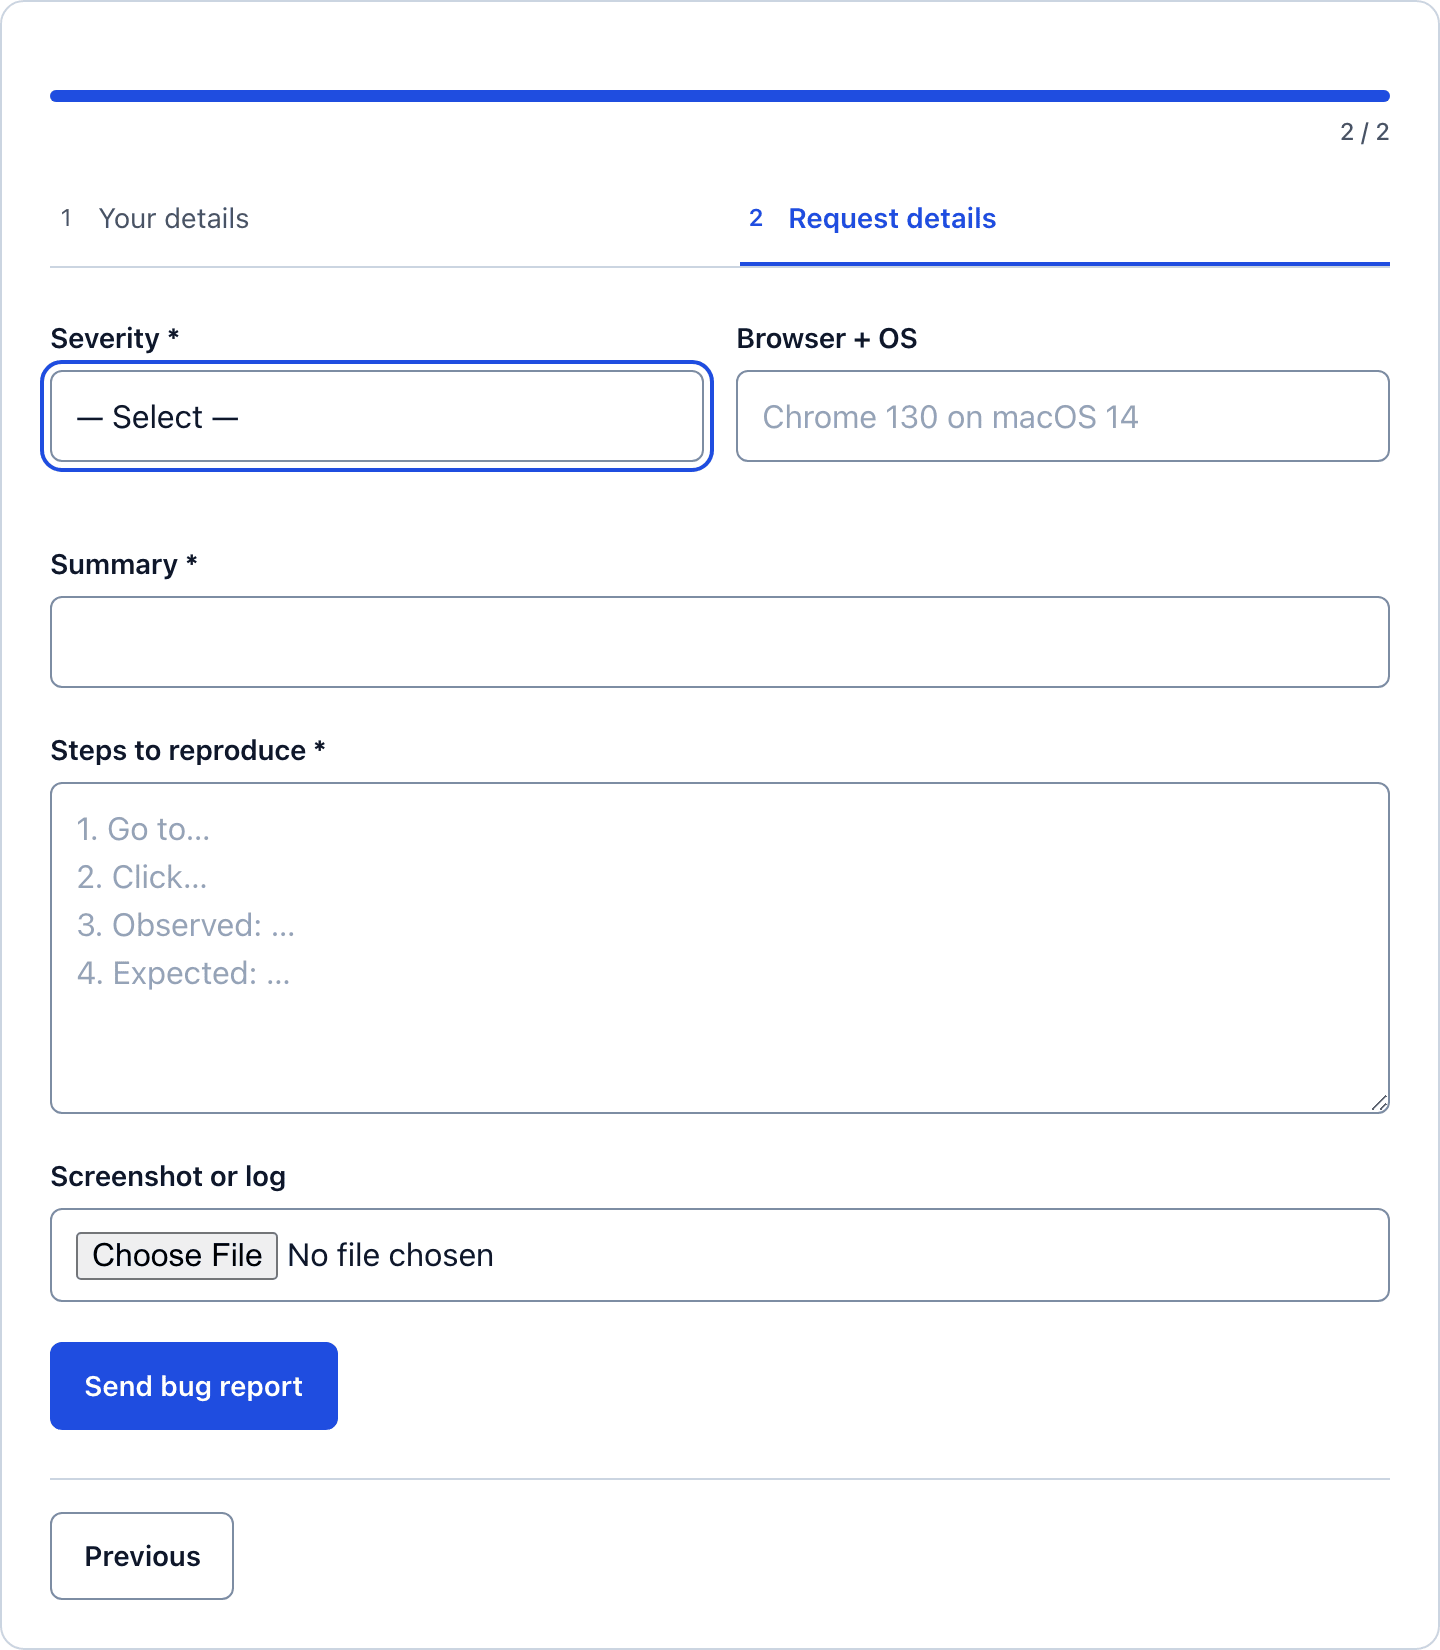 Next validates the first step before the second one appears, so a report never arrives without an email address.
For a bug report I would keep the single page. Someone reporting a bug is already annoyed, and one screen with the steps field in plain view gets the report finished faster than 2 screens do. The multi-step version earns its place when you add a component select, a version field and an impact question and the form stops fitting on one screen.
Publish the Bug Report Form
The shortcode is shown next to the form’s name in the editor:
[cf_form slug="bug-report"]
Paste it into a page, or use the Core Forms block. On a product site the form belongs on a page called Report a bug, linked from the support page and the footer, so people find it without asking.
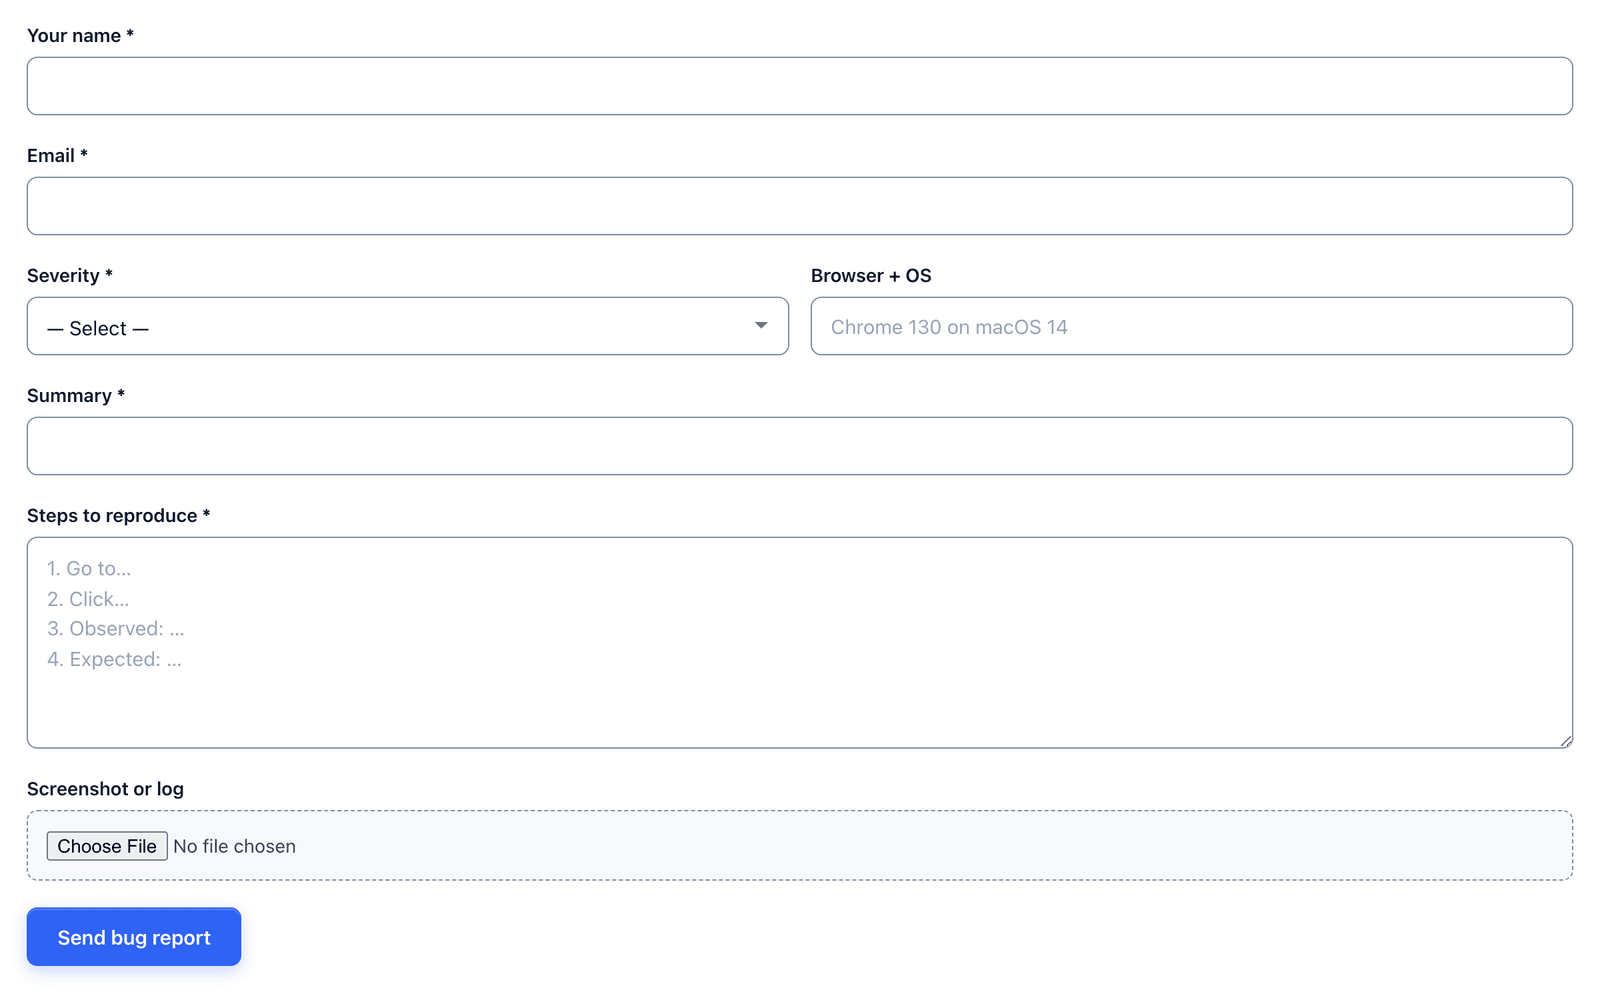 The two-column row keeps the form short without hiding anything.
Read the Reports
Every report lands in the form’s Submissions tab. Severity, browser and summary have their own columns, and the screenshot column links straight to the uploaded file.
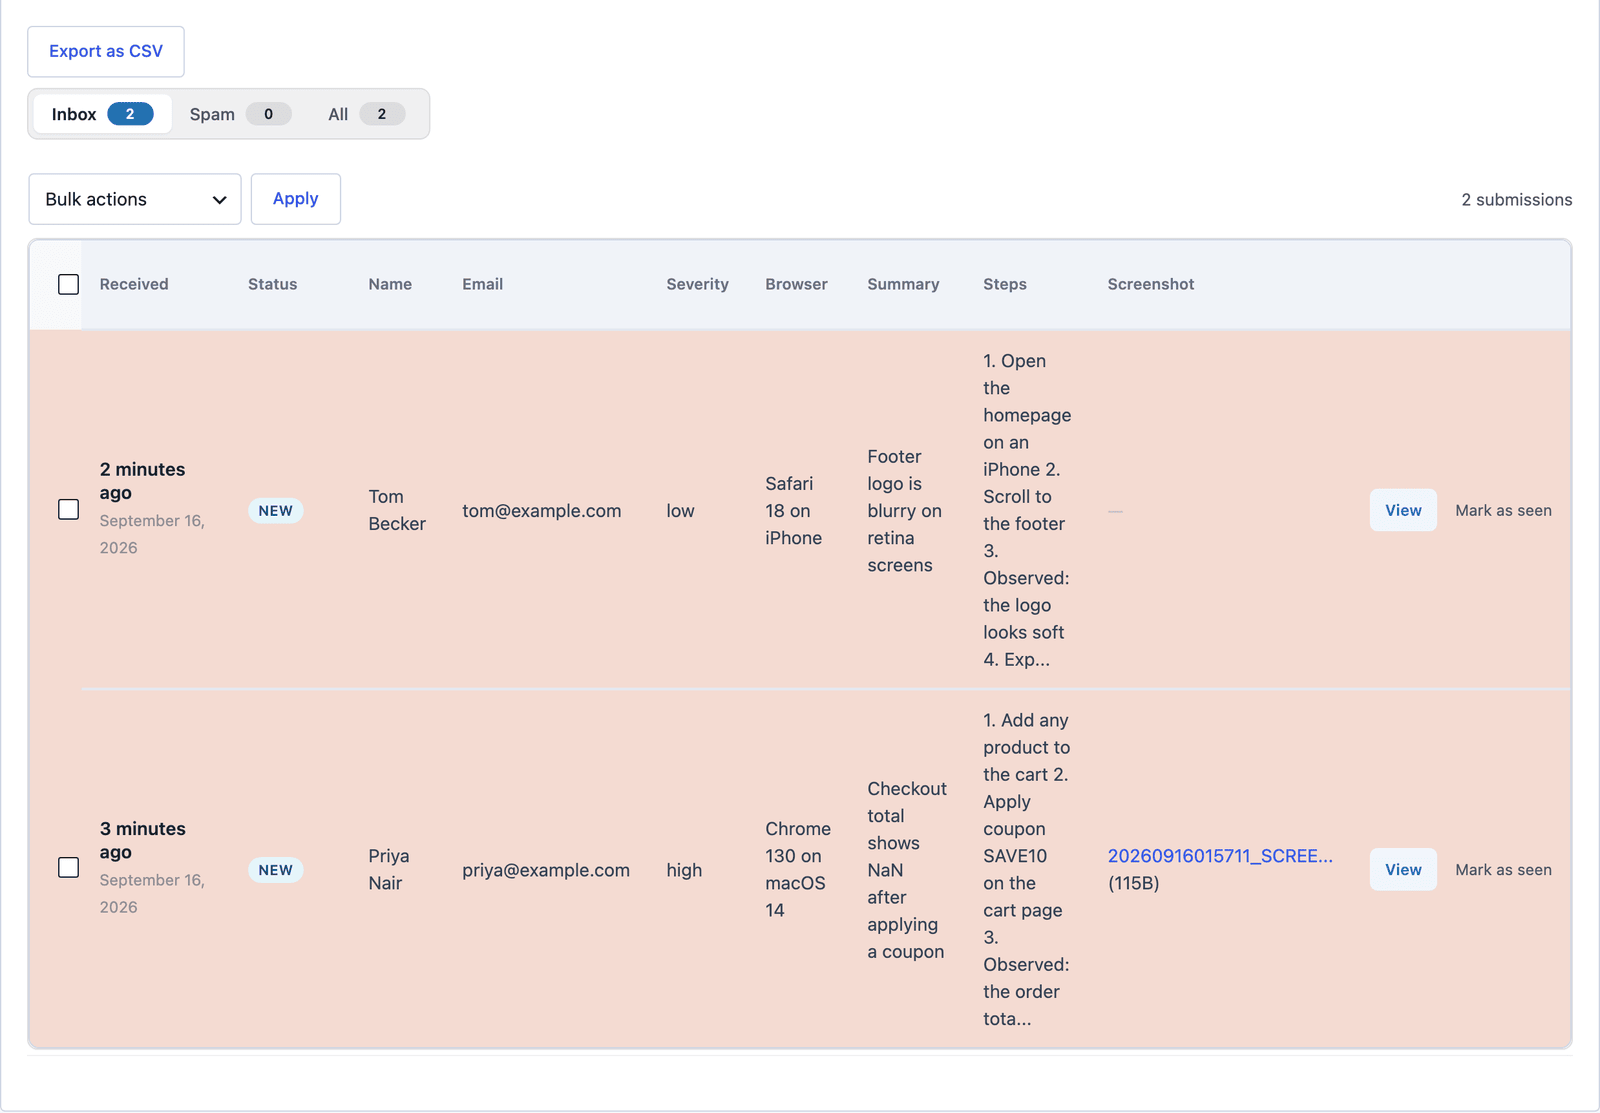 Sort by the Severity column and the critical reports come first.
Click View to open a single report. The steps keep their line breaks, and the Send Reply box at the bottom answers the reporter from the same screen.
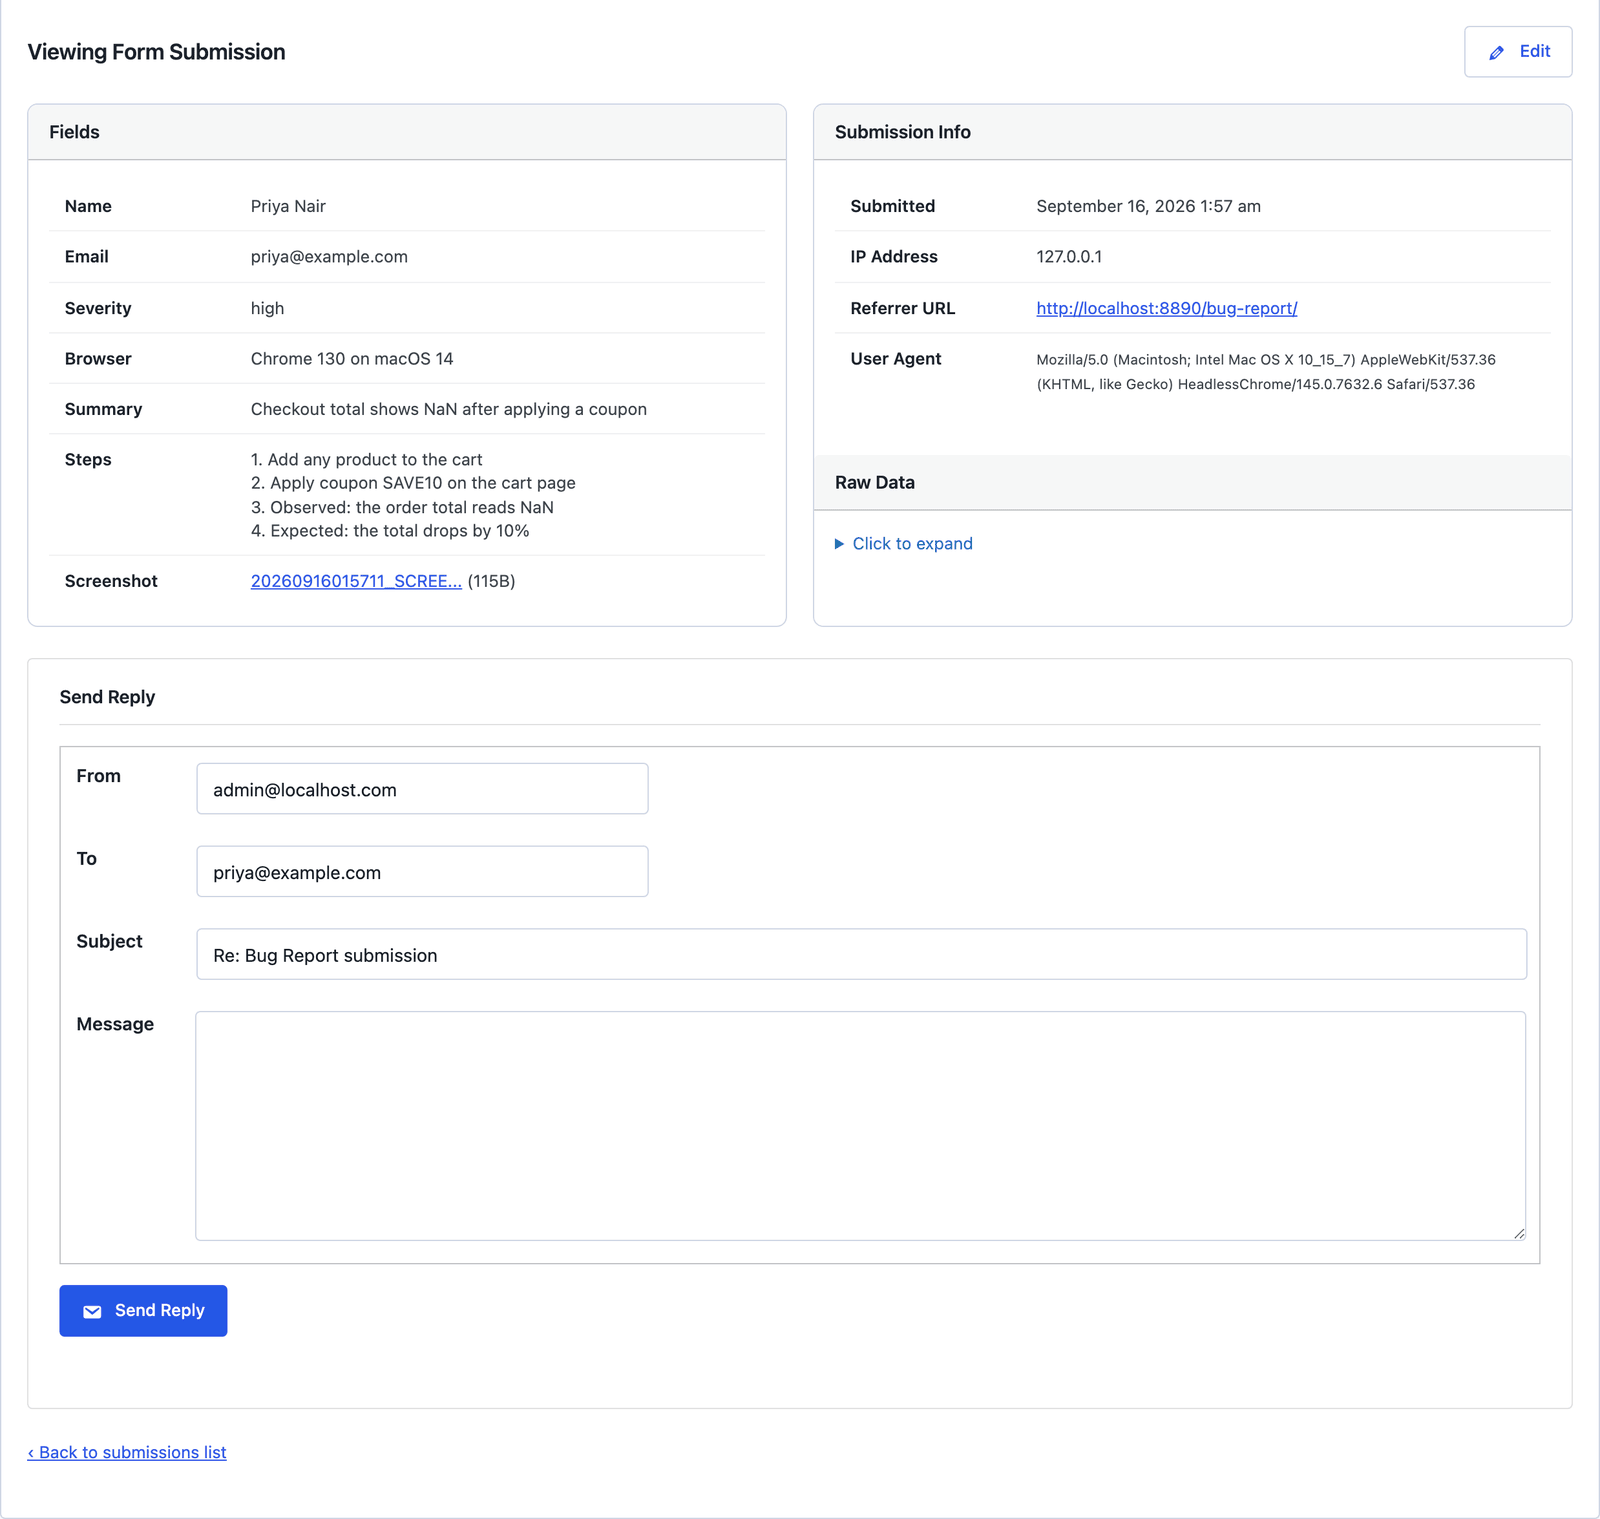 Asking “which coupon did you use?” from here takes 10 seconds and keeps the thread with the report.
If your team lives in a ticketing tool, a Zendesk action turns each report into a ticket with the uploaded file attached, and a Slack action posts the summary and severity to a channel the moment it arrives.
The Limits
The form does not give reporters a ticket number or a status page. They get the confirmation message and, if you add an Auto-Responder action, an email with their report. Anything after that happens in your inbox or your issue tracker.
Uploads are limited to 8 MB per file unless you raise the filter. A screen recording usually exceeds that, so ask for a link to a video rather than the file itself.
Severity is chosen by the reporter, and reporters rate their own bug as critical more often than it deserves. Treat it as a routing hint, not a triage decision.
The form stores what the reporter types. It does not capture the browser or the page URL on its own, so keep the Browser + OS field even though it is optional, and consider a hidden field with the page URL if the form lives in more than one place.
What Quietly Ruins a Bug Report Form
Removing the steps placeholder to make the form look cleaner. Without the “Observed” and “Expected” lines in front of them, most people write one sentence, and you spend the next 3 emails asking for the rest.
Making the screenshot required. Some bugs are a wrong number in an email and have nothing to screenshot, and a required file field turns those reports into abandoned forms.
Adding a priority field next to severity. Reporters cannot tell the two apart, so they set both to the top value, and you have 2 fields that mean the same thing.
Sending every report to one shared inbox. A critical bug that lands between 40 low ones waits until someone reads the whole inbox, which is the exact problem the routes above are for.
Final Remarks
You now have a bug report form that asks for the 4 things a developer needs, sends critical reports to the person who can act on them and keeps the screenshot next to the steps. If you keep one idea from this guide, keep this one: the placeholder in the steps field is doing more work than any other setting on the form, so leave it alone.
The bug report template page has the fields and a live demo, and the support request template is the right starting point when you want one form for bugs, questions and account issues together. If something here does not behave the way this guide describes, the support team can help.
I hope your inbox gets clearer reports from here on.
FAQ
Can reporters attach more than one file?
Yes. Open the file field in the builder and turn on multiple files, or add multiple to the input in the Code tab. Each file still has to pass the 8 MB limit and the type checks on its own.
Can I send bug reports to GitHub or Jira?
Not with a built-in action. A webhook posts the report as JSON to any endpoint, and Zapier, Make or n8n can turn that into an issue. Zendesk and Fluent Support have direct actions.
Where do uploaded files go?
Into the uploads folder under a core-forms directory, with execution blocked at the server level. The Submissions tab links to each file, and the email notification includes the link as well.