
How to Create a Multi-Step Form in WordPress
Turn any WordPress form into a multi-step form in the builder: switch the layout, name the steps, move fields between them and check that Next validates each step before the visitor moves on.

A multi-step form in WordPress is the same form with the fields split across named screens, so the visitor answers a few questions at a time and a Next button checks each screen before the next one opens. So, if you are looking to create a multi step form in WordPress without writing a schema or paying for an add-on, this guide can surely help.
I build Core Forms, and every screen here comes from its builder running on a test site.
One guide cannot settle whether your form should be multi-step at all, and there is a separate piece on this site for that decision. This one covers the how: switching the layout, naming and ordering the steps, moving fields between them, what the visitor sees, and the 3 mistakes that make a stepped form worse than the single page it replaced.
There is nothing to download. Or, if you get stuck halfway, support is a message away. Without further ado, let’s get started.
Start From a Template or a Form You Have
There are 2 starting points, and both end in the same builder.
If you are starting fresh, go to Core Forms > Add New and look for the Multi-step badge on the template cards. Sixteen templates ship with steps already named, and the guided versions of the longer single-page templates sit next to them. Click Use this template and skip to the step names below.
If the form already exists, open it and stay in the Fields tab in Visual mode. Every form has a Form layout control at the top of the builder, and it is where the switch happens.
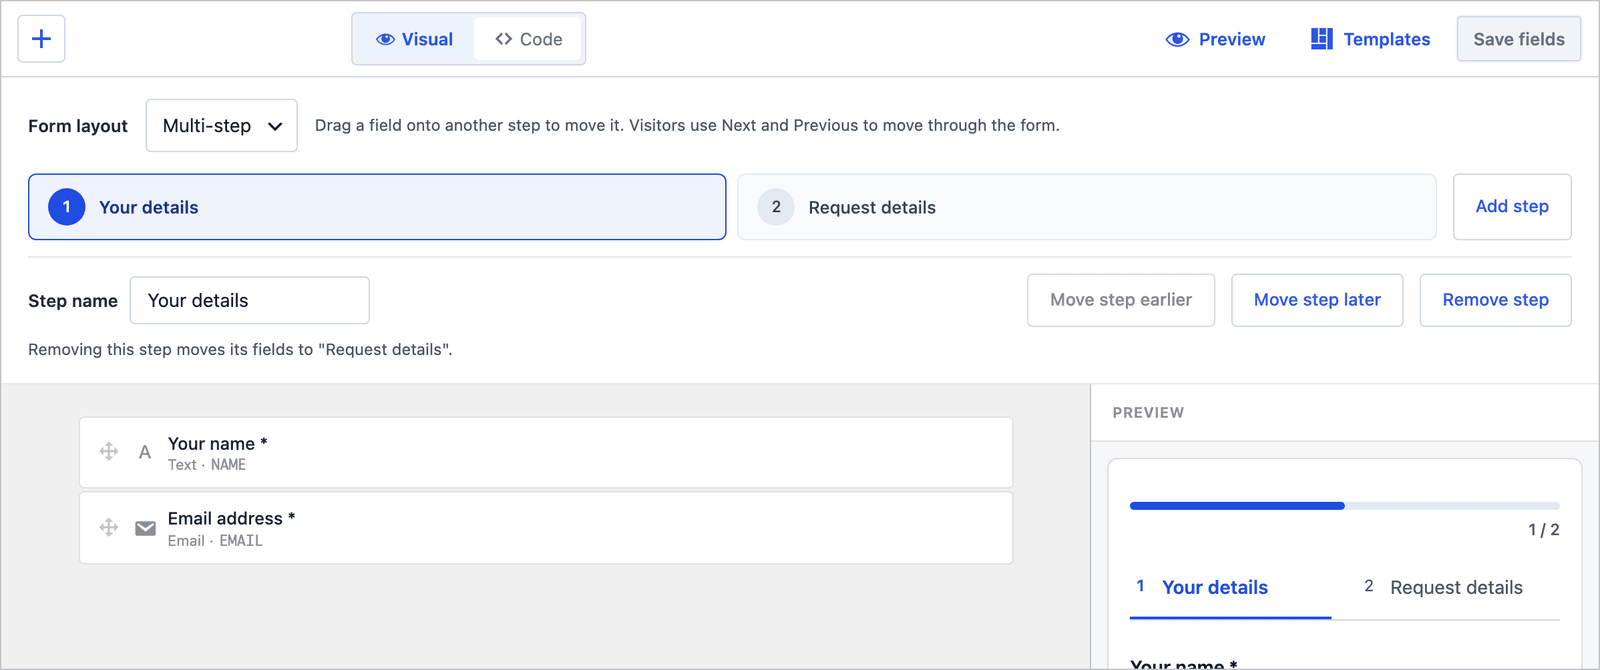 Single page is the default. The change to Multi-step is one dropdown.
Switch the Layout
- In the Form layout dropdown, choose Multi-step.
- A step bar appears above the canvas with one step holding every field. Type a name in Step name.
- Click Add step, name the second step, and repeat for as many as the form needs.
- Click Save fields.
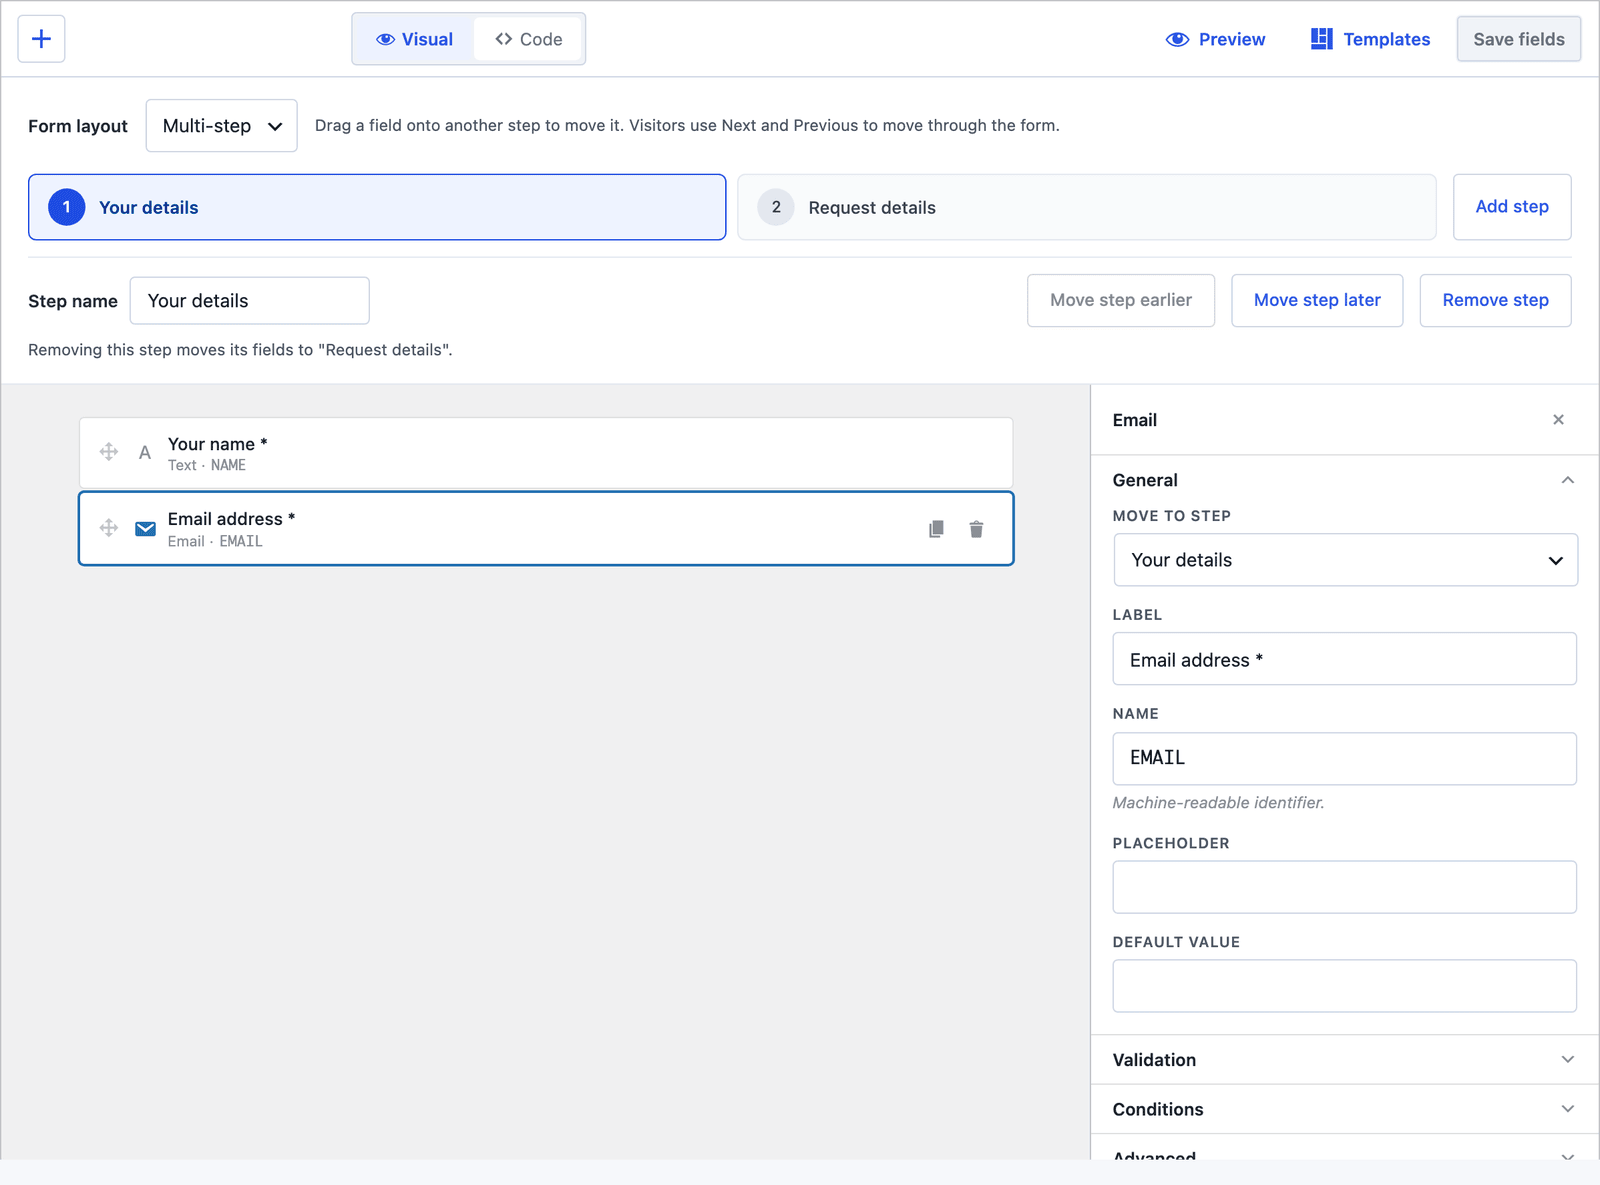 The step bar shows the steps in order. The selected step’s fields are the ones on the canvas.
Step names are what the visitor sees above the form, so write them for the visitor: “Your details,” “Your request,” “Confirm.” A step called “Step 2” tells nobody anything.
Move Fields Between Steps
A new step starts empty, and there are 2 ways to fill it:
- Drag a field from the canvas onto another step’s tab in the step bar. The field moves there, and a container moves with everything inside it.
- Select a field and use Move to step at the top of its inspector, which is quicker when the form has 20 fields and you are sorting them in one pass.
The submit button stays on the last step. Dragging it earlier is refused, because a form that submits before its final step is a broken form, and the builder will not let you build one.
Order and Remove Steps
Move step earlier and Move step later change the order without touching the fields. Remove step deletes the step and moves its fields to the neighboring step named in the editor, so nothing is lost by removing a step you no longer need.
Two rules keep the layout safe:
- Renaming a step changes its label and not its ID, so any styling or logic that references the step keeps working.
- Switching back to Single page keeps the step assignments, so you can compare both layouts on the same form and change your mind for free.
What the Visitor Sees
On the front end the visitor sees a progress bar, the step names as buttons and one step’s fields at a time, with Next and Previous at the bottom of each step.
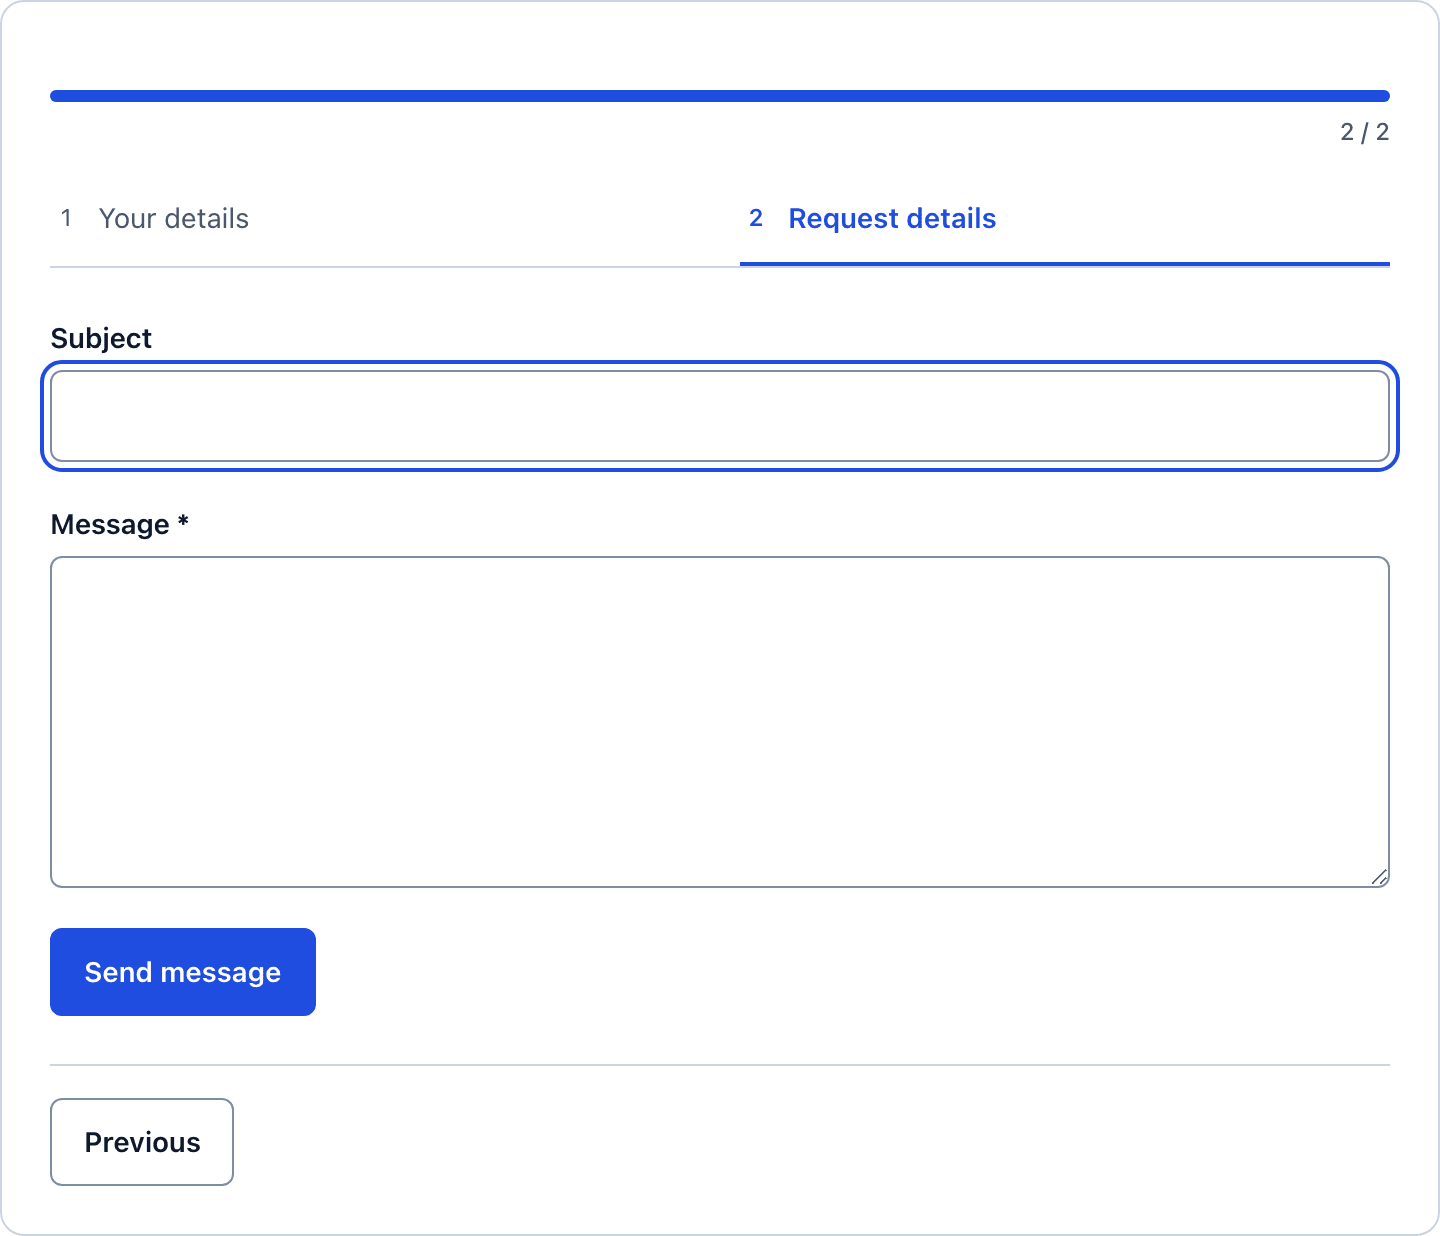 The progress bar and the step buttons are part of the form, not the theme, so they look the same on every site.
The behavior that matters, in 4 lines:
- Next validates the current step. A required field left empty or an invalid email stops the visitor there, with the message next to the field.
- Previous goes back without clearing anything.
- Completed step buttons are clickable, so a visitor can go back 2 steps to fix a typo. Future steps are disabled until reached.
- Enter in a text field advances to the next step. In a text area it adds a line, as it should.
Test it in Preview with the Mobile toggle, because a stepped form is most often filled in on a phone, and a step with 8 fields on a phone is a scroll, not a step.
Which Fields Go on Which Step
The builder will let you put any field anywhere, and the order below is the one that converts:
- Contact details first. Name and email on step 1, so a visitor who abandons on step 2 has still left you a way to follow up.
- The questions that need thought in the middle. The budget, the dates, the description of the problem, each group on its own step with a name that says what it is.
- Consent and the button last. The checkbox and the submit sit together on a short final step, so the visitor’s last screen is the one that asks for their agreement.
Three to 4 steps is where most forms land. A 2-step form is usually a single page with an extra click, and a 6-step form has a step that could be merged.
Add Conditions and Save and Resume
Two features pair naturally with steps:
- Conditions hide a field until an earlier answer makes it relevant, and they work across steps. A “Which competitor?” field on step 2 can show only when “Are you switching?” on step 2 is Yes. The conditional logic guide covers the panel.
- Save and resume, in the Settings tab, gives the visitor a link to come back to a half-finished form. It earns its place on any form with more than 3 steps, because “I need to find that document” is the moment a long form is abandoned. The save and resume feature has the settings.
Style the Steps
The step navigation ships with its own styles and does not depend on the optional form theme, so it works on any WordPress theme without a stylesheet. When you do want to match it to the site, the classes are stable:
.cf-progressand.cf-progress__barfor the progress indicator..cf-stepfor each step button, with.is-activeon the current one and.is-completedon the finished ones..cf-step-prevand.cf-step-nextfor the navigation buttons.
Put the overrides in the theme customizer’s additional CSS or in the form theme customizer, and leave the plugin’s stylesheet alone so updates do not undo the work.
The Limits
The visual layout control offers Single page and Multi-step. The one-question-at-a-time conversational layout is a separate schema type, and the full-screen forms guide covers it.
Steps are not branches. Every visitor sees every step, in order. A form that should skip a whole step for some visitors uses conditions on the fields inside it, and an empty step still shows.
A step’s fields validate on Next, and the whole form validates again on the server when it is submitted. A visitor cannot skip a required field by editing the page, and a step that passed on Next can still fail on submit if the server finds a problem the browser could not.
The preview of a saved form is a working form, and submitting it runs the actions. The preview of a template sample blocks submission. Know which one you are looking at before you click Submit.
What Quietly Ruins a Multi-Step Form
Splitting a 5-field contact form into 3 steps. The visitor now clicks Next twice to do what one screen did, and the when multi-step helps and when it hurts piece is the honest test to run first.
A step called “Step 2.” The name is the only thing telling the visitor what is coming, and “Your budget and timeline” makes them ready for it.
Putting the email on the last step. The abandonment happens in the middle, and a form that asks for the email last learns nothing from the people who left.
Eight fields on one step and 1 on the next. The steps should be roughly even in effort, and a lopsided form feels like a trick on the long step.
Final Remarks
You now have a multi-step form built in the builder, with named steps, the fields where they belong, Next validating each screen and the visitor’s contact details safely on step 1. If you keep one idea from this guide, keep this one: the step names are for the visitor, so write them as the questions the step asks.
The multi-step form templates show the 16 industry forms built this way, and the form builder feature explains how the visual builder and the code tab edit the same form. If something here does not behave the way this guide describes, the support team can help.
I hope the first stepped form you build is the one that finally gets finished.
The progress bar is on by default, and the form progress bars piece covers when it helps and when it misleads.
FAQ
Can I turn an existing single-page form into a multi-step form?
Yes. Open the form, change Form layout to Multi-step, name the steps and drag the fields onto them. Switching back to Single page keeps the assignments, so nothing is lost by trying.
Does a multi-step form save the visitor’s answers between steps?
The answers stay in the browser as the visitor moves between steps, and Previous does not clear them. To keep them across a closed tab or a different day, turn on save and resume in the Settings tab.
Can a step be skipped based on an answer?
Not as a whole step. Fields inside a step can be hidden with conditions until an earlier answer makes them relevant, and a step whose fields are all hidden still appears. For a form that branches heavily, the conversational layout is the better fit.