
How to Create a Contact Form in WordPress
Create a WordPress contact form from a template, set where the messages go, keep spam out with the honeypot and rate limit, and read replies from the submissions inbox.

A contact form is the first form most WordPress sites need and the one most guides make harder than it is. So, if you are looking to create a contact form in WordPress that delivers the message, keeps spam out and does not lose anything when the email fails, this guide can surely help.
I build Core Forms, and every screen here comes from its Contact form template running on a test site.
Every site wants something slightly different from its contact page, so one guide cannot cover every field. But almost every contact form needs the same 4 things, a name, an email, a subject and a message, and in this one I will try my best to cover those properly, along with the settings that decide where the message goes and what stops the spam.
The template ships with the plugin, so you can follow along click for click. Or, if you get stuck halfway, support is a message away. Without further ado, let’s get started.
What a Contact Form Asks
The Contact form template collects 4 things:
- Your name is required.
- Email address is required, because it is where your reply goes.
- Subject is optional, and it becomes the line you read in the inbox.
- Message is required.
That is the whole form, and it is enough. The contact form examples guide covers when a phone number, a company field or a topic select earns a place, and the answer is “less often than you think.”
Create the Contact Form
Two templates match a contact search, one on a single page and one split into steps:
- Go to Core Forms > Add New.
- Type
contactin the template search. - Click Use this template on the first Contact form card for a single page.
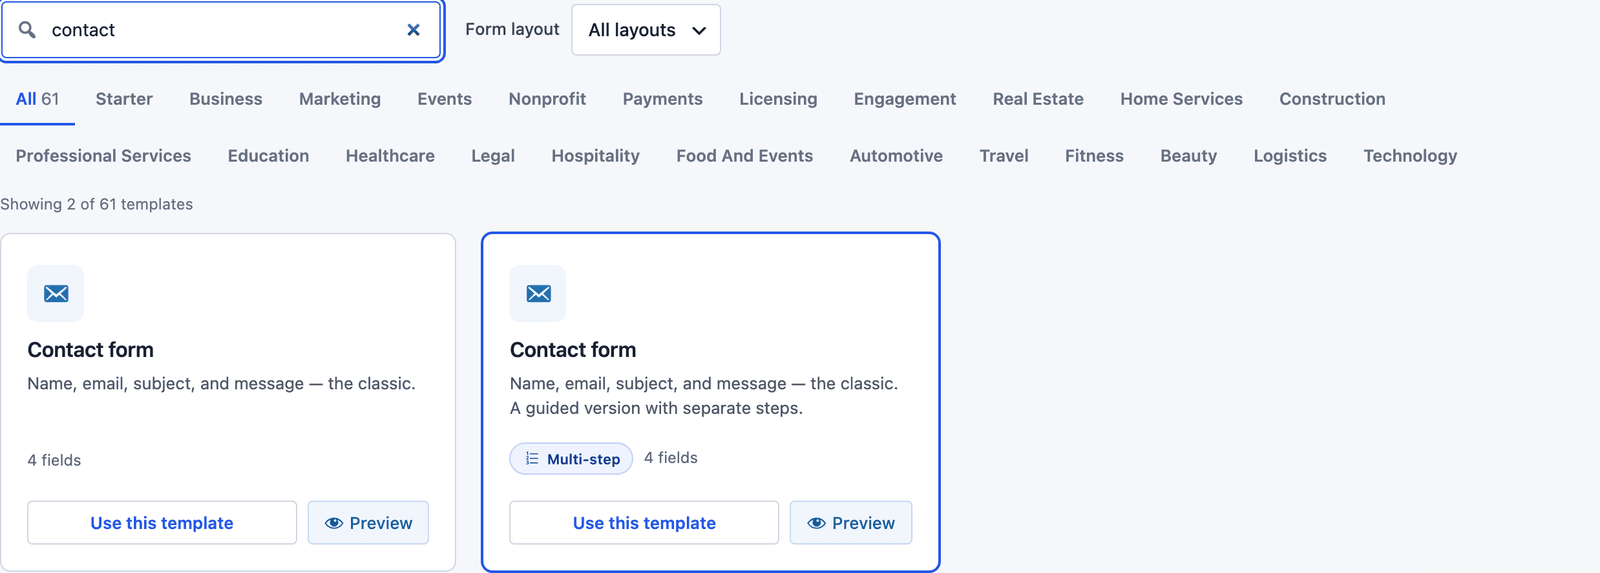 The same 4 fields, on one page or across two steps.
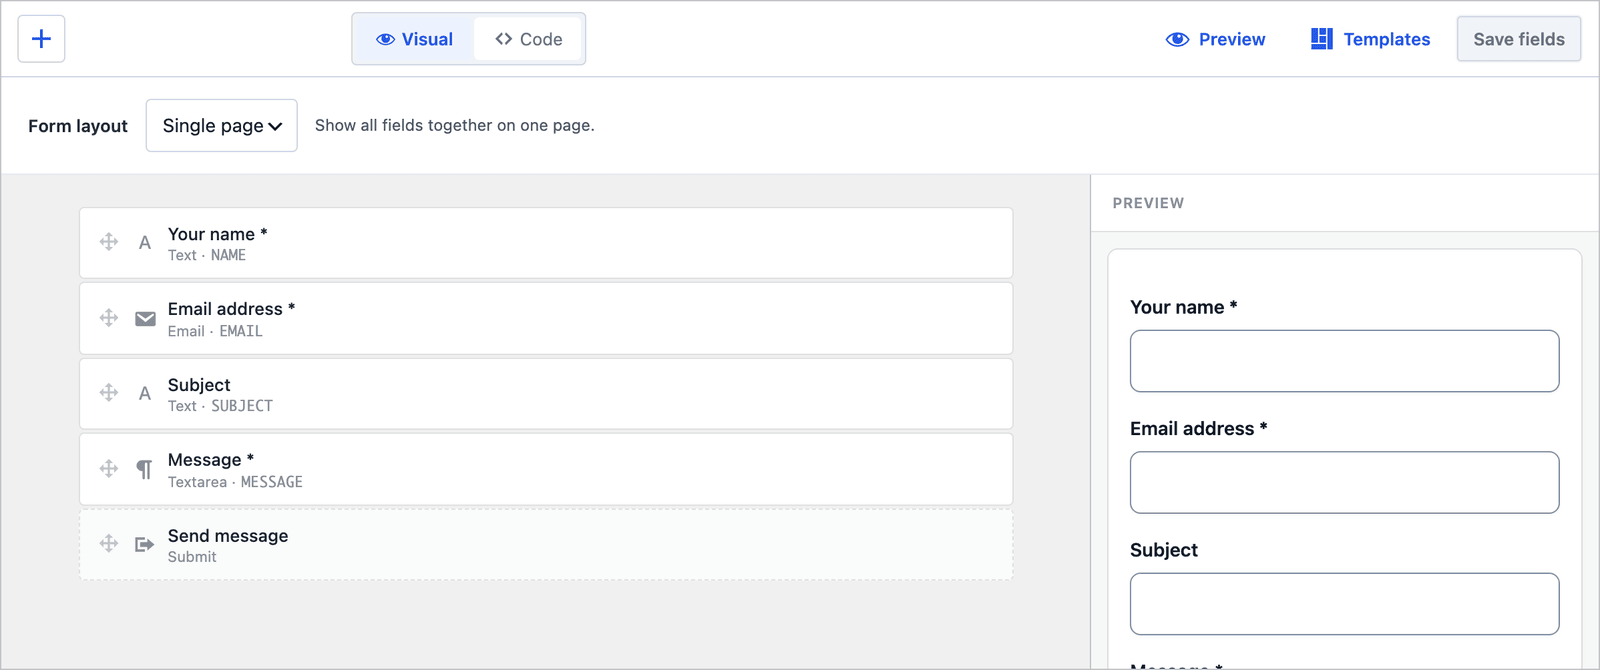 Name and email carry autocomplete hints, so browsers fill them in on the first click.
The builder is the visual side. The Code tab shows the same form as plain HTML, and any change in one shows up in the other. The guide to a WordPress contact form without a plugin shows what that HTML looks like by hand, and what a plugin adds on top of it.
Where the Message Goes
Every template except the blank one ships with a Send Email action, so a new contact form delivers messages from the first submission. Open the Actions tab to see it:
- From and To default to the site admin email.
- Subject is “New submission on” followed by your site name.
- Message is
[all:label], which prints every field with its label. - Additional Headers has
Reply-To: [NAME] <[EMAIL]>, so replying in your mail client answers the sender.
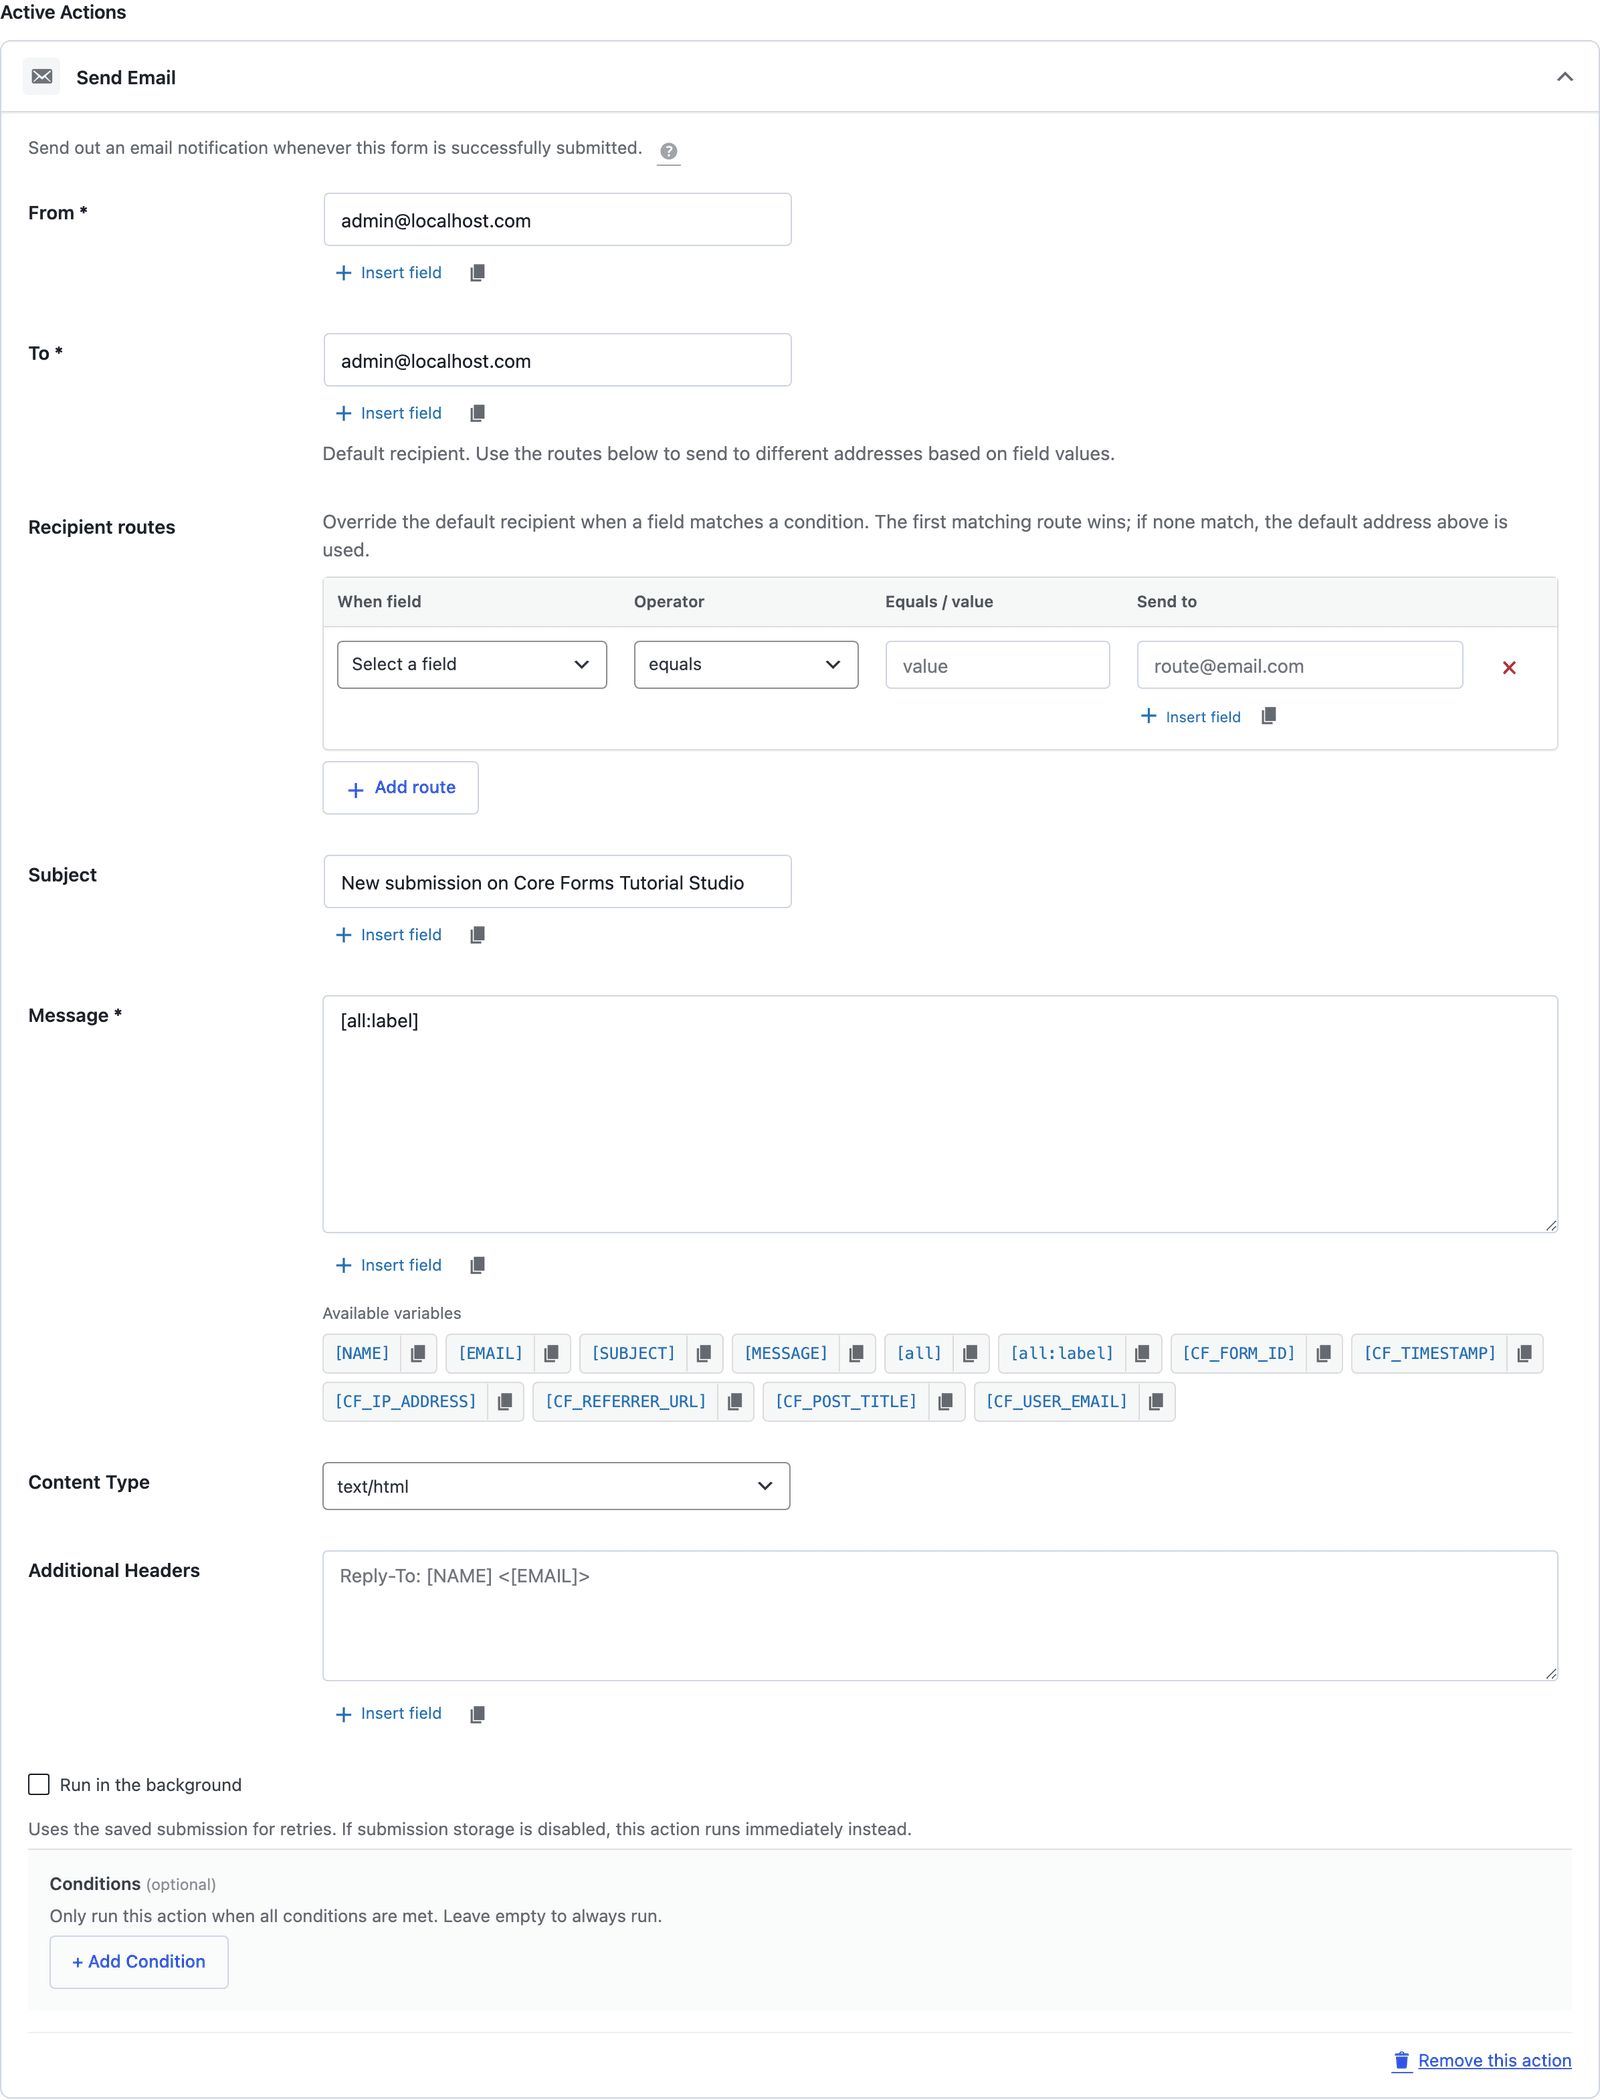 Change To if the messages should reach someone other than the site admin, and leave the Reply-To line alone.
The Reply-To header is the setting that matters most. Without it, every reply starts with copying the sender’s address out of the message, and with it the message behaves like an email they sent you. The data variables feature lists everything else you can put in the subject or the body, such as [SUBJECT] in the subject line.
Keep Spam Out
The Settings tab is where the anti-spam lives, and the defaults are sensible:
- Anti-spam shows honeypot on. A hidden field that people never see and bots fill in, which catches most automated junk with no effect on real visitors.
- Rate limit is 0, meaning unlimited. Setting it to 5 submissions per IP per hour stops a script from sending 400 messages before you wake up.
- Prevent duplicates blocks a repeat submission from the same browser session, which stops the double-click that sends 2 copies.
- Save submissions is on, so every message is stored even if the email fails.
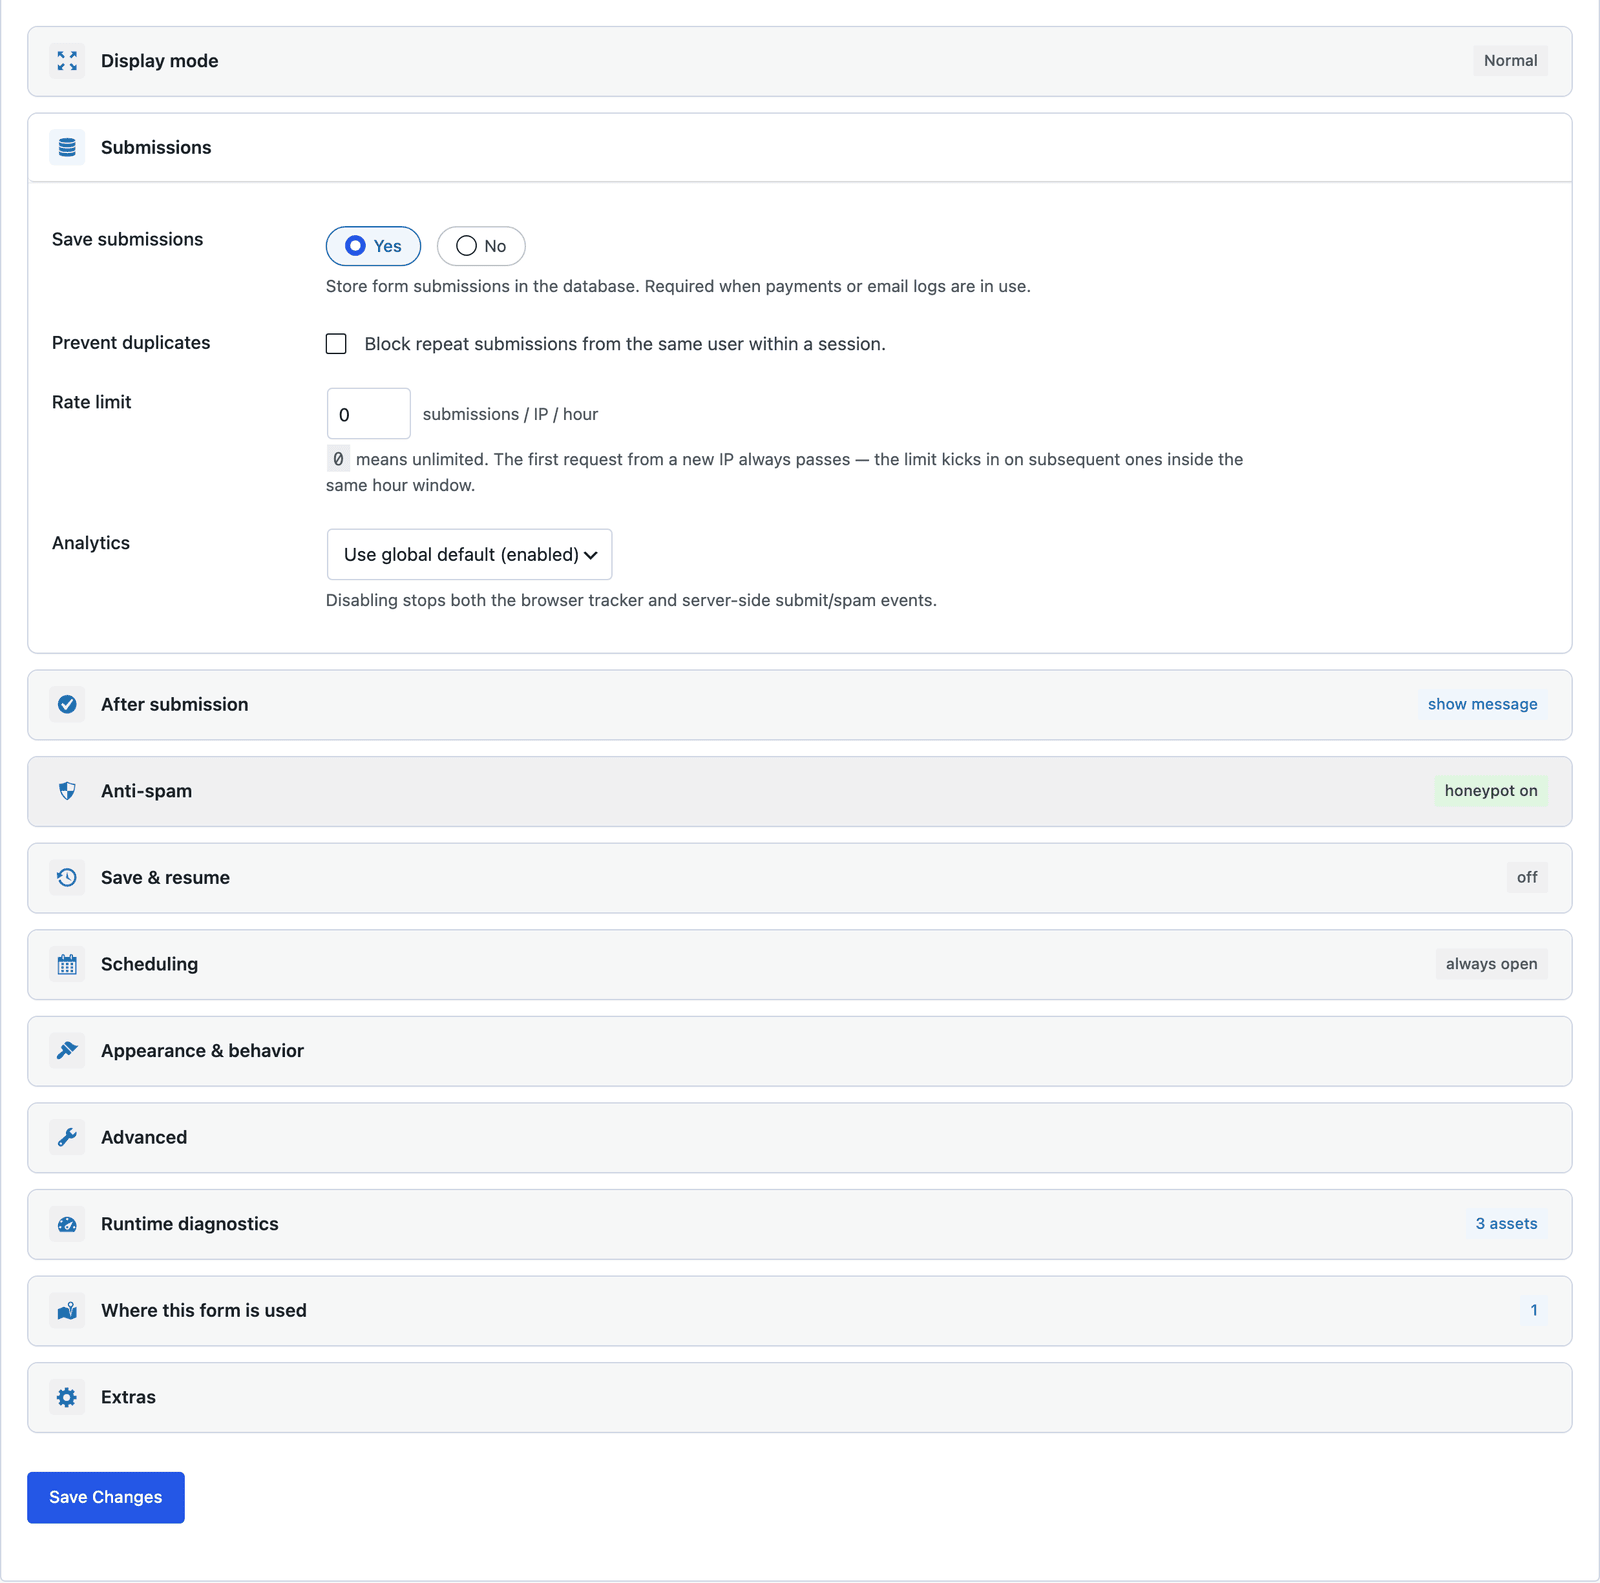 A rate limit of 5 per hour is invisible to a real visitor and painful for a script.
The guide to honeypot fields explains why the hidden field works, and the spam protection feature covers Turnstile, reCAPTCHA and Akismet for a site that needs more than the honeypot.
Single Page or Multi-Step
The multi-step version splits the form into “Your details” (name and email) and “Request details” (subject and message).
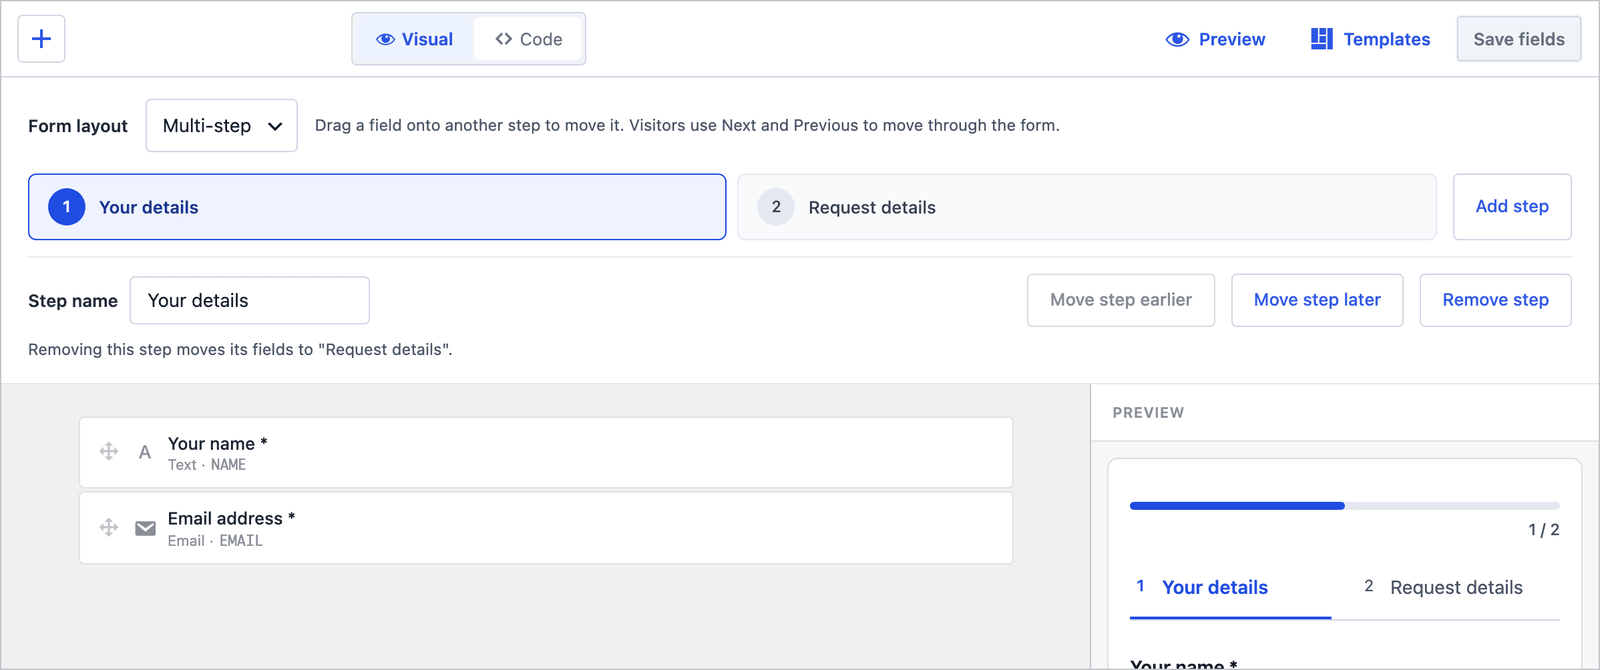 The Send Email action carries over, so both versions deliver the same way.
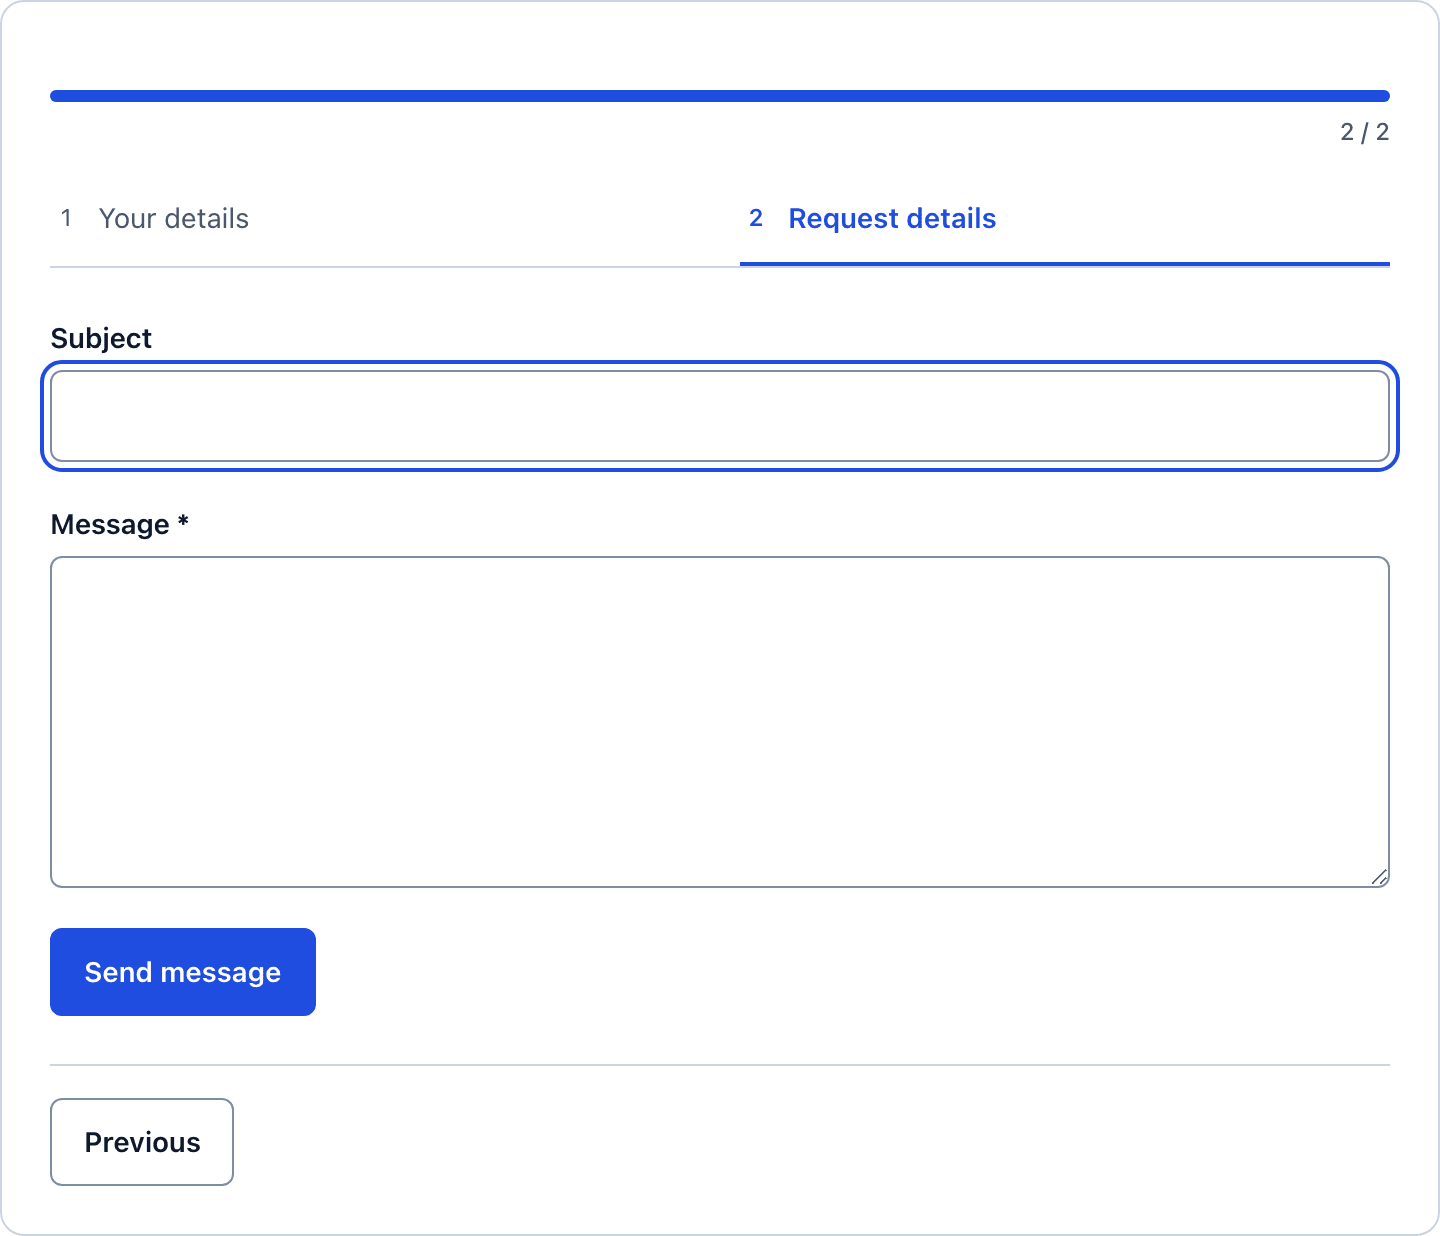 Step 1 has to pass validation before the message box appears.
For a 4-field contact form the single page wins, and it is not close. A visitor can see the whole form, judge how long it takes and finish it in under a minute. The multi-step version exists because the contact template is the one everybody starts from, and it is the shortest way to see how steps work before you build a longer form. The guide to when multi-step forms help and hurt has the rule of thumb.
Publish the Contact Form
The shortcode is shown next to the form’s name in the editor:
[cf_form slug="contact-form"]
Paste it into your contact page, or search for Core Forms in the block inserter and pick the form from the dropdown. Put a line above the form saying what happens next, such as “We reply within 1 working day,” because that line does more for conversions than any button color.
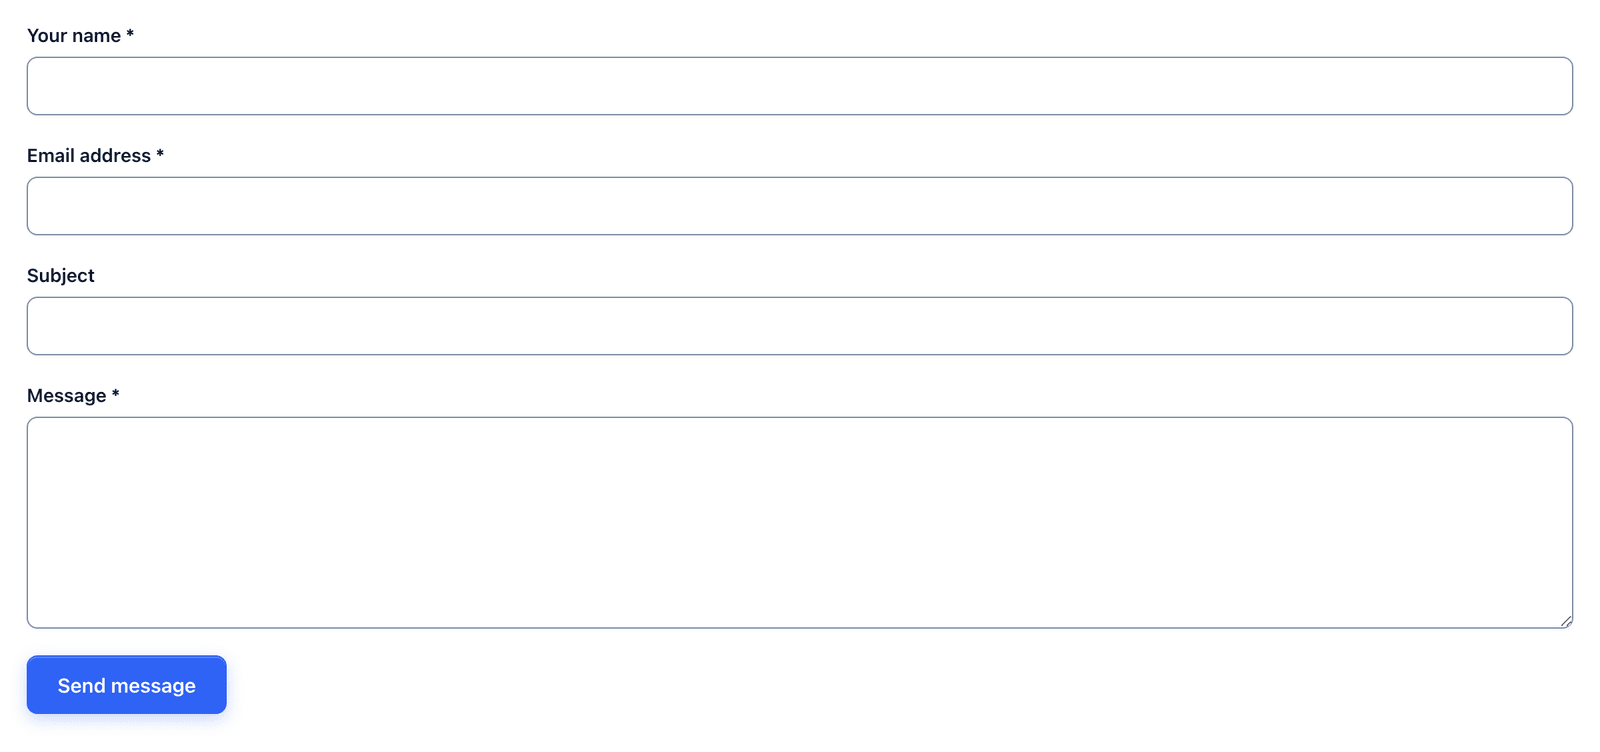 The form takes the page’s font and colors, so it looks like part of the site rather than a widget.
Read the Messages
Every message lands in the form’s Submissions tab, whether or not the email arrived.
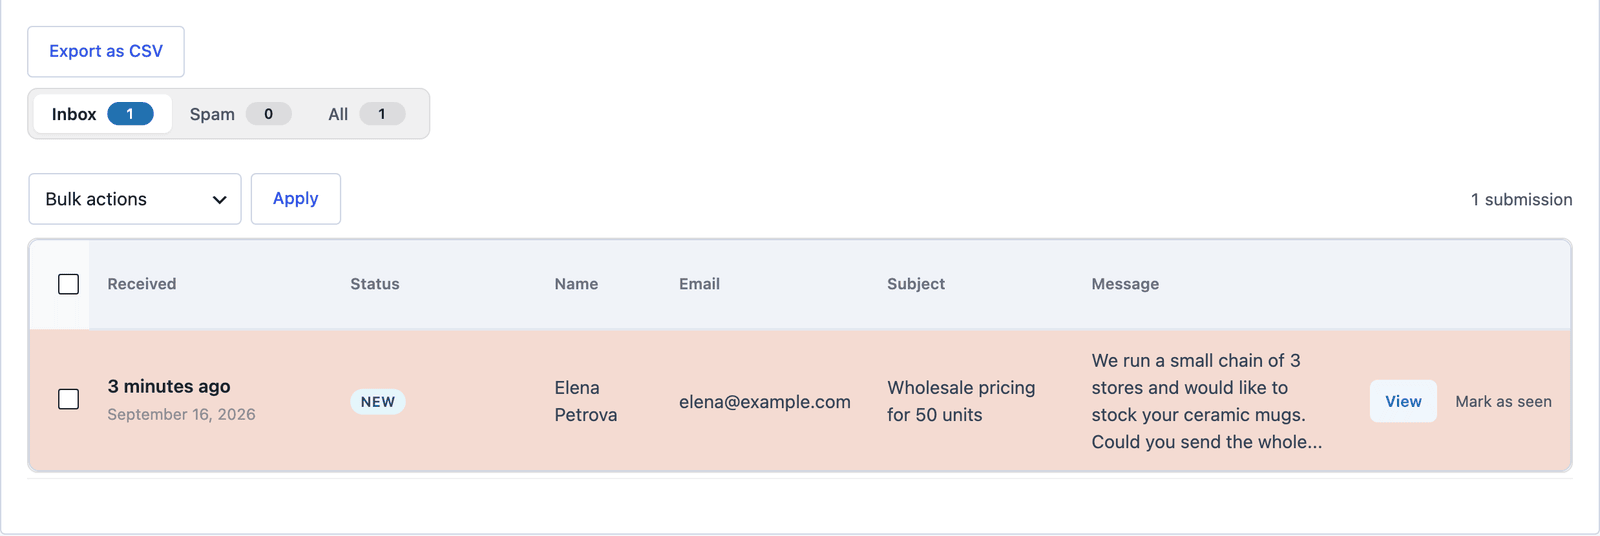 The inbox is the copy that survives a mail outage.
Click View to read the full message and answer from the Send Reply box on the same screen. When an email does go missing, Core Forms > Email Logs shows whether it was sent, and the guide to a WordPress form not sending email walks through the rest.
The Limits
The form sends email through whatever WordPress uses to send email. On many hosts that is PHP mail, which lands in spam more often than it should. An SMTP plugin or a transactional service such as the Resend action fixes delivery, and the form cannot do that for you.
There is no CAPTCHA by default. The honeypot handles most bot traffic, but a site that gets targeted by hand-typed spam needs Turnstile or reCAPTCHA turned on in the Settings tab.
The form does not tell the visitor when you have read their message. The Auto-Responder action can confirm receipt, and the reply itself is up to you.
Attachments are not in the template. A file field can be added, with the limits described in the file uploads feature.
What Quietly Ruins a Contact Form
Turning off saved submissions to keep the database small. A contact message is small, and the day the mail server fails is the day you find out the inbox tab was the only copy.
Sending the notification from the visitor’s email address. Mail servers reject email that claims to come from a domain it did not come from. From should be your address, and Reply-To should be theirs, which is how the template is set.
Adding a CAPTCHA on day 1 for a site with no spam. Every extra check costs a few real messages, so start with the honeypot and add more when the spam actually arrives.
Requiring a phone number. It halves the messages from people who wanted to write, not talk, and the ones who want a call will put their number in the message.
Final Remarks
You now have a contact form that delivers to the right address, replies to the sender in one click, keeps most spam out and stores every message where a mail outage cannot reach it. If you keep one idea from this guide, keep this one: the Submissions tab is the real inbox, and the email is a notification about it.
The contact form template page has the fields and a live demo, and the guide to contact form vs email address settles the question of whether you need a form at all. If something here does not behave the way this guide describes, the support team can help.
I hope the first message through it is a good one.
FAQ
Can I have more than one contact form?
Yes. Each form has its own slug, actions and settings, so a sales form and a press form can go to different addresses without any routing rules.
Can the contact form send messages to different people by topic?
Yes. Add a topic select, then use recipient routes in the Send Email action to send each topic to a different address. The feedback form guide shows the routes in use.
Does the contact form work with any theme?
Yes. The form is plain HTML that takes the theme’s font and colors. The Form Theme Customizer under Core Forms adjusts spacing and button styles when the theme’s defaults do not suit the page.