
How to Create an Auto Repair Form in WordPress
Build a WordPress auto repair form that collects the vehicle, the service needed and a preferred date for a workshop callback, with an automatic acknowledgement and a 3-step layout.

An auto repair form should get the workshop 3 things before anyone picks up the phone: the vehicle, what it needs and when the owner can bring it in. So, if you are looking to add an auto repair form or vehicle service request form to your WordPress site, for a garage, a tire shop or a dealership service desk, this guide can surely help.
I build Core Forms, and every screen here comes from its Vehicle service request template running on a test site.
Every workshop books differently, so one guide cannot cover every make-specific question. But almost every service request needs the same things, the vehicle, the service and a preferred date, and in this one I will try my best to cover those properly, in the 3-step layout the template ships with and on a single page.
The template ships with the plugin, so you can follow along click for click. Or, if you get stuck halfway, support is a message away. Without further ado, let’s get started.
What an Auto Repair Form Asks
The Vehicle service request template collects 8 things across 3 steps:
- Your name and Email address are required, and Phone is optional.
- Vehicle make and model is a required text field, such as “2019 Honda Civic.”
- Service required is a required select: Routine service, Inspection, Repair estimate or Other.
- Preferred service date is a required date field.
- Anything else we should know? is an optional text area with a 2,000 character limit.
- You may contact me about this request is a required consent checkbox on the last step.
The message field is where the useful part of a repair request usually lands, such as “grinding noise when braking at low speed.” Keep it optional, and keep it on the same step as the service select, so the person who picks Repair estimate sees the box right under it.
Create the Auto Repair Form
The industry templates ship in the multi-step layout only, so the search shows one card:
- Go to Core Forms > Add New.
- Type
vehiclein the template search. - Click Use this template on the Vehicle service request card.
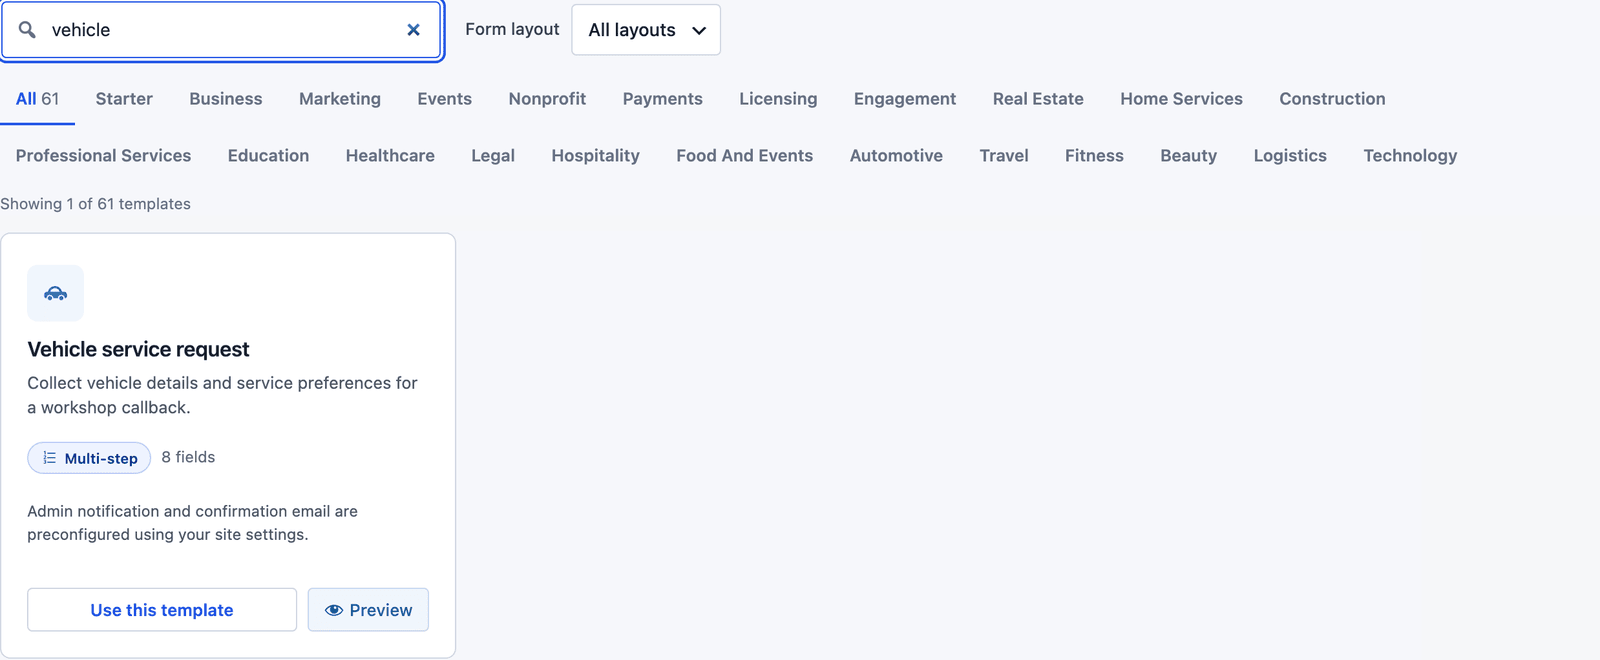 The card notes that the admin notification and the confirmation email are already set up.
The builder opens with 3 steps: “Your details,” “Your request” and “Confirm.”
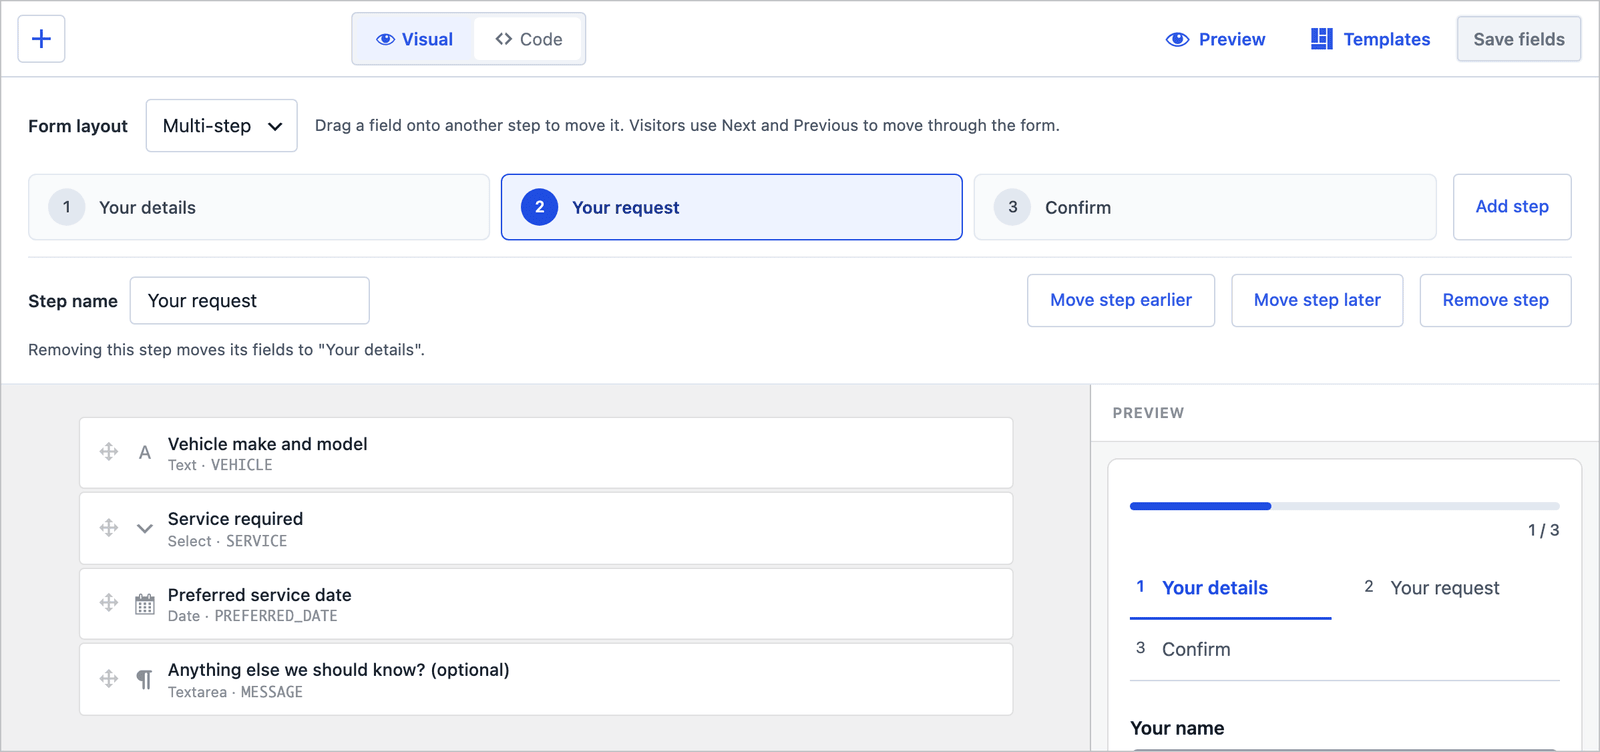 Vehicle, service and date sit together on the second step.
Two fields worth adding on the “Your request” step: Registration number as a text field, so the desk can pull the history before the callback, and Mileage as a number, which decides what a routine service includes.
The 3-Step Layout
On the front end the owner fills one step at a time, with a progress bar and the step names above the fields.
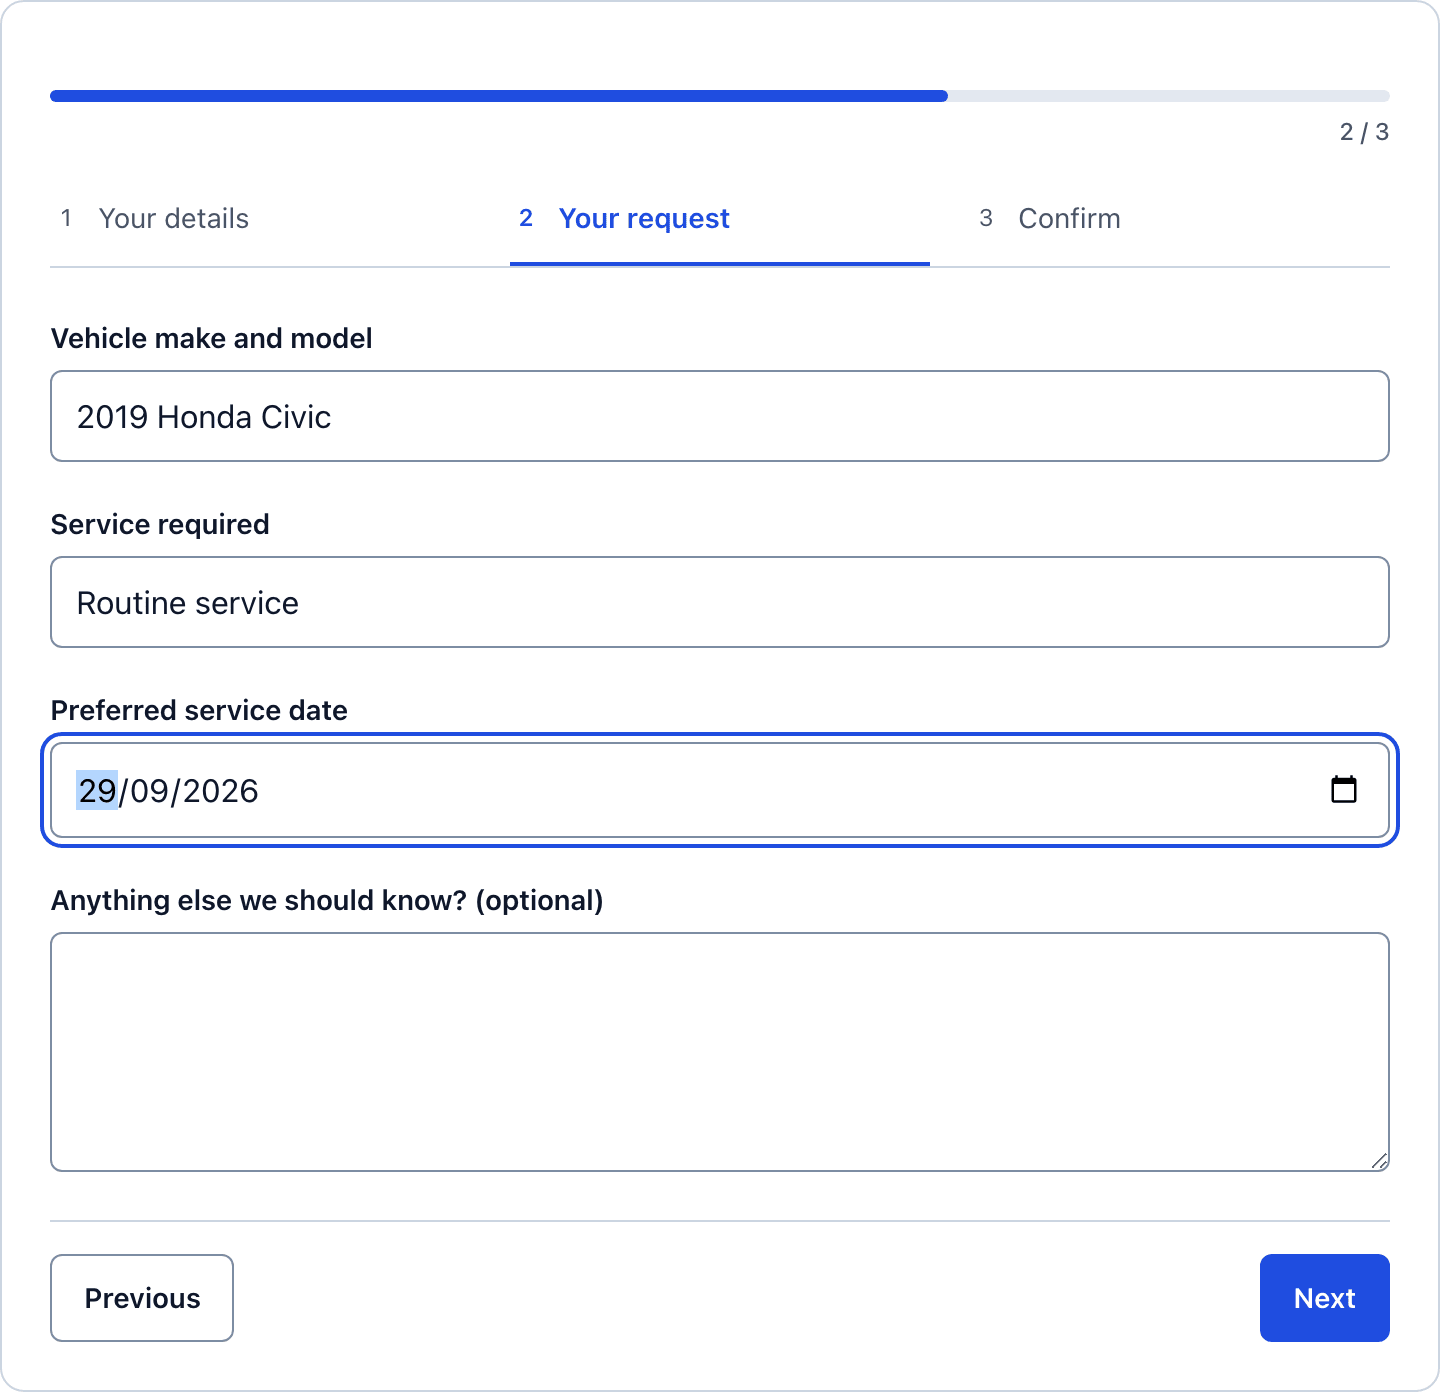 Three short fields, which is the whole request for most people.
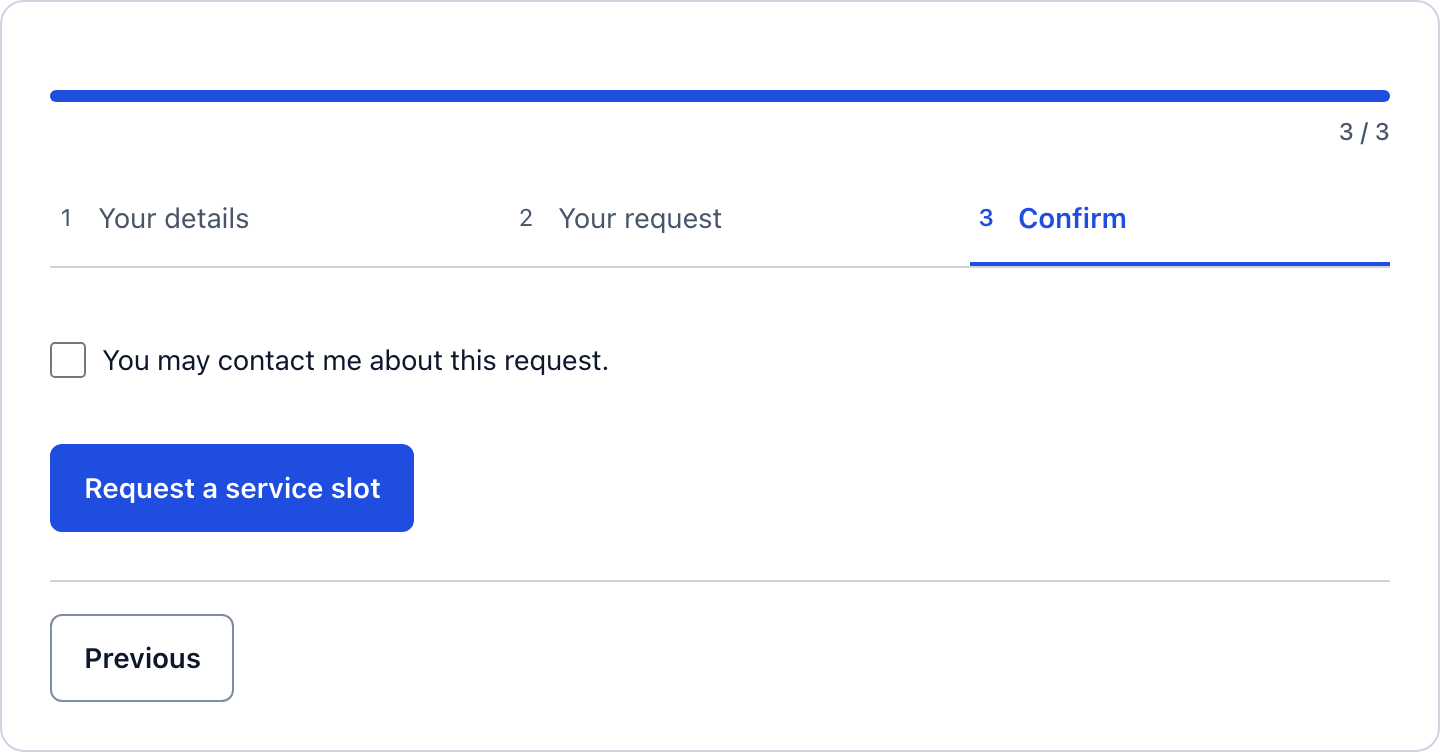 The button asks for a slot. The workshop confirms it.
Collapse It to One Page
For a form on a page people open at a desk, such as a fleet manager booking 5 vans, a single page can be quicker. In the builder, change Form layout to Single page and click Save fields. The step assignments stay saved, so switching back is one click.
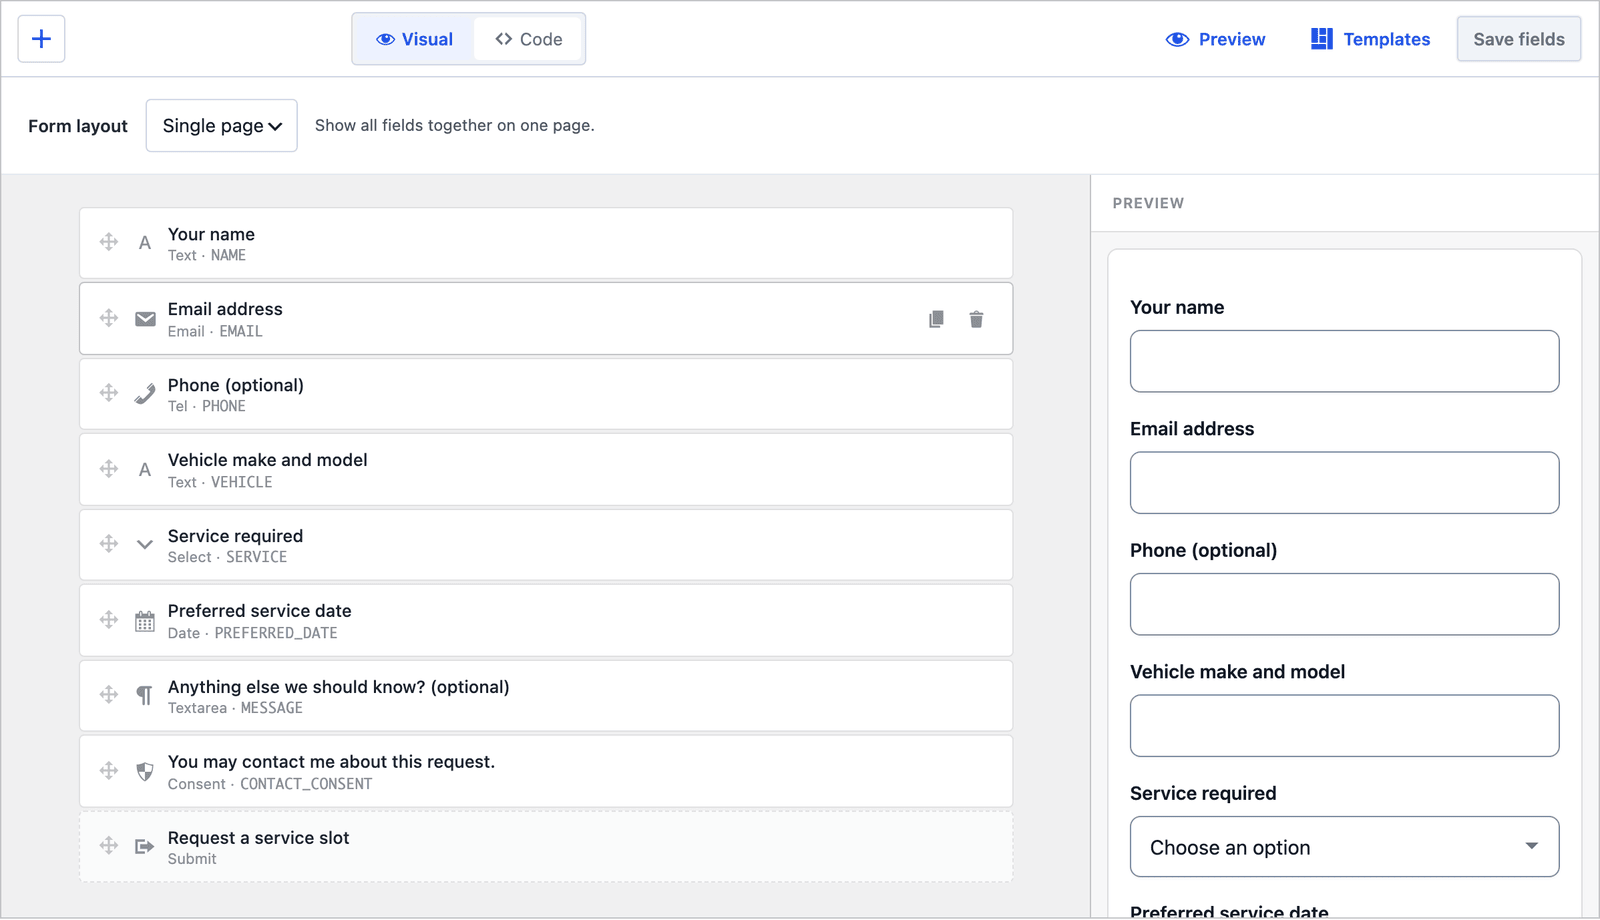 Same fields, same order, no steps.
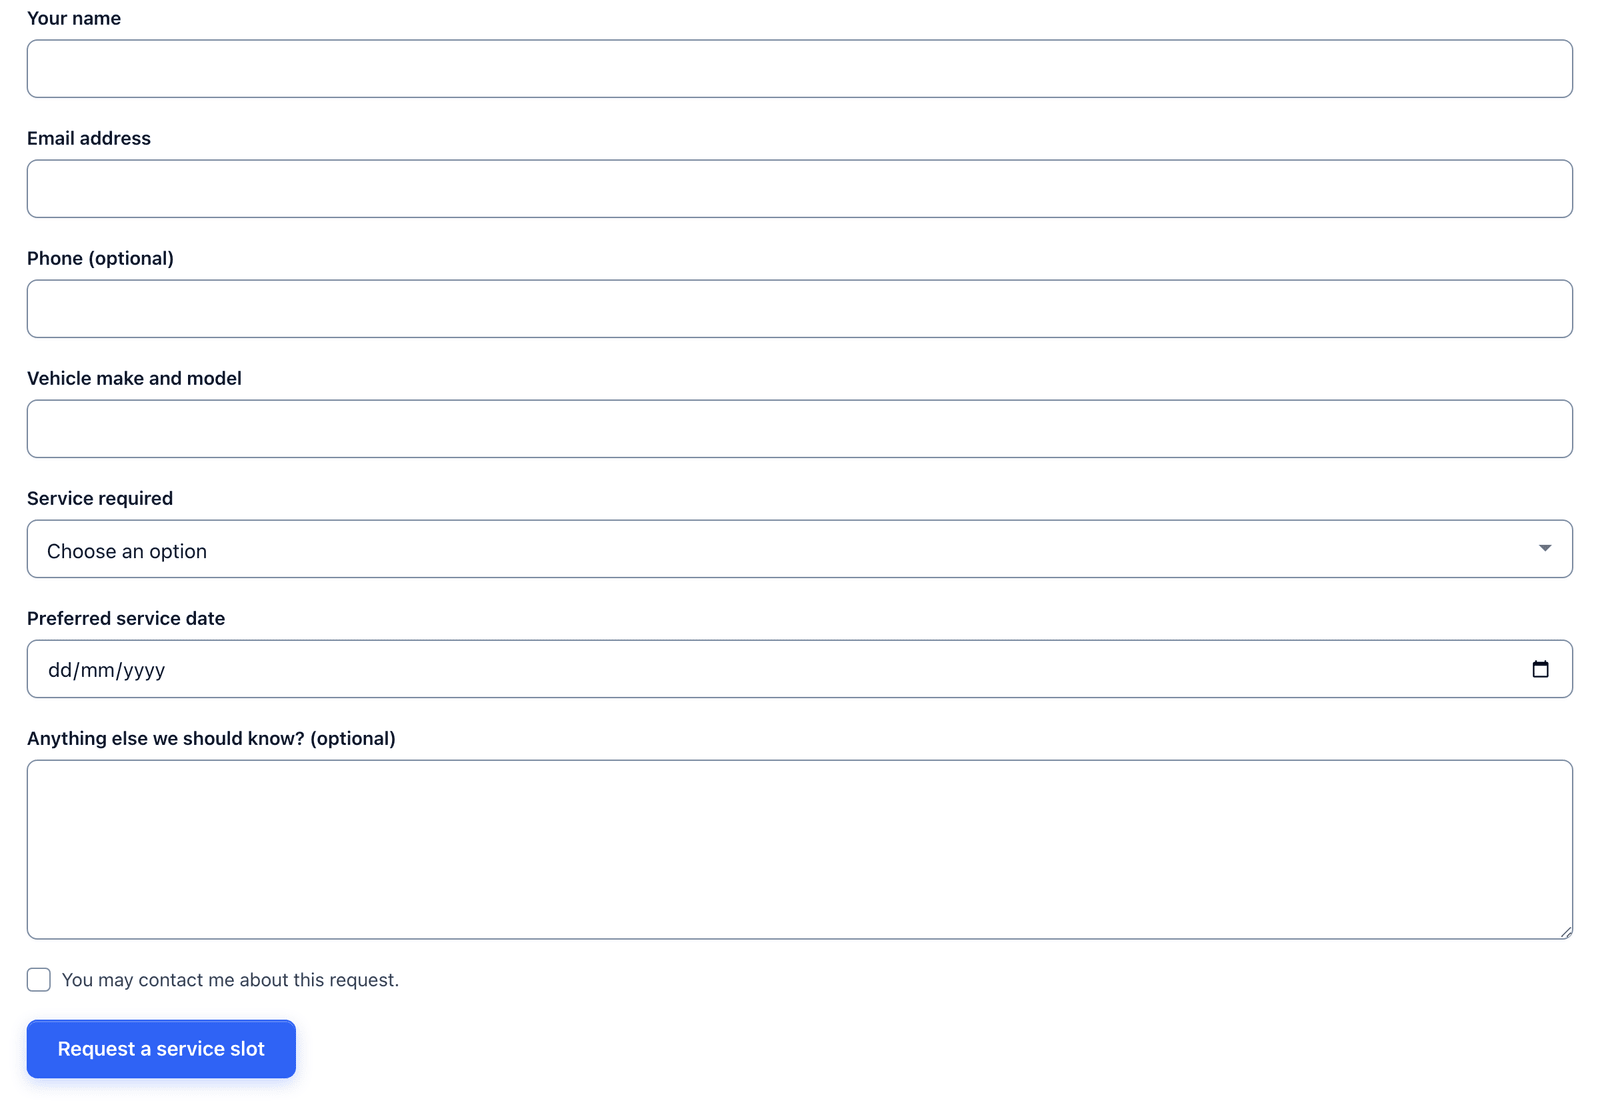 8 fields on one page is still a short form.
For a garage I would keep the steps. Most people fill this in from the driveway on a phone, and 3 short screens beat 1 long scroll there.
Two Emails Out of the Box
The template ships with 2 actions already configured:
- Send Email notifies the admin address with the subject “Vehicle service request: [NAME]” and a Reply-To header set to the owner.
- Auto-Responder sends the owner “Vehicle service request - Request received,” with the same text they saw on screen: the request was received and the workshop will contact them to confirm a slot.
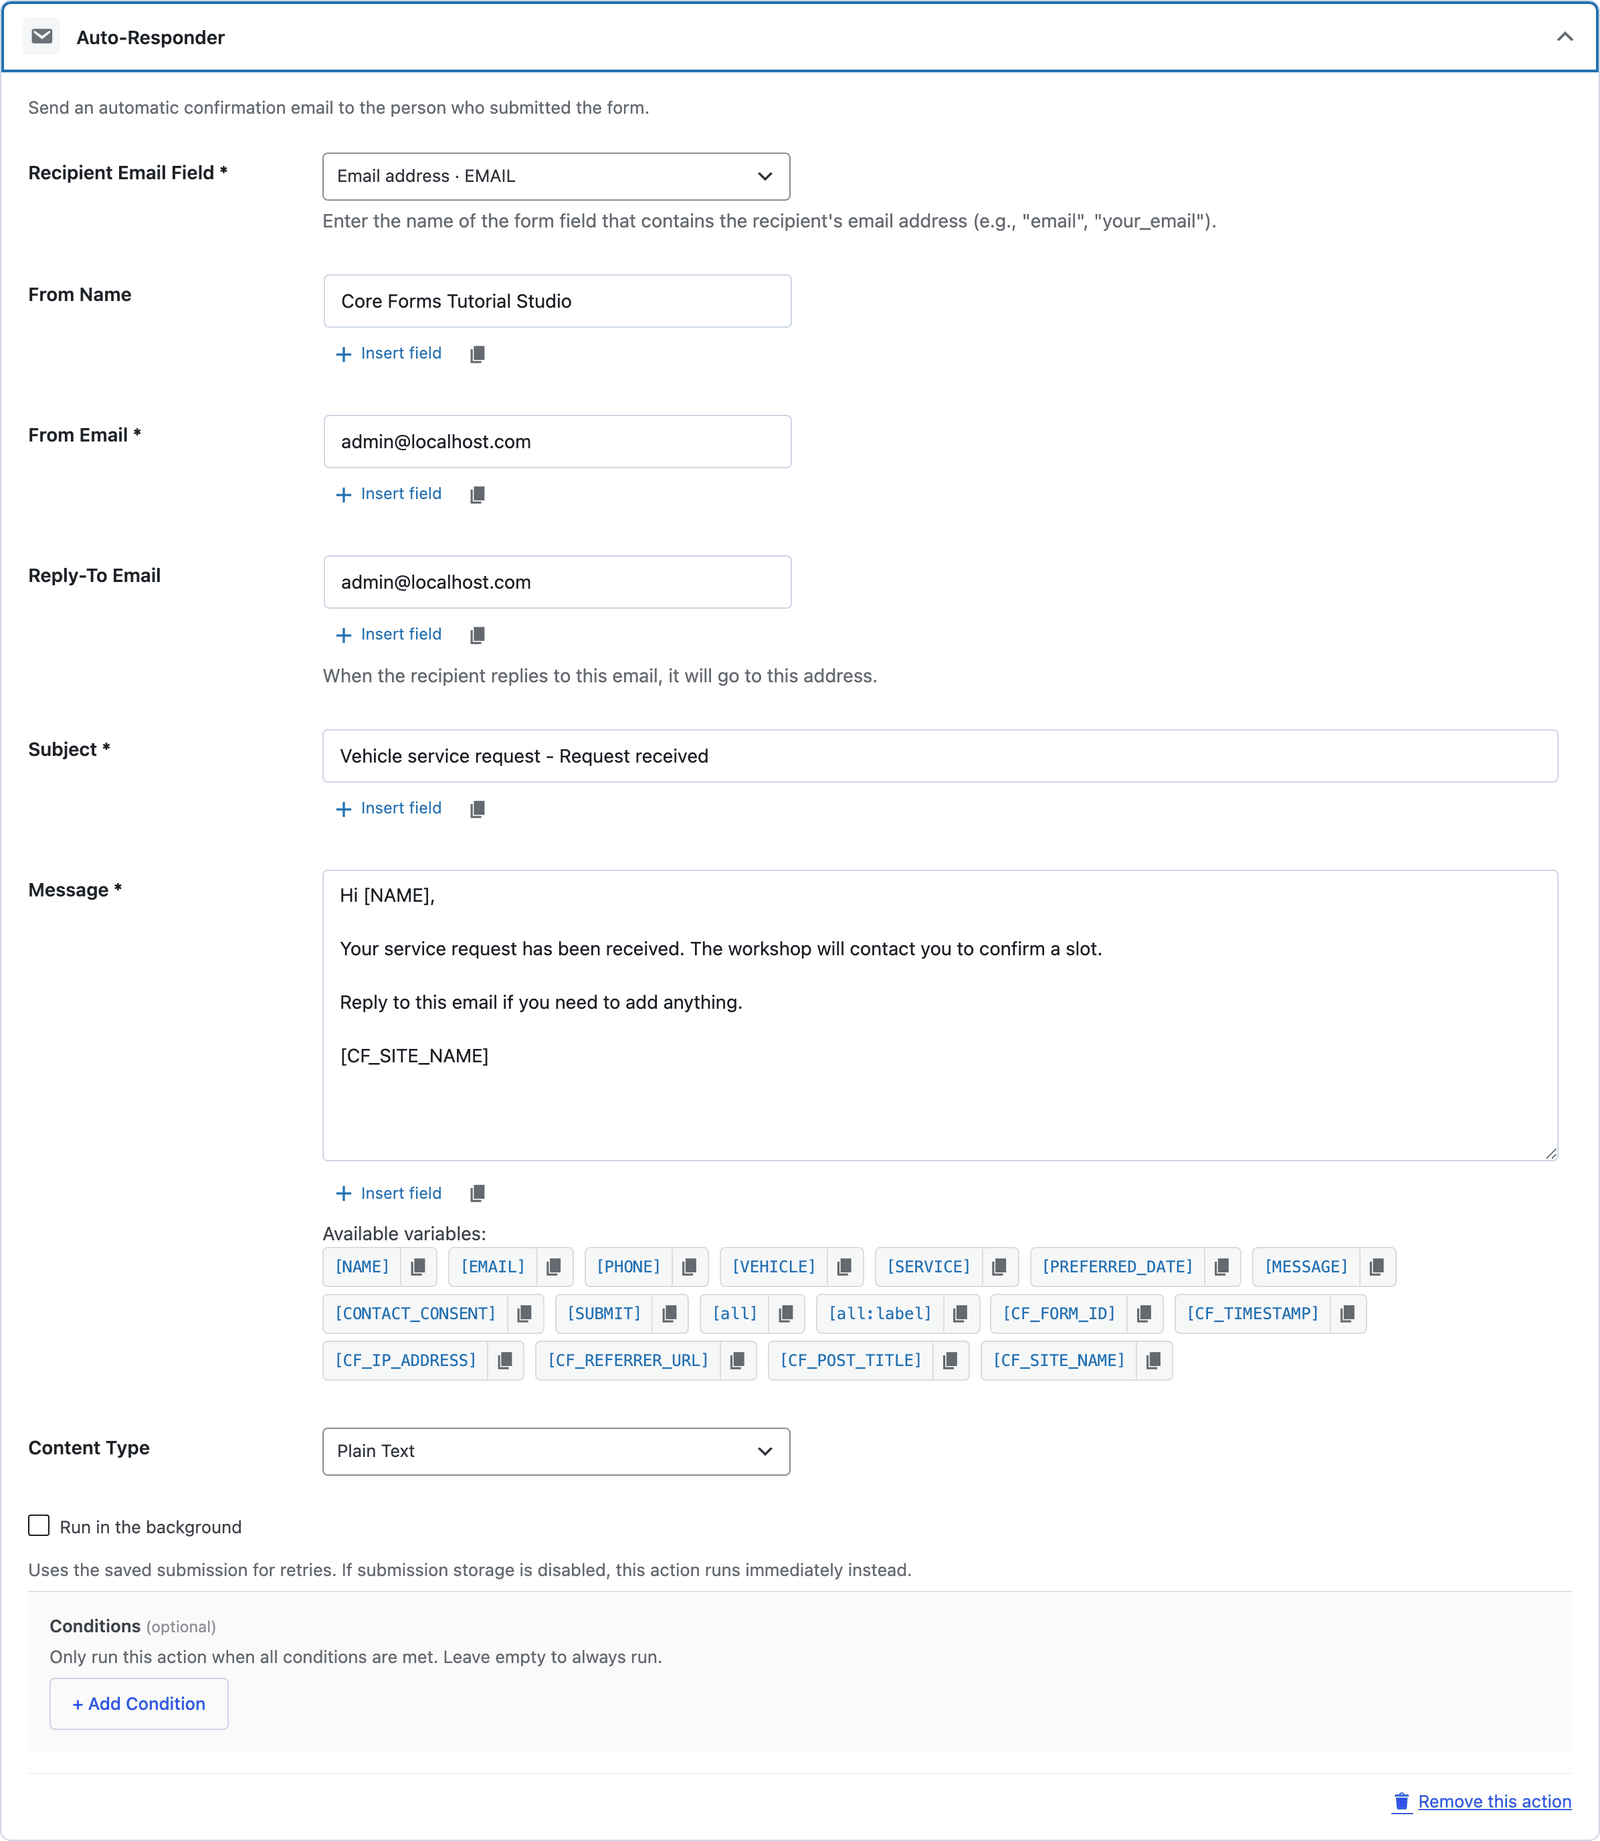 Change the From name to the workshop’s name before publishing.
Route Repair Estimates to the Workshop
Routine services can go to the desk, and repair estimates to the technician who prices them. Recipient routes in the Send Email action do it:
- Open the Actions tab and expand Send Email.
- Under Recipient routes, click + Add route.
- Set When field to Service required, Operator to equals, and the value to
repair-estimate. - Enter the workshop address in Send to and click Save Changes.
The value is the stored option, repair-estimate, not the label. The first matching route wins and replaces the default recipient, so add a CC header if the desk should still see a copy.
The Settings the Template Turns On
The Settings tab arrives with the sensible defaults for a public request form:
- Save submissions is on, so every request is stored even if the email fails.
- Prevent duplicates is on.
- Rate limit is set to 10 submissions per IP per hour.
- Anti-spam shows the honeypot on.
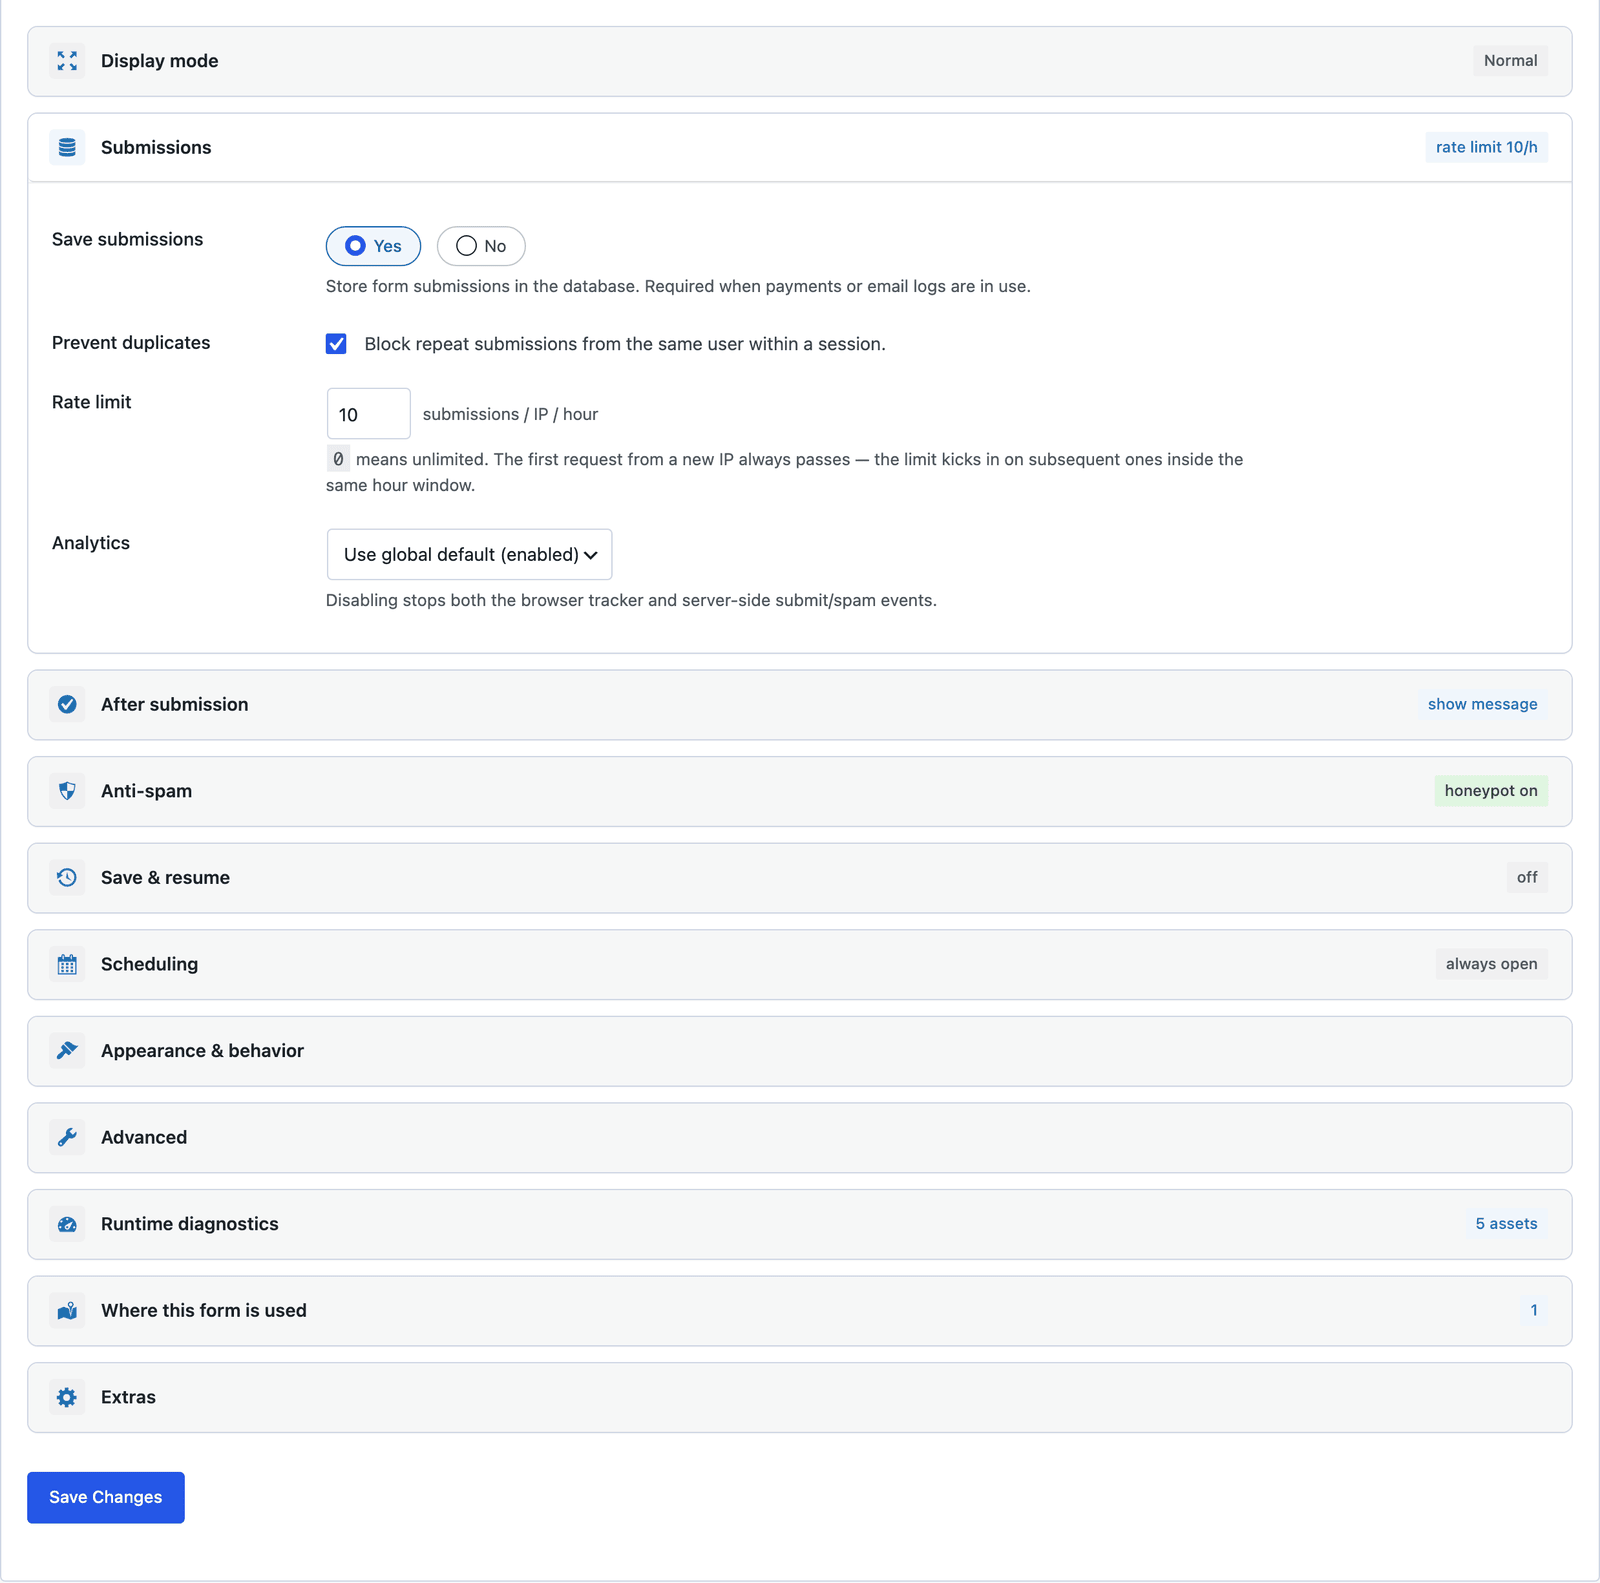 Payment stays off. The invoice comes after the work, not before the callback.
Publish the Auto Repair Form
The shortcode is shown next to the form’s name in the editor:
[cf_form slug="vehicle-service-request"]
Paste it into your Book a service page, or use the Core Forms block. Put your opening hours and the makes you work on above the form, because the form cannot turn away a make you do not service, and a line of text can.
Read the Requests
Every request lands in the form’s Submissions tab, with the vehicle, service and preferred date in their own columns.
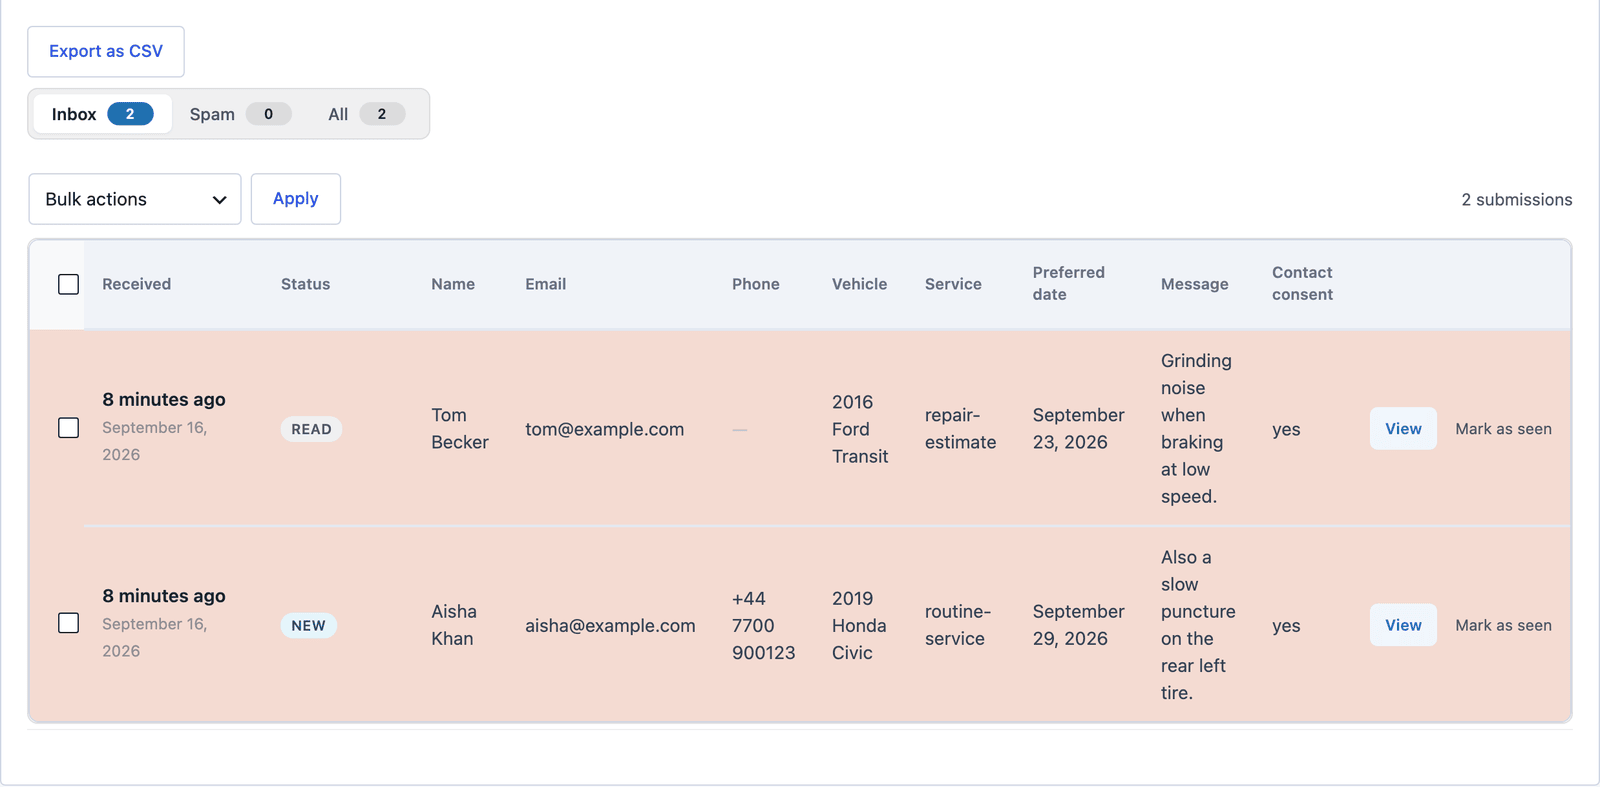 Sort by the Preferred date column and tomorrow’s requests come first.
Click View to read the whole request, including the message, and answer from the Send Reply box on the same screen.
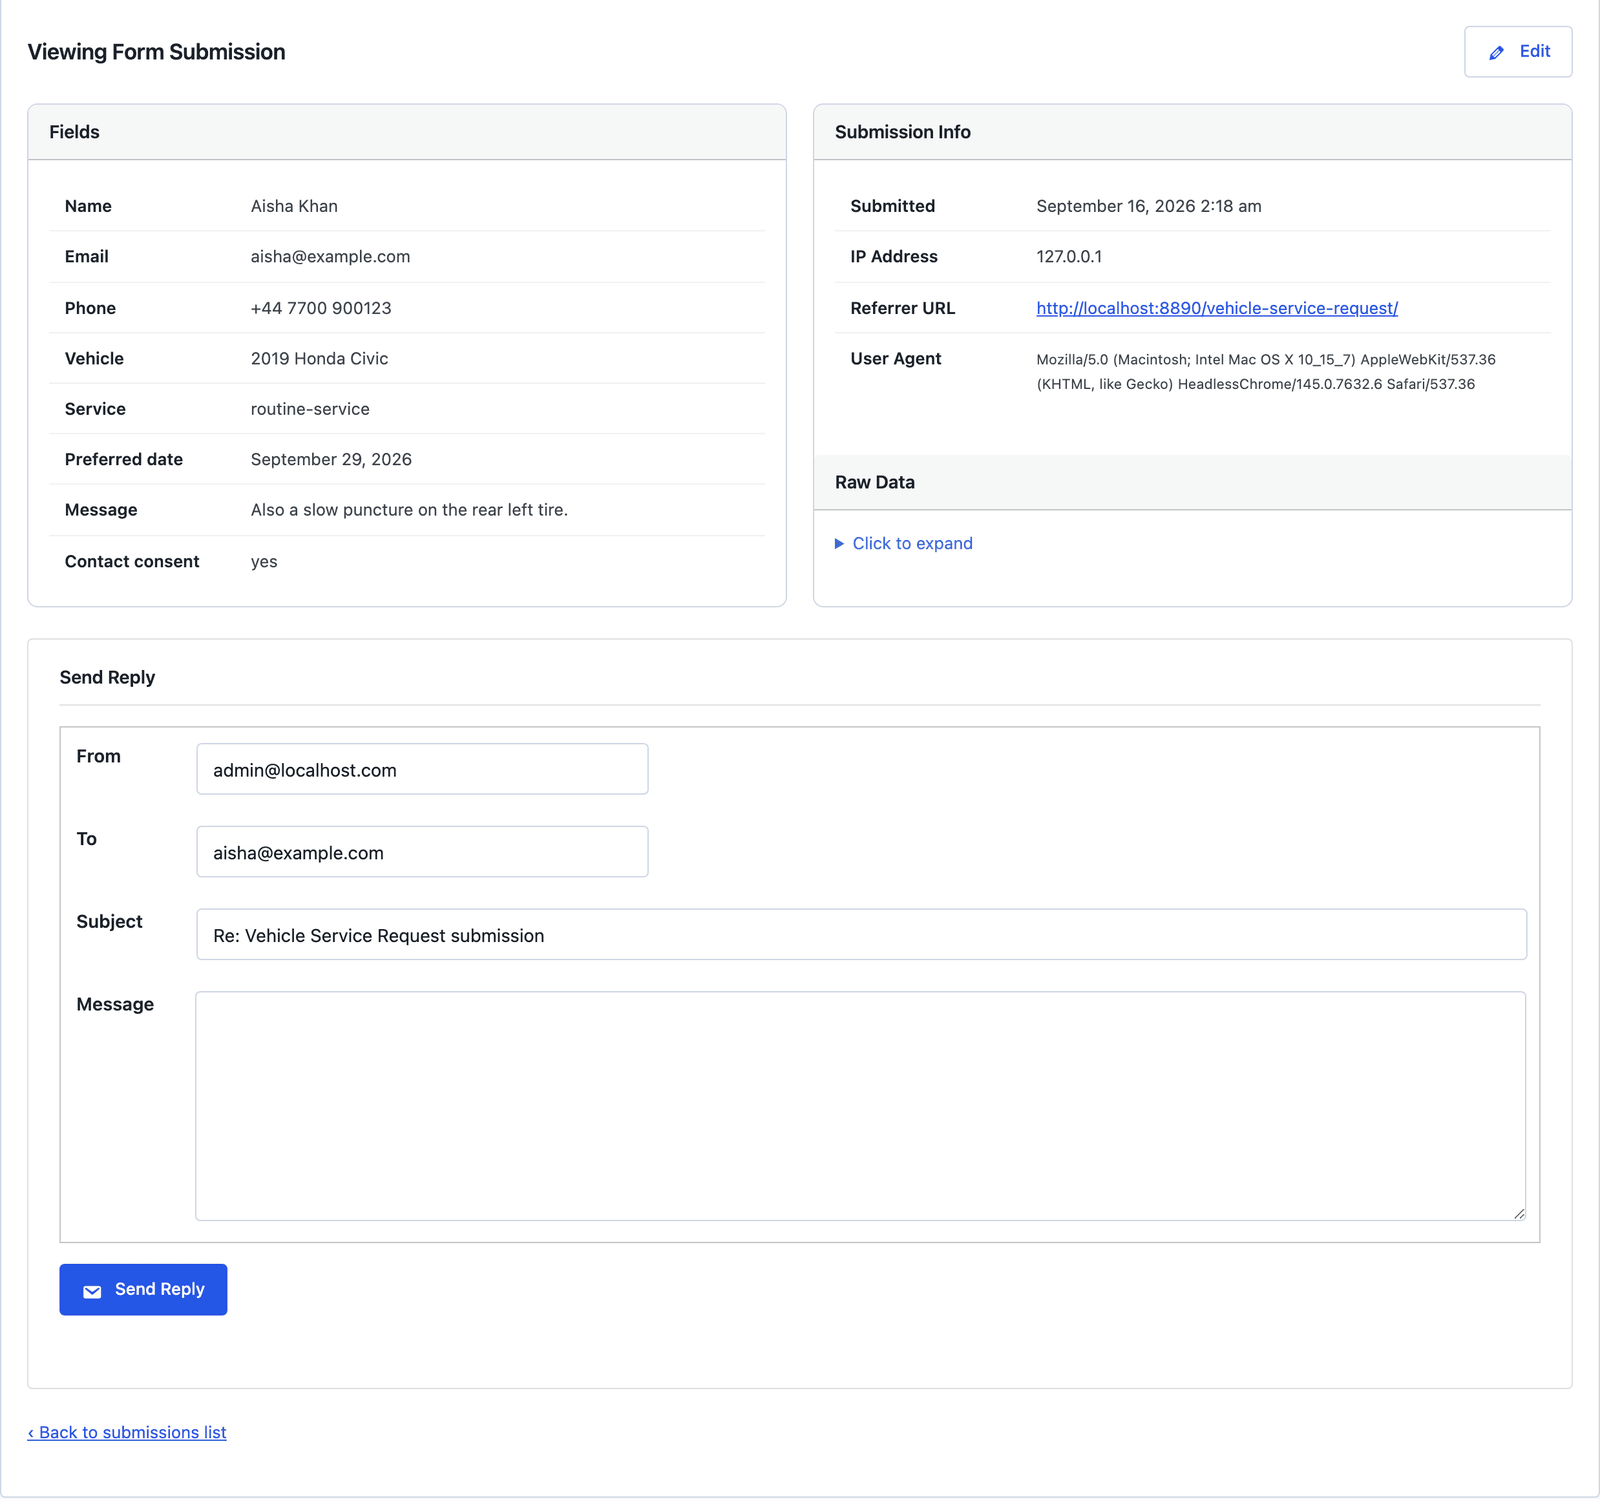 “Bring it in Tuesday at 8, and we will check the rear left tire while it is up” is the reply, from here.
A workshop that texts its customers can add a Twilio SMS action so the desk gets a text for each request, or send the request to a Google Sheets row that doubles as the day’s job list.
The Limits
The form does not book the bay. Two owners can ask for the same morning, and both requests arrive. The workshop confirms the slot, which is what the acknowledgement says.
The vehicle is a free text field. “2019 Honda Civic” and “civic 19” both arrive as typed, so a make select and a year field are the first upgrade if you want to filter by them.
There is no price in the form. A routine service price list belongs on the page above the form, and a repair estimate is the reply.
The preferred date has no earliest date until you set one. A min attribute on the date field, added in the Code tab, keeps last week out of the inbox, and the appointment booking form guide shows how.
What Quietly Ruins an Auto Repair Form
Making the phone number required. Plenty of owners would rather email, and the ones who want a call will type their number in the message anyway.
Replacing the message field with a symptom checklist. “Grinding noise at low speed” tells the technician more than 4 ticked boxes, and a long checklist is where people give up.
Asking for the registration number on the first step. It is useful, and it is also the field most people have to go and look for, so put it on the second step, after they have committed.
Sending every request to the front desk. A repair estimate sitting in the desk inbox for a day is a lost job, and the route above takes 2 minutes.
Final Remarks
You now have an auto repair form that asks for the vehicle, the service and a date, walks the owner through it in 3 short steps, acknowledges the request the moment it arrives and keeps every one in an inbox you can sort by date. If you keep one idea from this guide, keep this one: the message field is where the diagnosis starts, so leave it optional and leave it in.
The vehicle service request template page has the fields and a live demo, and the appointment booking form guide covers the shorter form with a time picker. If something here does not behave the way this guide describes, the support team can help. The other 15 industry forms are listed in the industry form templates guide.
I hope the next request through it is an easy one.
FAQ
Can owners upload a photo of the damage?
Yes. Add a file field on the “Your request” step. Uploads accept images up to 8 MB per file by default, and the photo link appears in the submission and the notification email.
Can the form add a time as well as a date?
Yes. Add a time field next to the preferred date, or use the appointment booking template, which already has both.
Can I send requests to the workshop by SMS?
Yes. A Twilio SMS action sends a text with the vehicle and service to a number you set, and conditions on the action can limit it to repair estimates.